
Here's Nicole...
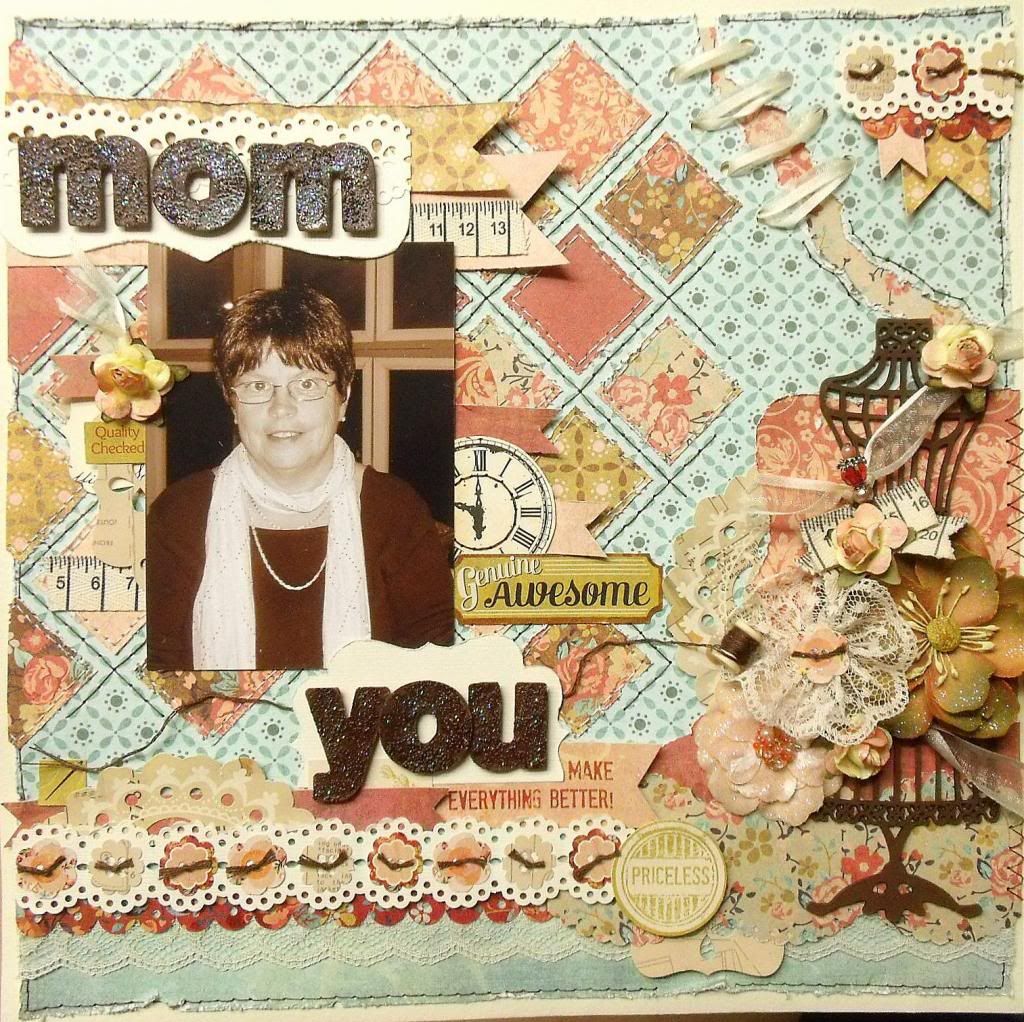
Along with the LE kit came a big sheet of Basic Grey letter stickers. I wanted to modify them a bit to give them a little pizzazz and make them match my 'Mom' layout a bit more.
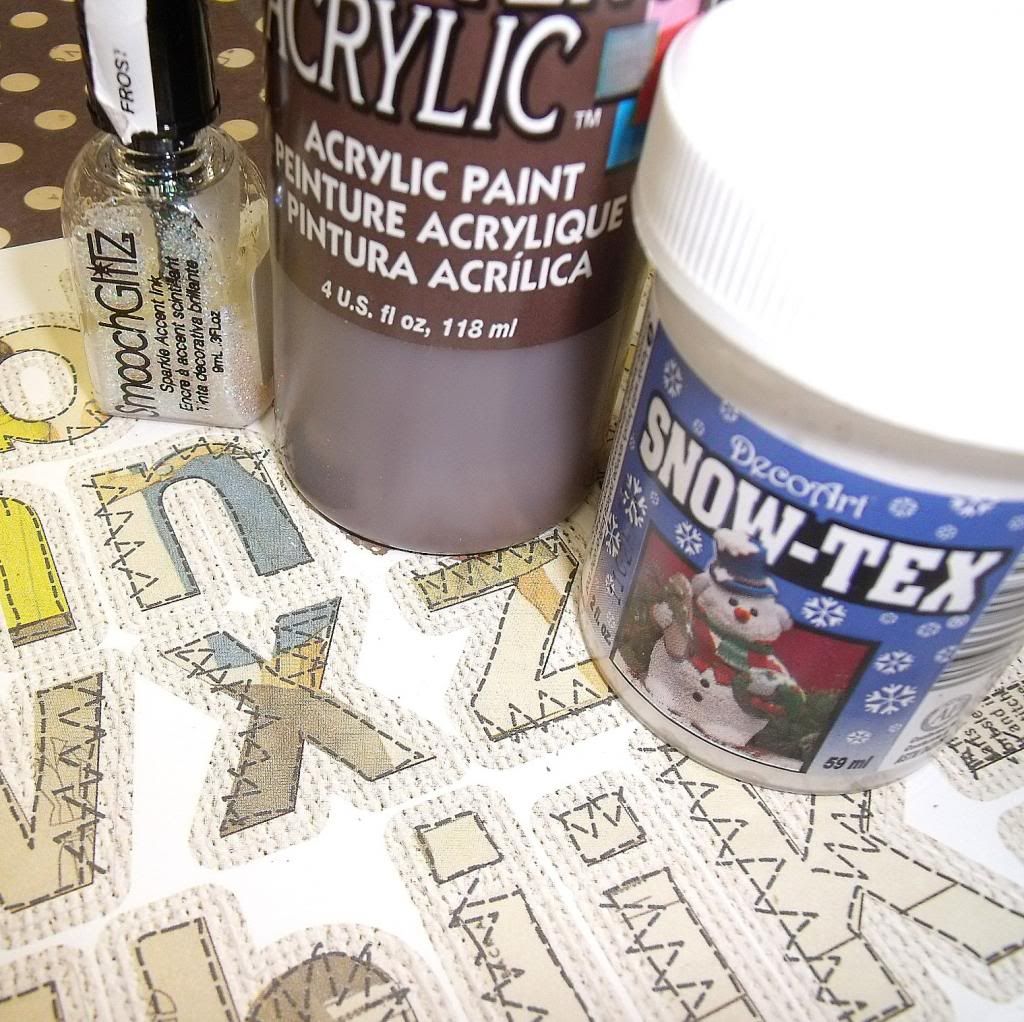
I used Snow-Tex (any modeling paste or even embossing powder would do the same - anything that will give your letters some added texture), acrylic paint and SmoochGlitz.
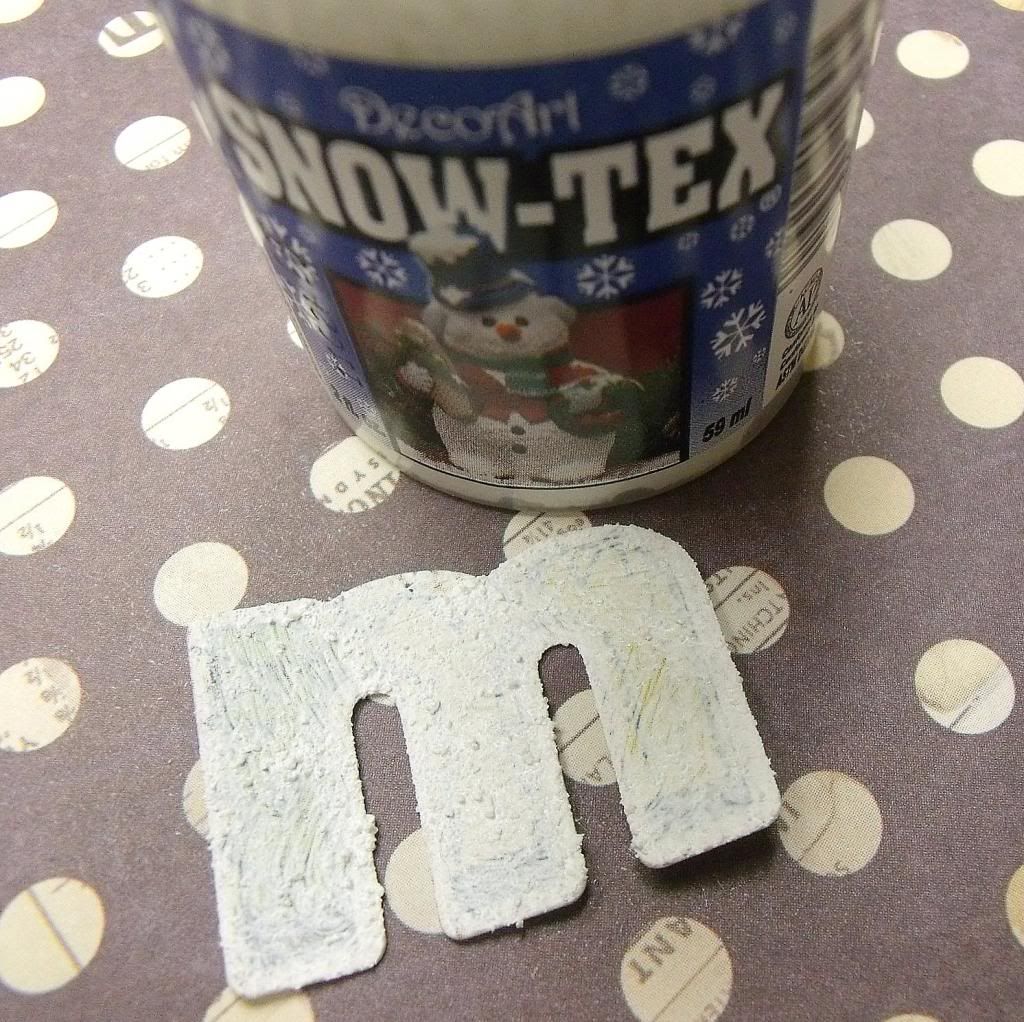
I covered each letter needed with a generous coat of Snow-Tex and then let it dry completely. If you're impatient like me, you can use a heat gun to make the drying go much faster.
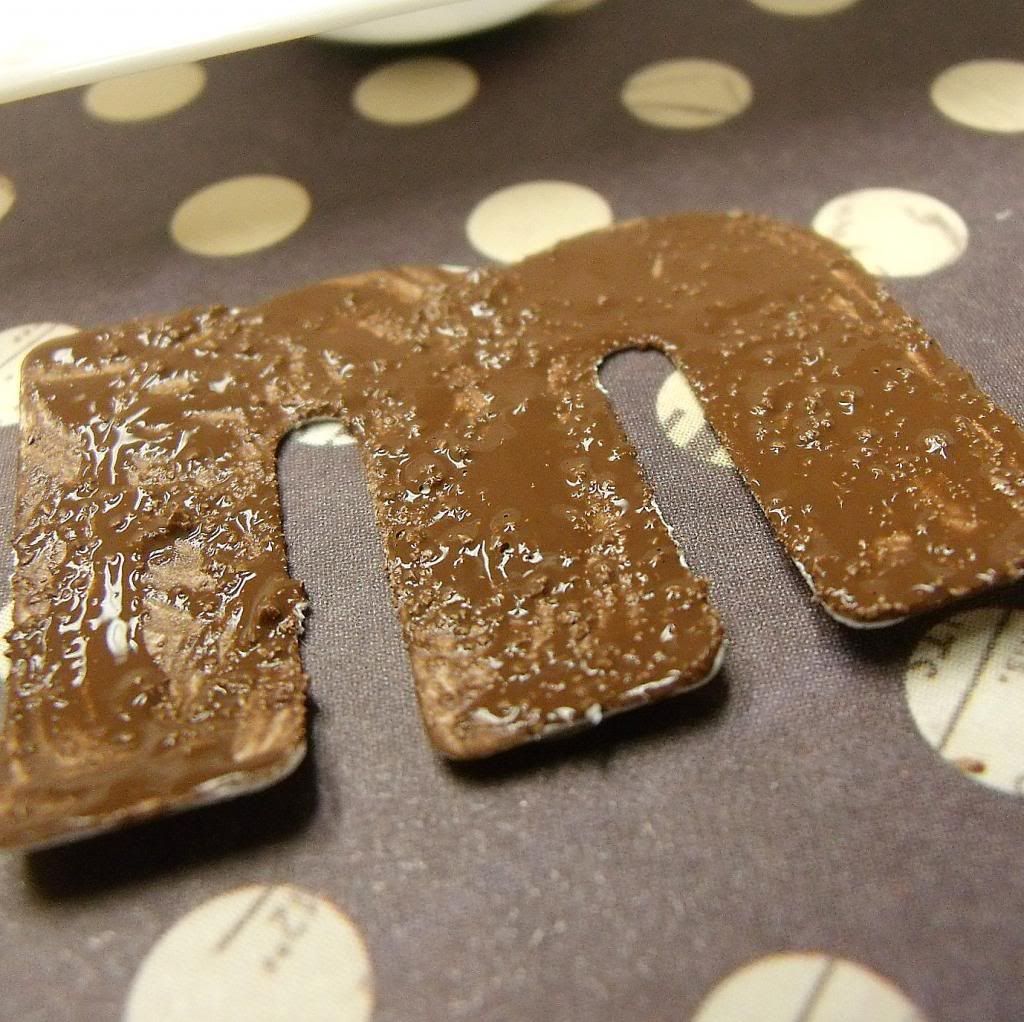
I then painted my letters and reached for my heat gun again.
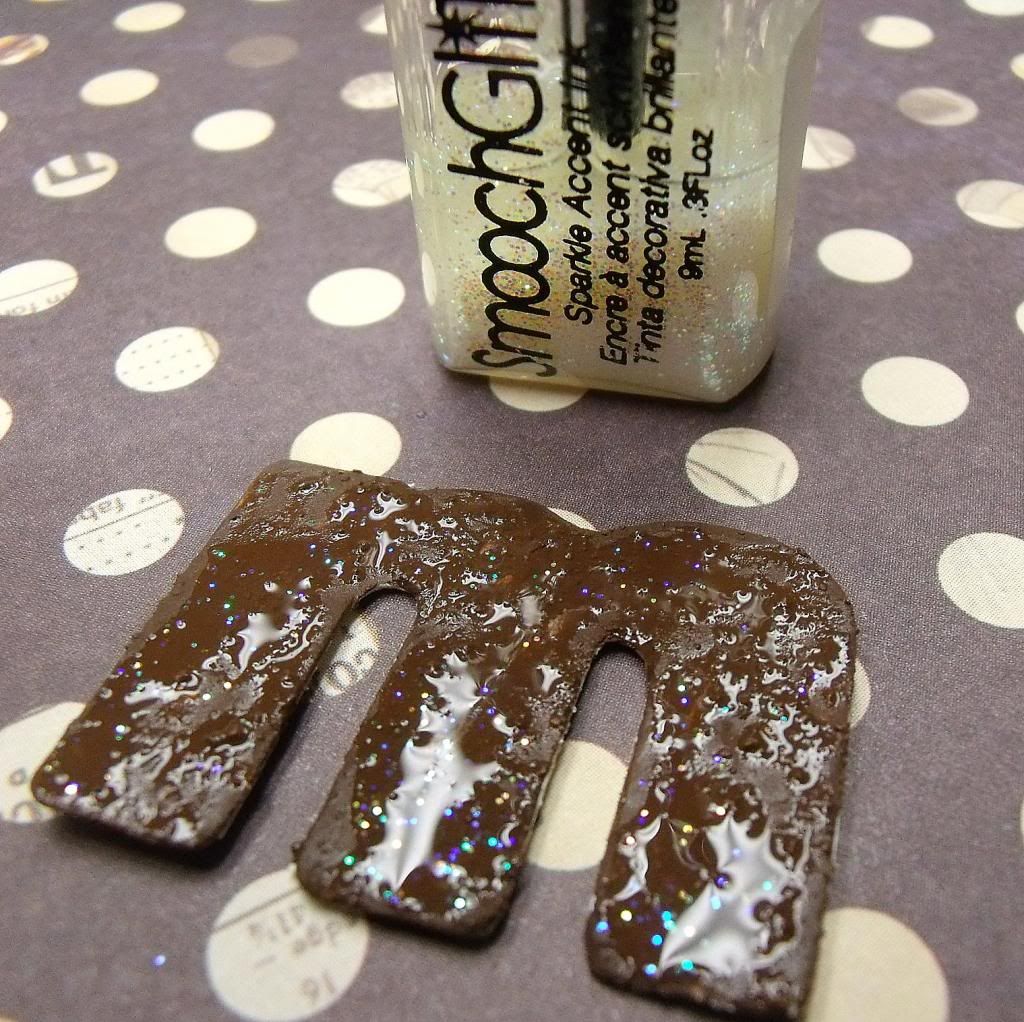
I finished with a coat of SmoochGlitz to add some shine!
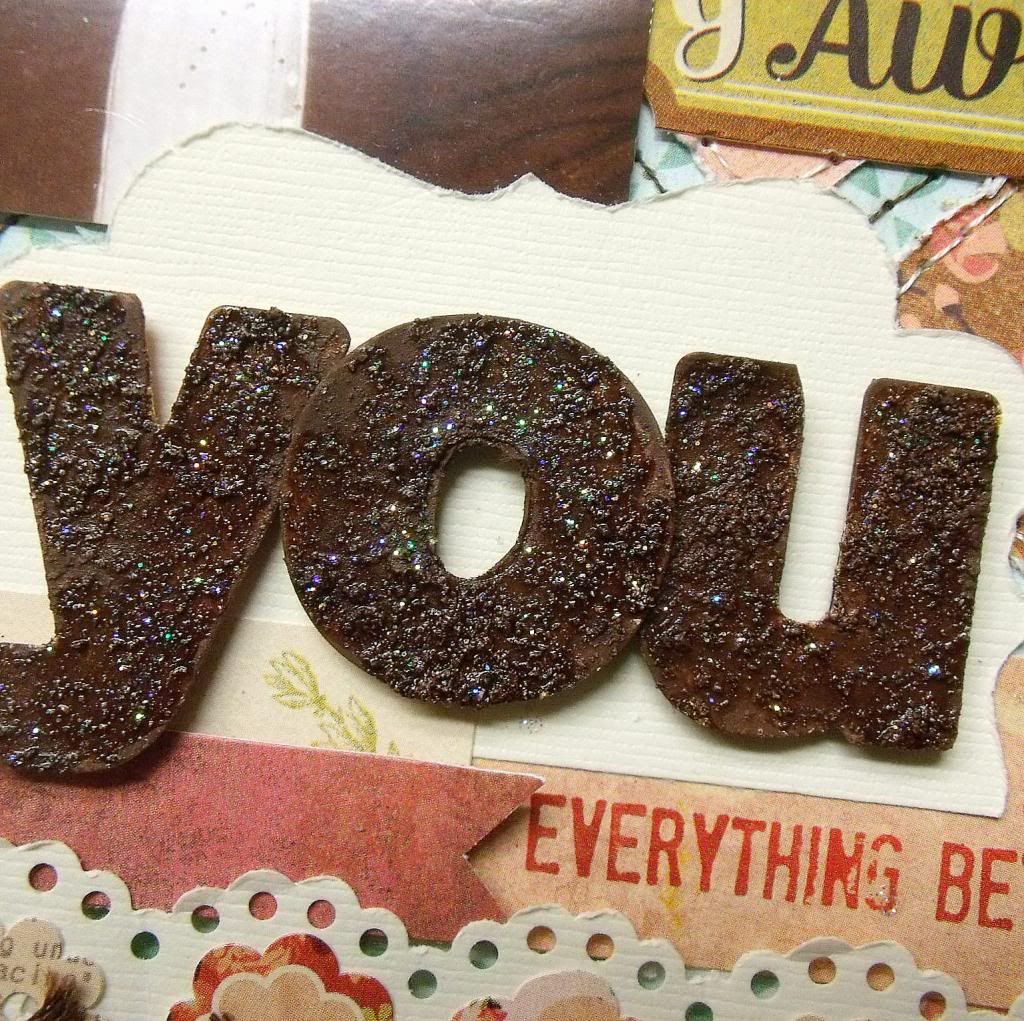
And here is the end result!
------------------------------
Anyone who is familiar with my creations knows that I absolutely adore stitching on any of my projects. Having never learned how to properly use a sewing machine, I do all my stitching by hand. Can you say 'Carpal Tunnel Syndrome'?! hehehe
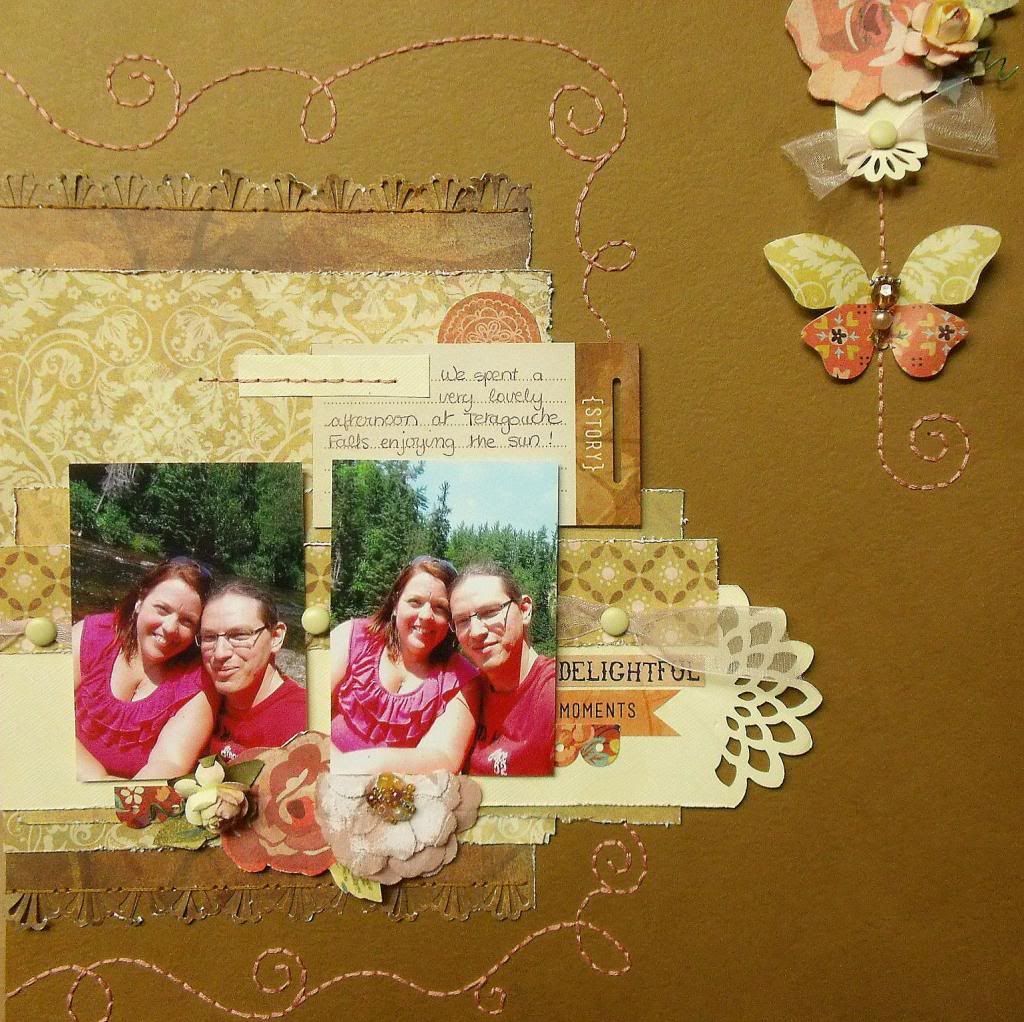
Here's how I stitched the swirly pattern on my 'Summer Love' double-page layout.

With a pencil, I lightly drew on my layout the pattern to stitch.
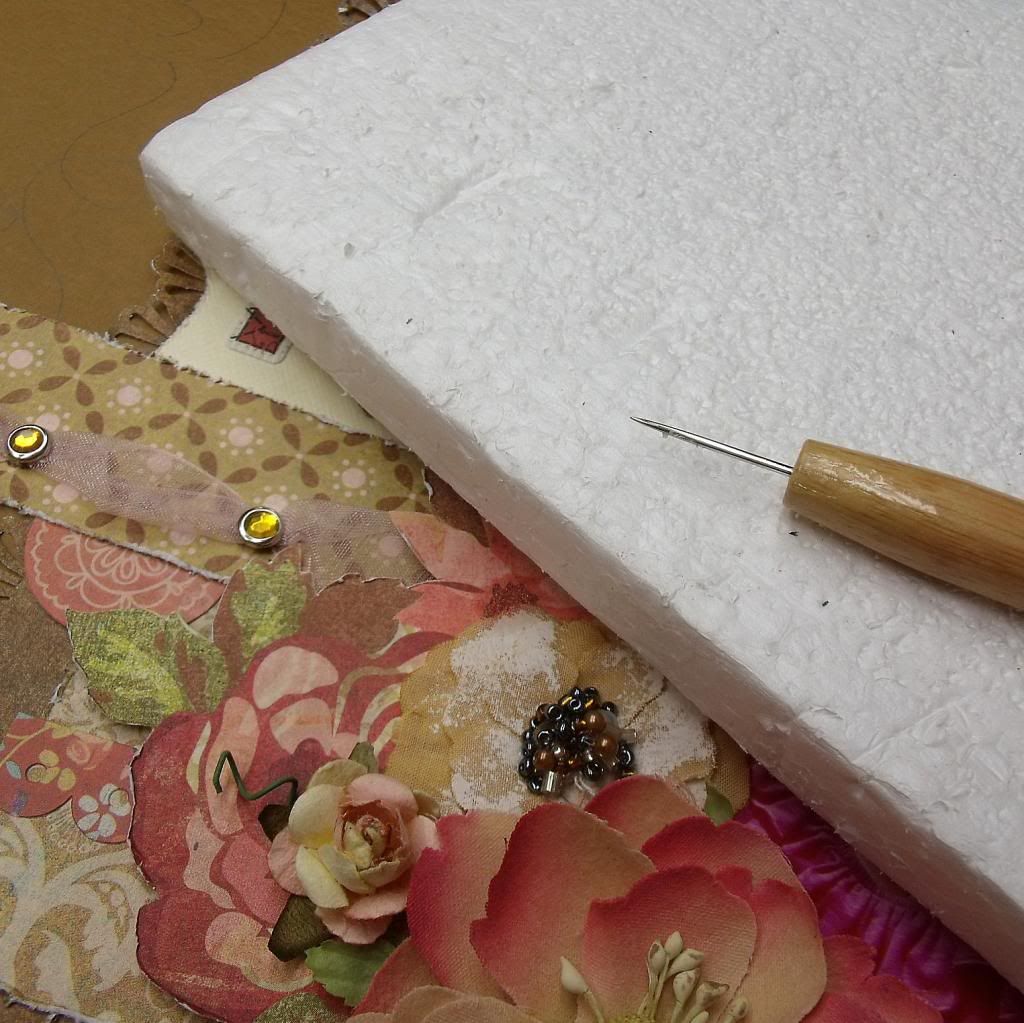
I always have a sturdy piece of styrofoam handy in my scraproom (you could say it's the MOST used and and at the same time the cheapest tool I own!) and I could never do without my paper piercer either.
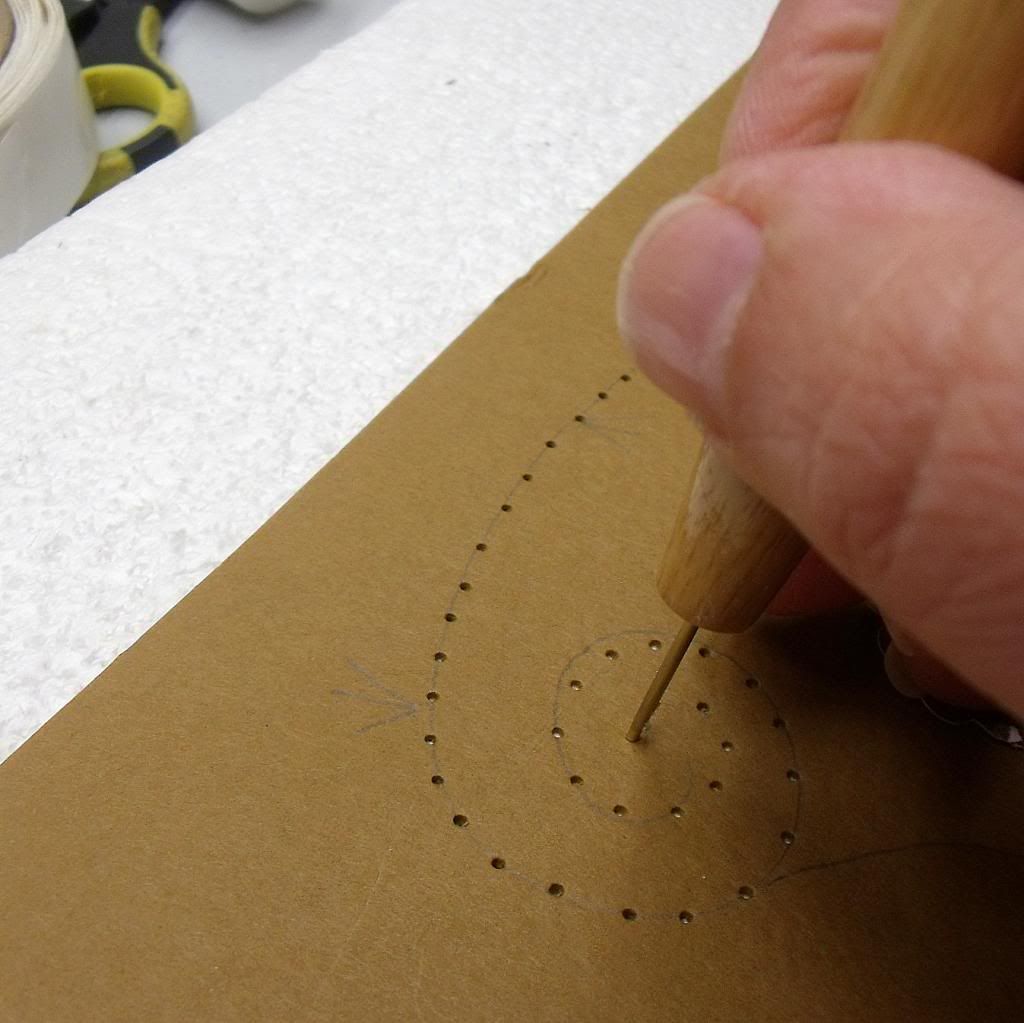
Placing the styrofoam underneath my layout, I used the paper piercer to pierce evenly spaced holes on the drawn lines. When I want to make stitches in a straight line, I simply place a ruler up against where I want my line to run and firmly holding the ruler in place, I pierce my holes using the marks on the ruler as a guideline.
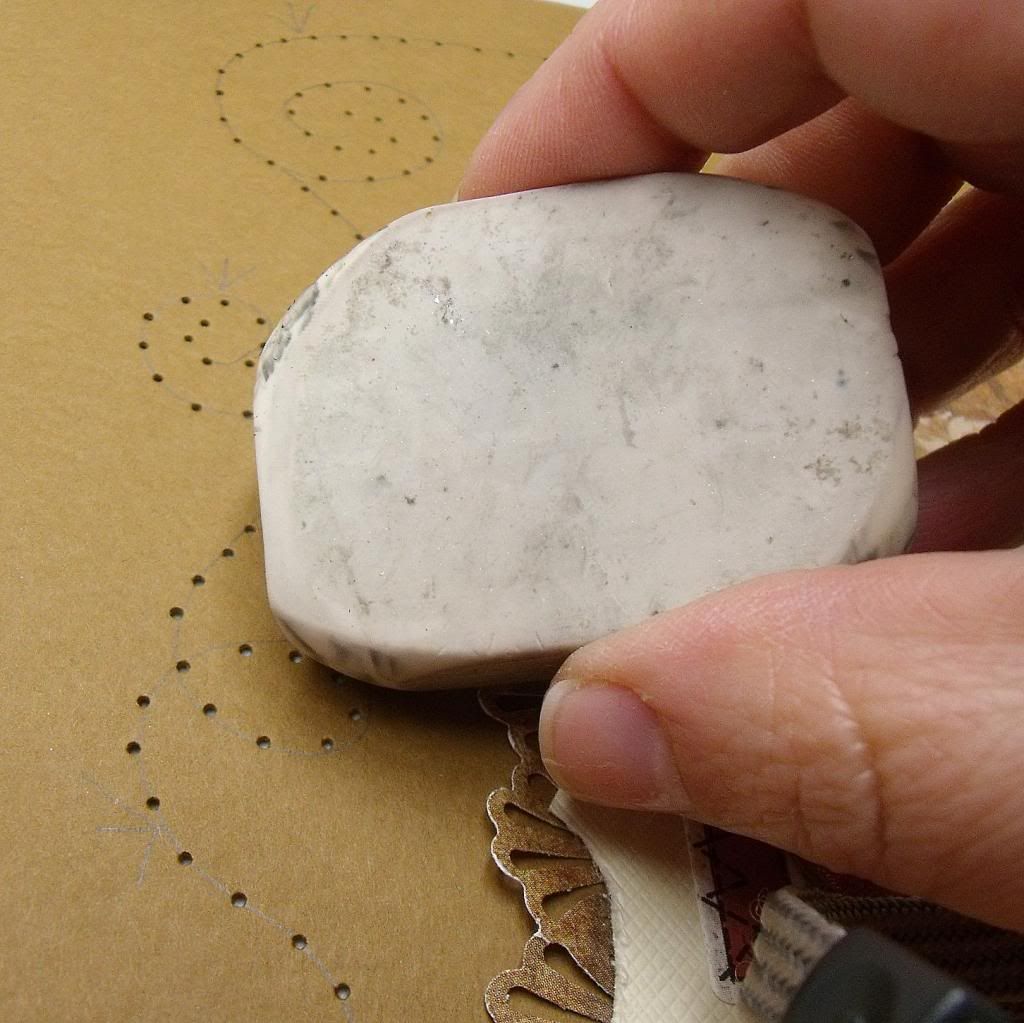
After all my holes were pierced, I erased all pencil markings off my layout.

I stitched through each hole with embroidery floss (3 threads thick in this case) following the desired pattern.
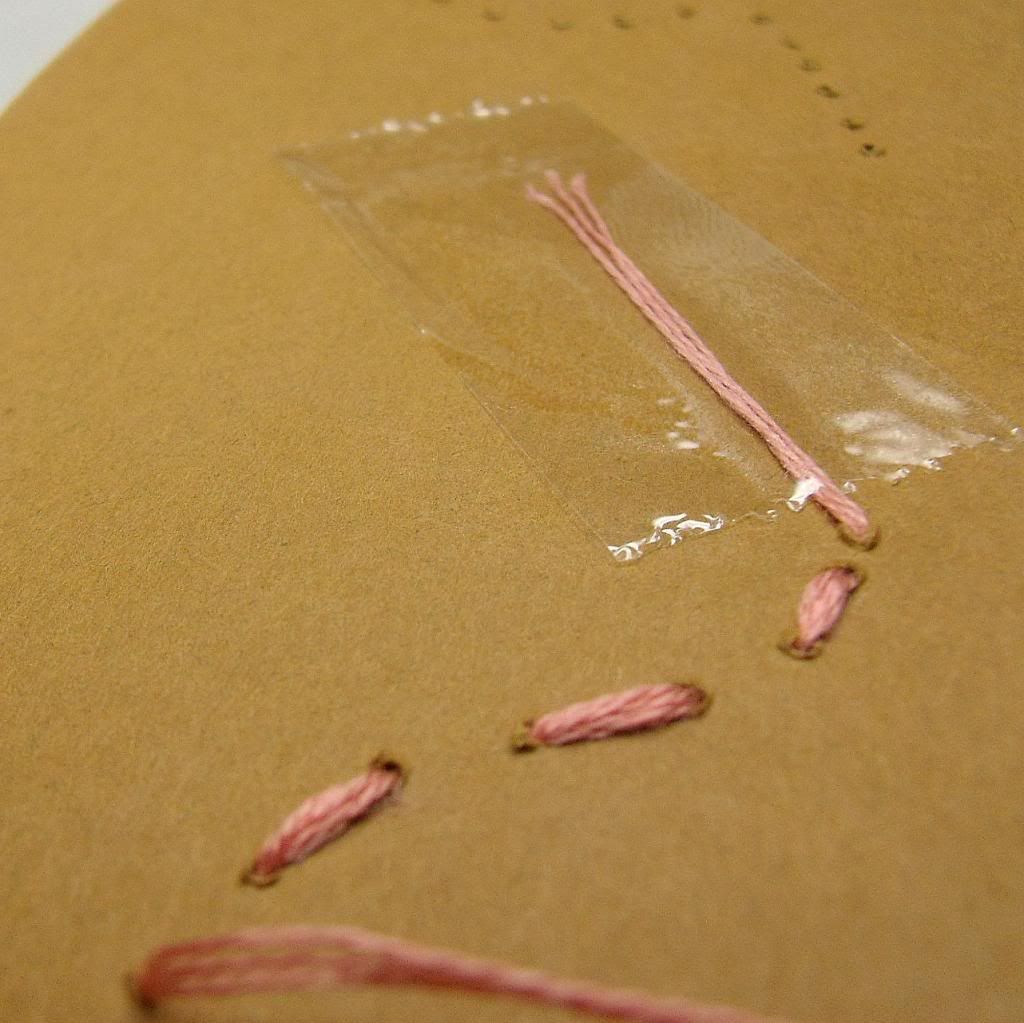
Using scotchtape, I made sure to tape all the ends of the floss in place on the back of my layout to stop the stitches from coming apart.
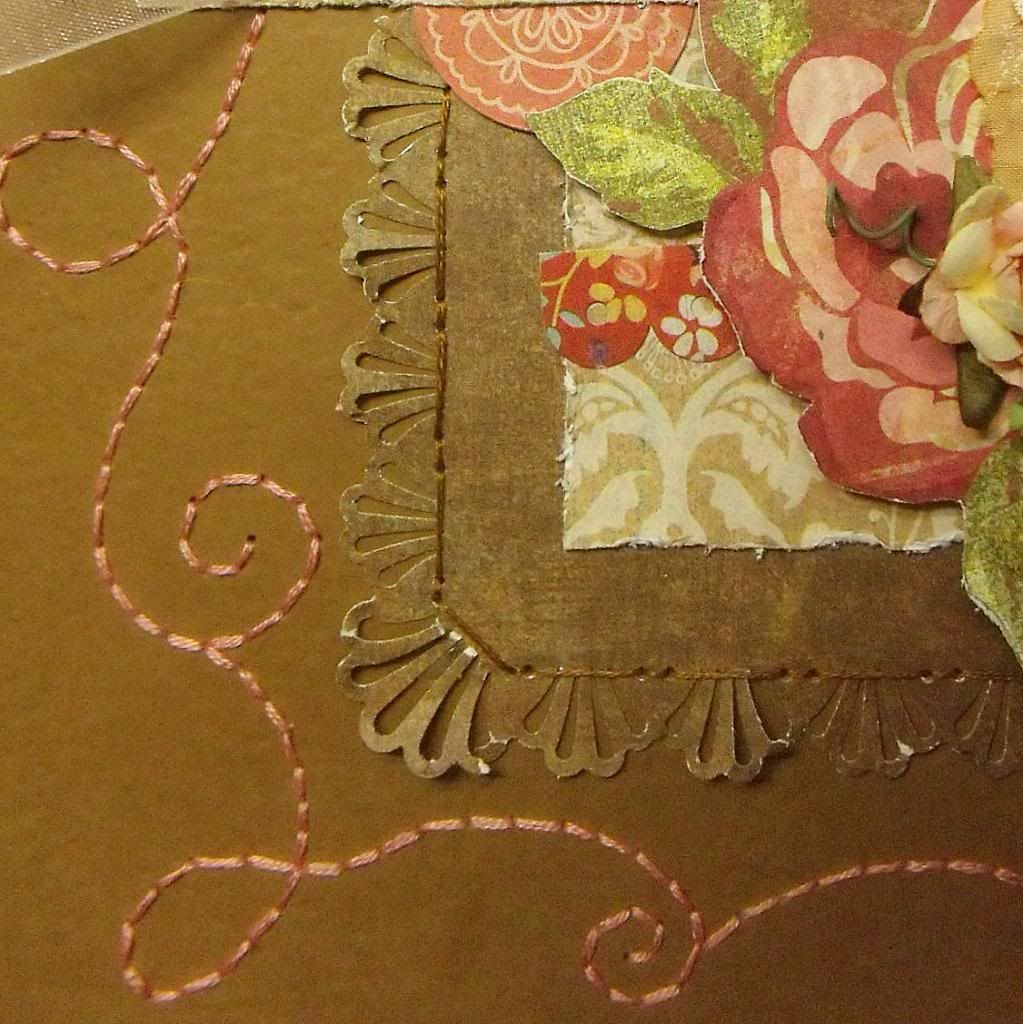
Now you try stitching ANY pattern on your next project! Trust me, it will look great! You'll probably get lots of comments like 'MY! I can't believe how patient you are!!' as I always do - hehe Well, I won't lie, adding handmade stitches on all my layouts does take time and can get quite hard on the hands, but I just love the stitched look so much that I cannot help it! It's one of those cases where you can say 'No pain, no gain!'
Thank you and happy creating!!!
------------------------------

My Creative Scrapbook Guest Designer
Have a look at our Design Team Gallery for even more layouts, cards, and projects from our designers!
------------------------------
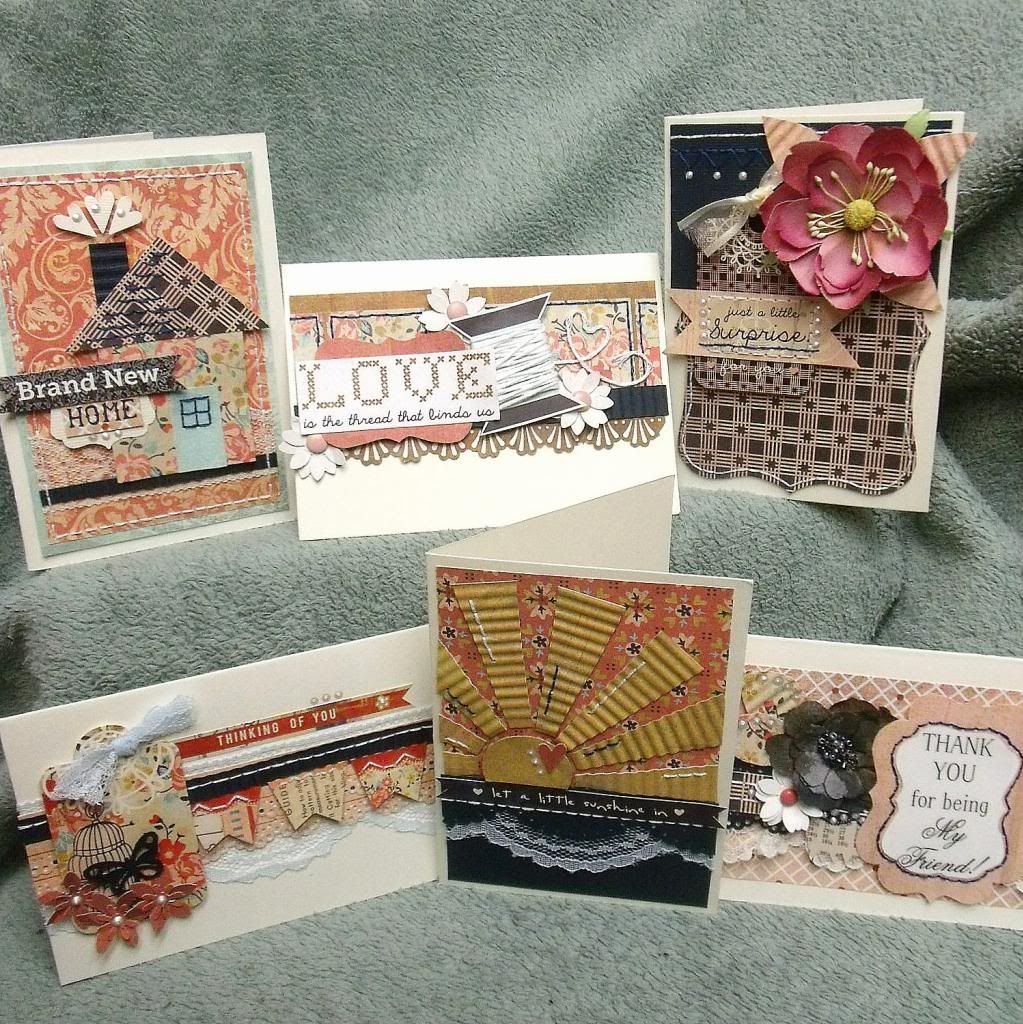
Nicole also created a lovely card set with the January Limited Edition Kit:
Have a look at our Design Team Gallery for even more layouts, cards, and projects from our designers!
We invite you to join us and experience all of the fun and excitement that we have planned for 2013. Click here to find the My Creative Scrapbook kits.
No comments:
Post a Comment