Hello! My Creative Scrapbook design
team member Marilyn Rivera is sharing one of her awesome techniques today featuring our August Limited Edition kit!
Here's Marilyn:
Hello
everyone! Marilyn here to show you step by step how I created this
textured background with a die cut paper and molding paste in my page
"Love" that I created with the August Limited Edition kit. Let's get
started...
I
selected the "Ceremony"paper from the August Limited Edition kit and
made a slit then I added a piece of "proposal" paper to cover the
opening.
I have this 12 x 12 die cut paper by Basic Grey and I used it by the backside like a mask.
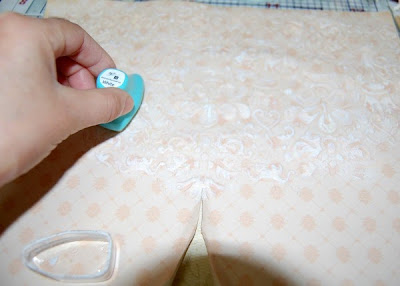
With a spatula I applied molding paste
It should looks like the photo, I gave it a "V" form with the molding paste not even.
Then carefully remove the die cut paper
You can see all the textures and the pretty design here
After the molding paste was dry, I painted the design with chalk inks in three different colors.
Then I did the same process in the slit sides, I put the die cut paper around the slits and I applied the molding paste.
Let
it dry and start to paint the design with the chalk inks, once you
painted it, it's time to decorate your page with all the beautiful
flowers and embellishments from the kit.
Closer details...
I hope this inspire you!! Go for this Gorgeous kit...HERE
Until next time!
My Creative Scrapbook Design Team Member
------------------------------
We
invite you to join us and experience the possibilities that our
coordinated monthly kits offer. To purchase a kit, please visit our
website, here.


No comments:
Post a Comment