Here's Marilyn...
Hello! Spring is in the air and it was my inspiration for this project that I did with the April Mix Media Kit.
When I saw the Prima Vintage Trinkets that comes in this fabulous kit, I thought in a topiary.
Here's how I did it..
I selected the.... on Holiday paper by the Girls' paperie, Jenni Bowlin embellishments(butterflies and bows), Bo Bunny stamps all are in the April Mix Media Kit. I added a styrofoam ball, a pot, an one buck pearl collar.
I started to pin some of the Vintage Trinkets to my styrofoam ball. I used pearl pins.
I pinned the trinkets randomly ...
I took the Holiday paper and I punched it with my two inches circle scallop punch and some in 1 1/2 " circle scallop punch.
I made roses with my circles but you can do your favorite flowers for this project.
Then, distress ink in all the flowers.
Start gluing the flowers
Glue the flowers around the trinkets.
I boughtt a pearl collar for one dollar and I broke it to use the pearls.
Start gluing the pearls.
Cover all the space..it should look like this....
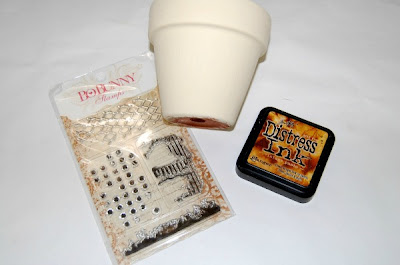
I used a pot for my base.
I painted the pot with acrylic paint.
Then I stamped the pot with the Bo Bunny stamp that comes in the MM kit.
It should look like this...
Some corrugated strips
Glue this strips to the pot...
To fix my Topiary I used some styrofoam inside the pot.
I did a cord bow but you can use a ribbon.
I covered my foam with a paper doily.
Then I added some piece of papers and all the rest of the pearls.
Now is time for add the butterflies and bows.
My tip for the butterflies is to add a drop of hot glue to a pin like the photo, then add the butterflies to the topiary.
Here is the final result and this is my spring vintage topiary home decorating....
I hope this inspired you!! Go for your Mix Media Kit...HERE
Until next time!!!
Marilyn Rivera
My Creative Scrapbook Design Team member
----------------------------------------
Here's the April Mixed Media kit:
Marilyn also designed with our April Limited Edition kit. Here's one of her layouts:
Check back a bit later for another awesome mixed media tutorial from Marilyn!
My Creative Scrapbook kit club is all about you and helping you preserve your memories in a fun and creative way. For information about subscribing to any of our monthly kits, please visit our website, here.


3 comments:
WOw, Wow, Wow MARILYN!!!! What an awesome idea and fantastic tutorial - you rock!!!
How very pretty this is! Thanks for sharing! Bye, bye, Jen.
So pretty! I love the brown, unique and elegant looking!
Post a Comment