

Altered frames are really fun and easy to make and they are a great way to personalize a photo frame. Start by choosing your frame. I tend to choose frames that either come with a thick mat under the glass or are a shadowbox type frame. That way, there is room to work both under the glass and above it. The frame I used for this project was a simple black frame that had a thick photo mat. I took the mat out and discarded it.
Step one: I traced the back of the picture frame on patterned paper, cut it out, then glued the paper to the back of the frame (to the part of the frame that slides out to place your photo).
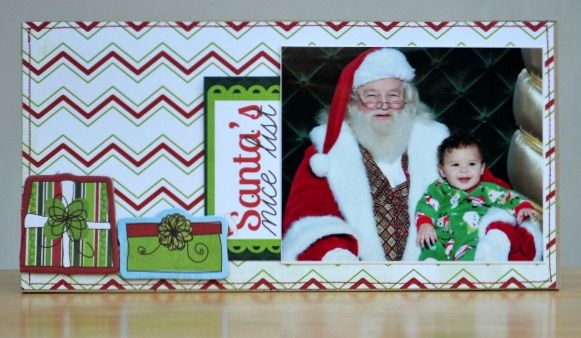
I decided to put my photo on the light side of the frame to leave the left side open for decoration. I tucked a journaling card underneath. Then I added a couple of chipboard gifts on the left. They will fit here under the glass because they were the same thickness as the photo mat I discarded.

You can see the completed frame here for reference. The next steps are to add chipboard to the outer frame.
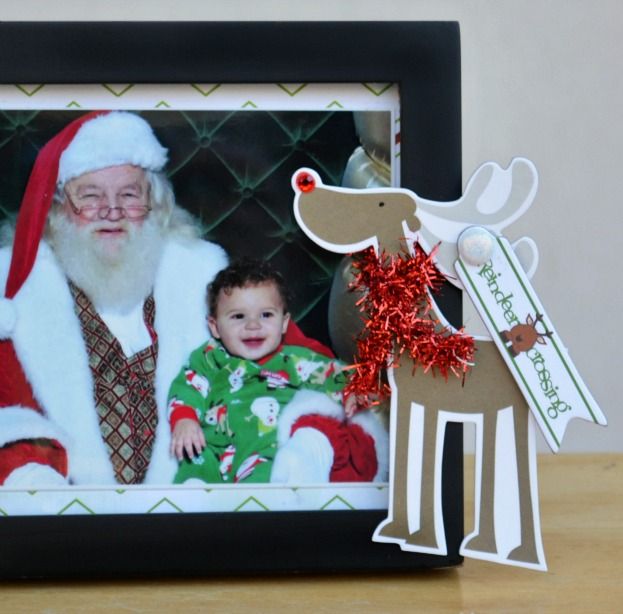
On the right, I added a reindeer. I used a glitter brad to hold a hanging chipboard tag and wrapped some tinsel from the kit around his neck as a winter scarf.

On the left, I added a big Christmas tree, the word "believe" and some gifts. Under the tree, you can see the other gifts that are beneath the glass. Decorating both under and above the glass gives a nice dimension to the frame.
2 comments:
Very cute! Great gift idea!
Really makes such a huge difference, so unique too. Thanks for the inspiration Izzy.
Post a Comment