
Guest Designer Jennifer Haggerty is up today to share a fun way to add extra interest to your pages!
Here's Jennifer...
Here's Jennifer...
Hello! Jennifer Haggerty here to share a fun, easy tutorial on how I added texture to my background for my "Hello Love" layout using the February Main Kit!

I am a big fan of using stencils and any type of medium whether it be spray ink, gesso, or acrylic paint! I also love the "white on white" look as well so creating with modeling paste is one of my favorites!
First, I started with white cardstock for my background. I always use a bit of washi tape to secure my stencil in place before beginning.

Using a diagonal swiping motion, I added a light layer of modeling paste. Remember it doesn't have to be perfect! And feel free to use as much or as little paste as you like.
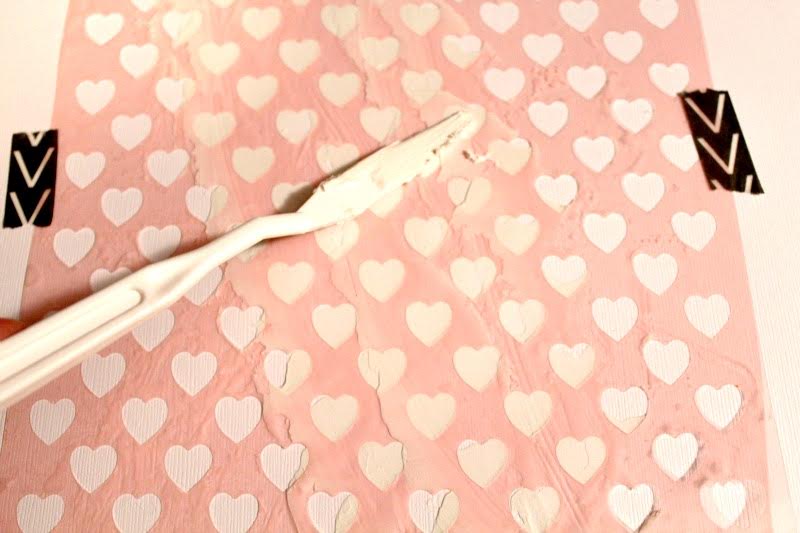
Before lifting up the stencil, I sprinkled a small amount of glitter to the modeling paste. You can also add spray ink if you want some color for your background! Don't be afraid to try something new! When I first started using modeling paste, I wasn't so sure if I would care for it. Now, it is one of my favorites!

Here is the end result! I love how it gives a little bit of "lift" to your page!

Once dry, you are free to start adding papers and embellishments! I am a fan of layering (A LOT) so the modeling paste just gives my layouts an additional dimension!

Thanks for reading today and I hope this inspires you to try something new on your pages!
Please visit our Design Team Gallery to view more of Jennifer’s beautiful work.
Here are our February Kits (click to enlarge):


For full descriptions of our kits, subscription information, and more, visit our website at MyCreativeScrapbook.com


1 comment:
Lovely tutorial!!
Post a Comment