
My Creative Scrapbook guest designer Stephanie Buice is up today with a step by step layout tutorial featuring our April Main Kit!
Here's Stephanie:
>>><<<
This is Lovely, By: Stephanie Buice

Step1: To start my layout I first picked out all the supplies from the Main Kit that I thought I's like to use on my layout. With so much to choose from it was hard to narrow it down so not everything made it onto my page.

Step 2: To create the background of my layout I used gelatos and different inks to make a little center spot on my page that I will use to define the "center" which will eventually be the focal point of my finished project.

Step 3: Once that was dry I started playing around with my pictures and placement. I layered them on top of a doily and decided on some of the butterflies from the Die Cut pack.

Step4: After getting those things in place I found that it was still a bit too plain, so I chose one of my favorite patterned papers from the kit to layer in behind the pictures.

Step 5: Looking at my layout I still felt like it needed more color so I decided to cute strips of the Pebbles Lilia patterned paper to try out under each of the butterflies. I liked it and wanted it to look like strips of washi tape so I simply tore off a bit from each of the ends to give it a "torn" look. I tore them in ascending sizes according to which butterfly they would be under.

Step 6: Once I got everything how I liked it I decided to add more ink on to the background, so I took everything back off my page and dropped down some ink spots. I didn't want the ink to take away from the "whiteness" of my layout so I just added a few drops here and there.

Step7: Then I placed everything back on my page but my pictures and embellishments that would go on top of them. Using some washi tape I held my bottom embellishment layer in place and I sewed a straight line down the center of my layout. I use this trick all the time so I don't have to glue down each piece, not only does it save me tons of time but it also keeps my needle from getting all sticky from the adhesive.


Step 8: After I sewed through my bottom layer of embellishments I once again placed my pictures and stuff back onto my page. Finally to finish off my layout I placed a few more of the die cuts under my pictures, glued them down and added a few sequins of my own here and there. And Voila! Complete!

>>><<<
>>><<<
This is Lovely, By: Stephanie Buice
Step1: To start my layout I first picked out all the supplies from the Main Kit that I thought I's like to use on my layout. With so much to choose from it was hard to narrow it down so not everything made it onto my page.
Step 2: To create the background of my layout I used gelatos and different inks to make a little center spot on my page that I will use to define the "center" which will eventually be the focal point of my finished project.
Step 3: Once that was dry I started playing around with my pictures and placement. I layered them on top of a doily and decided on some of the butterflies from the Die Cut pack.
Step4: After getting those things in place I found that it was still a bit too plain, so I chose one of my favorite patterned papers from the kit to layer in behind the pictures.
Step 5: Looking at my layout I still felt like it needed more color so I decided to cute strips of the Pebbles Lilia patterned paper to try out under each of the butterflies. I liked it and wanted it to look like strips of washi tape so I simply tore off a bit from each of the ends to give it a "torn" look. I tore them in ascending sizes according to which butterfly they would be under.
Step 6: Once I got everything how I liked it I decided to add more ink on to the background, so I took everything back off my page and dropped down some ink spots. I didn't want the ink to take away from the "whiteness" of my layout so I just added a few drops here and there.
Step7: Then I placed everything back on my page but my pictures and embellishments that would go on top of them. Using some washi tape I held my bottom embellishment layer in place and I sewed a straight line down the center of my layout. I use this trick all the time so I don't have to glue down each piece, not only does it save me tons of time but it also keeps my needle from getting all sticky from the adhesive.
Step 8: After I sewed through my bottom layer of embellishments I once again placed my pictures and stuff back onto my page. Finally to finish off my layout I placed a few more of the die cuts under my pictures, glued them down and added a few sequins of my own here and there. And Voila! Complete!
>>><<<
Be sure to take a look at Stephanie's beautiful work in our Design Team Gallery!
Here's the Main Kit:
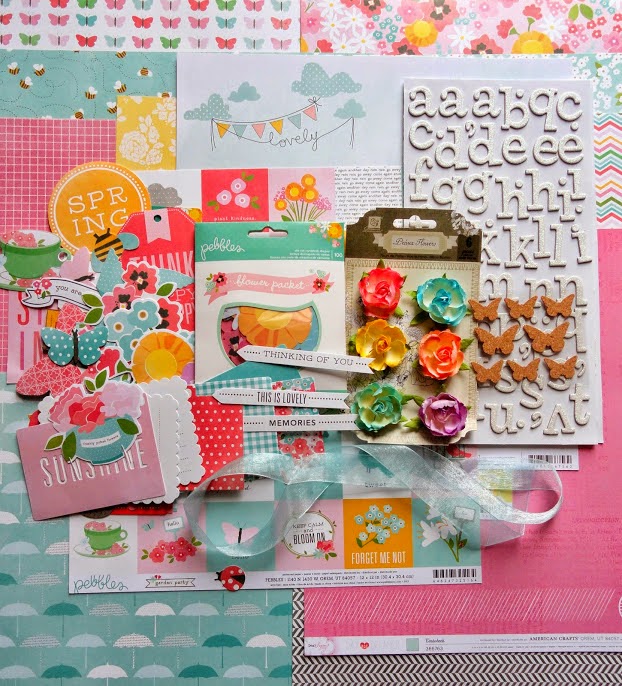
Here's the Main Kit:
We invite you to join us and experience the possibilities that our coordinated monthly kits offer. To purchase a kit, please visit our website, here.
2 comments:
Stephanie , Wow I love your tutorial I am a huge fan of your work. Thank you ! I will be using your tip for sewing embellishments on your page..Love that
really a useful tutorial! the layout is beautiful
Post a Comment