My Creative Scrapbook design team member Lydell Quin is up today with some tips featuring our October Main kit!
Here's Lydell:
Here's Lydell:
Welcome to My October Tutorial for My Creative Scrapbook.
This month I thought I would have a play with Die cut Embellishments and border strips.
This month there is a pack of Noteworthy Die cuts from Bo Bunny, and a packet of Canvas borders from Prima in your Main Kit. They were fun to create with. Die cuts dont have to be flat and boring!!!
I began by pulling out the Cardstock die cuts from Bo Bunny and the canvas resist strips....
I sorted through them all and took a look at what I could layer together and add to. So here are some of the things I did up front.
Distressing edges and adding inks is the first thing I did. It adds dimension and texture to an other wise flat item. Really easy to do and adds a lot with not much effort.
I used the distress tool from Prima by Ingvild Bolme
The next thing to do that instantly adds texture is sewing.
I love adding stitching to any little elements, as it makes them so much more dimensional.
.....add ink and your tiny little boring embellishment has a totally new look!
I also look for symmetrical elements I can cut in half and layer behind other things, to make them appear larger....great as photo mats in my Project Life!
The next thing I looked for were little areas I could make interactive.
This pack has these little window/door/shutter elements which are perfect to 'open up'.
I popped my journalling under this little open window for my LO this month
I saw a few that I could accent with Glossy Accents, to pick out and highlight a pattern.
This is easy, and really effective!
The other thing I often do, is look at the border strips. I dont use them as borders, but rather cut them apart and use them as smaller accents. These little pieces were perfect for that. Here is one cut apart.
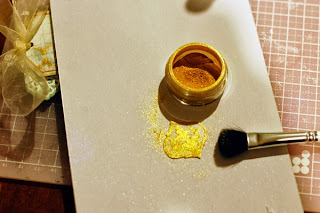
And a step further, I drew on top of the pattern with an embossing pen and then brushed on Perfect Pearls.
This is a lovely, yet easy technique with great results.
The tiny little circles in the pack make cute little flower centres, after I pulled apart the Prima roses, to make them less bulky for my Layouts. Ink and add a foam dot for dimension.
Which brings me to the next step.
The next thing is to see what accents can be layered to create more dramatic elements.
Foam tape and ink is a must here, to highlight the layering.
I have all these lovely little bits and pieces to create with. Some can be slipped directly onto pages, sneaking them in around flower arrangements, and added to existing embellishing, creating cute little 'groupings' on your project, but some are perfect to layer together creating an entire layered accent to add directly as one piece to a project.
And here are some of the Canvas Border strips getting some they are cut apart, with an eyelet added with string and recoloured with spray ink/paint.
and here they are 'snuck' in around my projects......
This is a great way to make use of co-ordinating die cuts in Kits, and really get your moneys worth out of your Kit. You can create many Layouts and cards with the one kit, using everything in the pack. You just keep going until you have run out! And you feel good about using your stash, ready for next months kit!!!!
Have a fantastic October!
--------------------------------------------------------------
Be sure to take a look at Lydell's beautiful work in our Design Team Gallery!
We
invite you to join us and experience the possibilities that our
coordinated monthly kits offer. To purchase a kit, please visit our
website, here.


No comments:
Post a Comment