
For our Prima prize giveaway, click here.
------------------------------
We have a wonderful tutorial to share today from My Creative Scrapbook Design Team member Sandie Edwards featuring our May Limited Edition kit. Read on to learn how to create a lace and beaded frame.
Here's Sandie:
"1. Cut photograph into an oval shape, trace using a household object, or old photo-frame.

2. Thread a long length of cotton, double threaded onto needle and tie off. Use smallish gathering stitches along edge of lace, and pull to gather, measuring around photograph as you work to get exact length needed. When you have achieved this, join the two lace ends, and tie off securely.
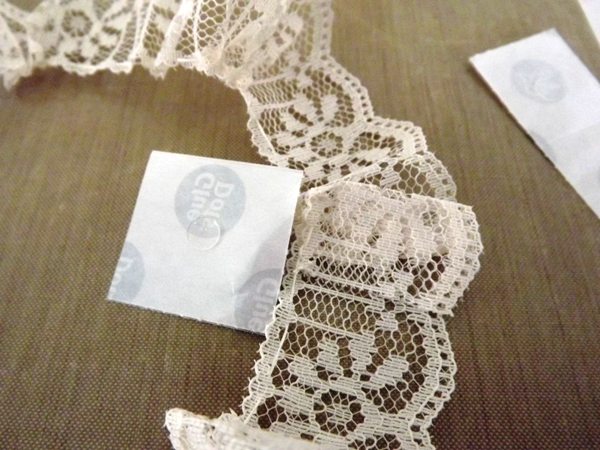

3. Apply several glue dots to the edge of gathered lace, and adhere to back of photograph as pictured in Photograph 2, and 3.

4. Work your way around the edge with glue, making sure all edges are well adhered, and gathers are even.


5. Apply a light beading of liquid adhesive around very edge of outside edge of photograph, and adhere pearl strand.

6. Optional: Adhere magic mount to back of lace framed photograph, and adhere onto a larger cardstock base ready to be used in a project. Adding an extra base aids in stability and also helps keep the gathered lace in place perfectly."

Sandie Edwards
My Creative Scrapbook Design Team member
------------------------------
Here's Sandie's completed layout:

------------------------------
Here's Sandie's completed layout:
Here's the May Limited Edition kit:

and here's more of Sandie's beautiful work using the kit:


Thank you, Sandie!
My Creative Scrapbook kit club is all about you and helping you preserve your memories in a fun and creative way. For information about subscribing to any of our monthly kits, please visit our website, here.
My Creative Scrapbook kit club is all about you and helping you preserve your memories in a fun and creative way. For information about subscribing to any of our monthly kits, please visit our website, here.
1 comment:
Such gorgeous creations from Sandie!!
Post a Comment