
Hi, I'm Michelle and I'll show you today in my tutorial how to easily create a colorful Layout. This Layout is based on the amazing January scrapbooking kit from my creative Scrapbook.
You will need:
My creative Scrapbook Kit January
Photo
Scissors
Glue
Bakers Twine
1 piece of white card stock (I work here in 8 "x12", you can also do the layout in 12"12")
Foam pads (optional) with it you achieve a better three-dimensional optics

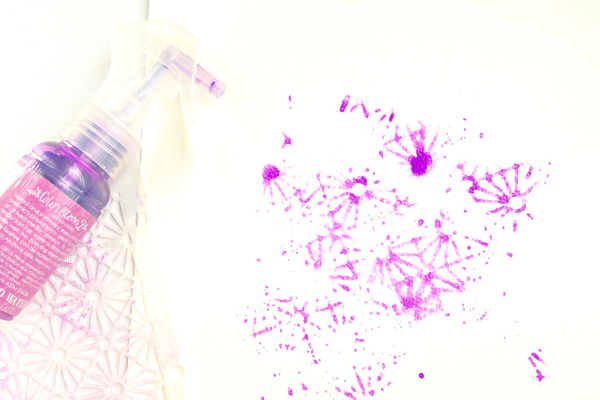
Step 1 - Design background
Take your stencil and spray and create a base for your layout. You can put the stencil on it, spray the paint on - or you can also use the leftover paint on the stencil like a stamp to get different patterns.
Step 2 – make it colorful J
Then cut out strips of different widths from the many colorful papers included in the scrapbooking kit. If you like, you can also fold and / or glue individual strips on top of each other to get more three-dimensionality. I have done so with the blue strip. You can also wrap the paper strip around a pen or your little finger to make it curl. I did this on the left outside with a paper strip. Glue all your strips with some space between each strip.

Step 3 - Photo cluster
In case of very colorful and contrasty backgrounds, I usually create the photo cluster separately. Take the photo in your hand and glue it on a colorful background. Then take different embellishments or paper scraps, tags, cards and glue them step-by-step under the photo. I used a card with a saying cut out of the papers included in the scrapbooking kit, then used it with a tag (also included in the kit) and a butterfly cut out of the papers. After that, I added an embellishment in the shape of a backpack in front of the photo, which I also cut out of a paper. If you want you can still attach a piece of Twine to the tag.

Step 4 - Title
Stick your desired title on the layout. I used an embellishment from the scrapbooking kit. Then combined with a cut out design from a paper.

Step 5 - Build a bridge between photo and title

Now glue on your photo cluster. Fill the gap between the title and the photo with embellishments. I cut out my embellishments from the papers included in the scrapbooking kit. Then add more embellishments until you like your layout.
I wish you a lot of fun while redesigning my layout. If you have any questions, I'll be there for you and I'm always happy to receive your feedback.
Michelle
No comments:
Post a Comment