Hello friends! Aimee here with you today to share a step by step tutorial on my Wintertime Fun layout. There are so many fun elements to the My Creative Scrapbook creative kit this month that I was wowed with them all when I opened my kit! As soon as I saw the snowman stamp and die set, I knew I had to have one of those sweet snowmen on a layout. So let's get started!
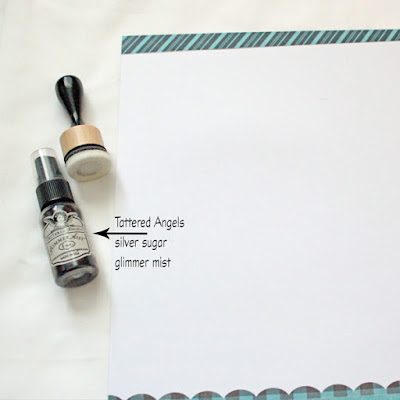
I started off with a sheet of white cardstock. I trimmed out the blue stripes from the border strips paper and then trimmed them into 2 separate pieces. Adhere them to the top and bottom of the cardstock. Slip the scalloped blue/black border sticker under the bottom piece.
I trimmed a photo of our tiny and adorable snowmen down to 3.5" x 3.5" and layered papers behind. With a pencil, I placed a tiny mark on the top right corner and bottom left corner for my next step.
I used some Tattered Angel Silver Sugar Glimmer Mist and an ink blending tool to create the look of glimmering snow coming from behind my picture.
Instead of misting, I opened the bottle (after shaking it up good) and flipped it upside down on the blending tool to get a fair amount of the mist. Then using a sweeping motion, I went from corner to corner so it would peek out from around my picture.
After the Glimmer Mist had dried, I adhered my picture onto the cardstock and started all of the fun of placing embellishments.
In the picture below, you can see that I added one of the tags upside down. I knew that once I had my snowman ready to go, he would cover up the words and only the pretty blue pattern on the tag would show. I added some of the other tags and stickers to my layout. *One little side note - Once I had my snowman tag on the bottom right corner of the layout, I realized I wanted to carry the Glimmer Mist to that corner as well.
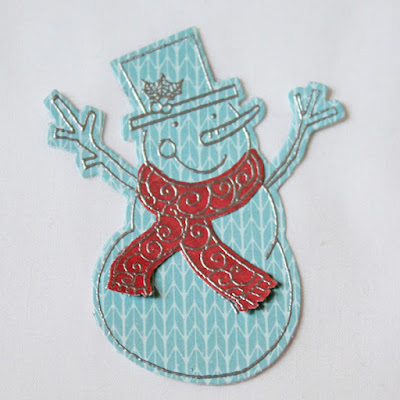
Now comes that adorable little snowman! Instead of stamping in black ink, I wanted this little guy to really pop so I used silver embossing power and my VersaMark ink pad. I embossed 2 images...one on the blue patterned paper and one on the red patterned paper and used the die to cut them both out. Then I trimmed out the scarf on the red paper and adhered it to the snowman on blue paper.
And here he is! So cute!!
I adhered him to my layout and started working on adding some snowflakes around him with the snowflake stamps and stickers.
I felt like I needed a little something in the upper right hand corner with the wreath so I pulled apart this tag so I could use the mitten by themselves. I know I can find a use for the beautiful wood tag in another project. ;)
I used pop dots to raise the mittens above the wreath for dimension.
A few more embellishments and finishing the title with a sticker and call it done!
I hope you enjoyed this tutorial and by now are enjoying one of the fabulous January kits! Here is a look at the Creative kit from My Creative Scrapbook that I had the pleasure of working with!


No comments:
Post a Comment