
Hey guys, Tracy here and today I thought I would share a great little tutorial that is great for using up those little bits and pieces of a favorite kit or collection. Here are all of the details: 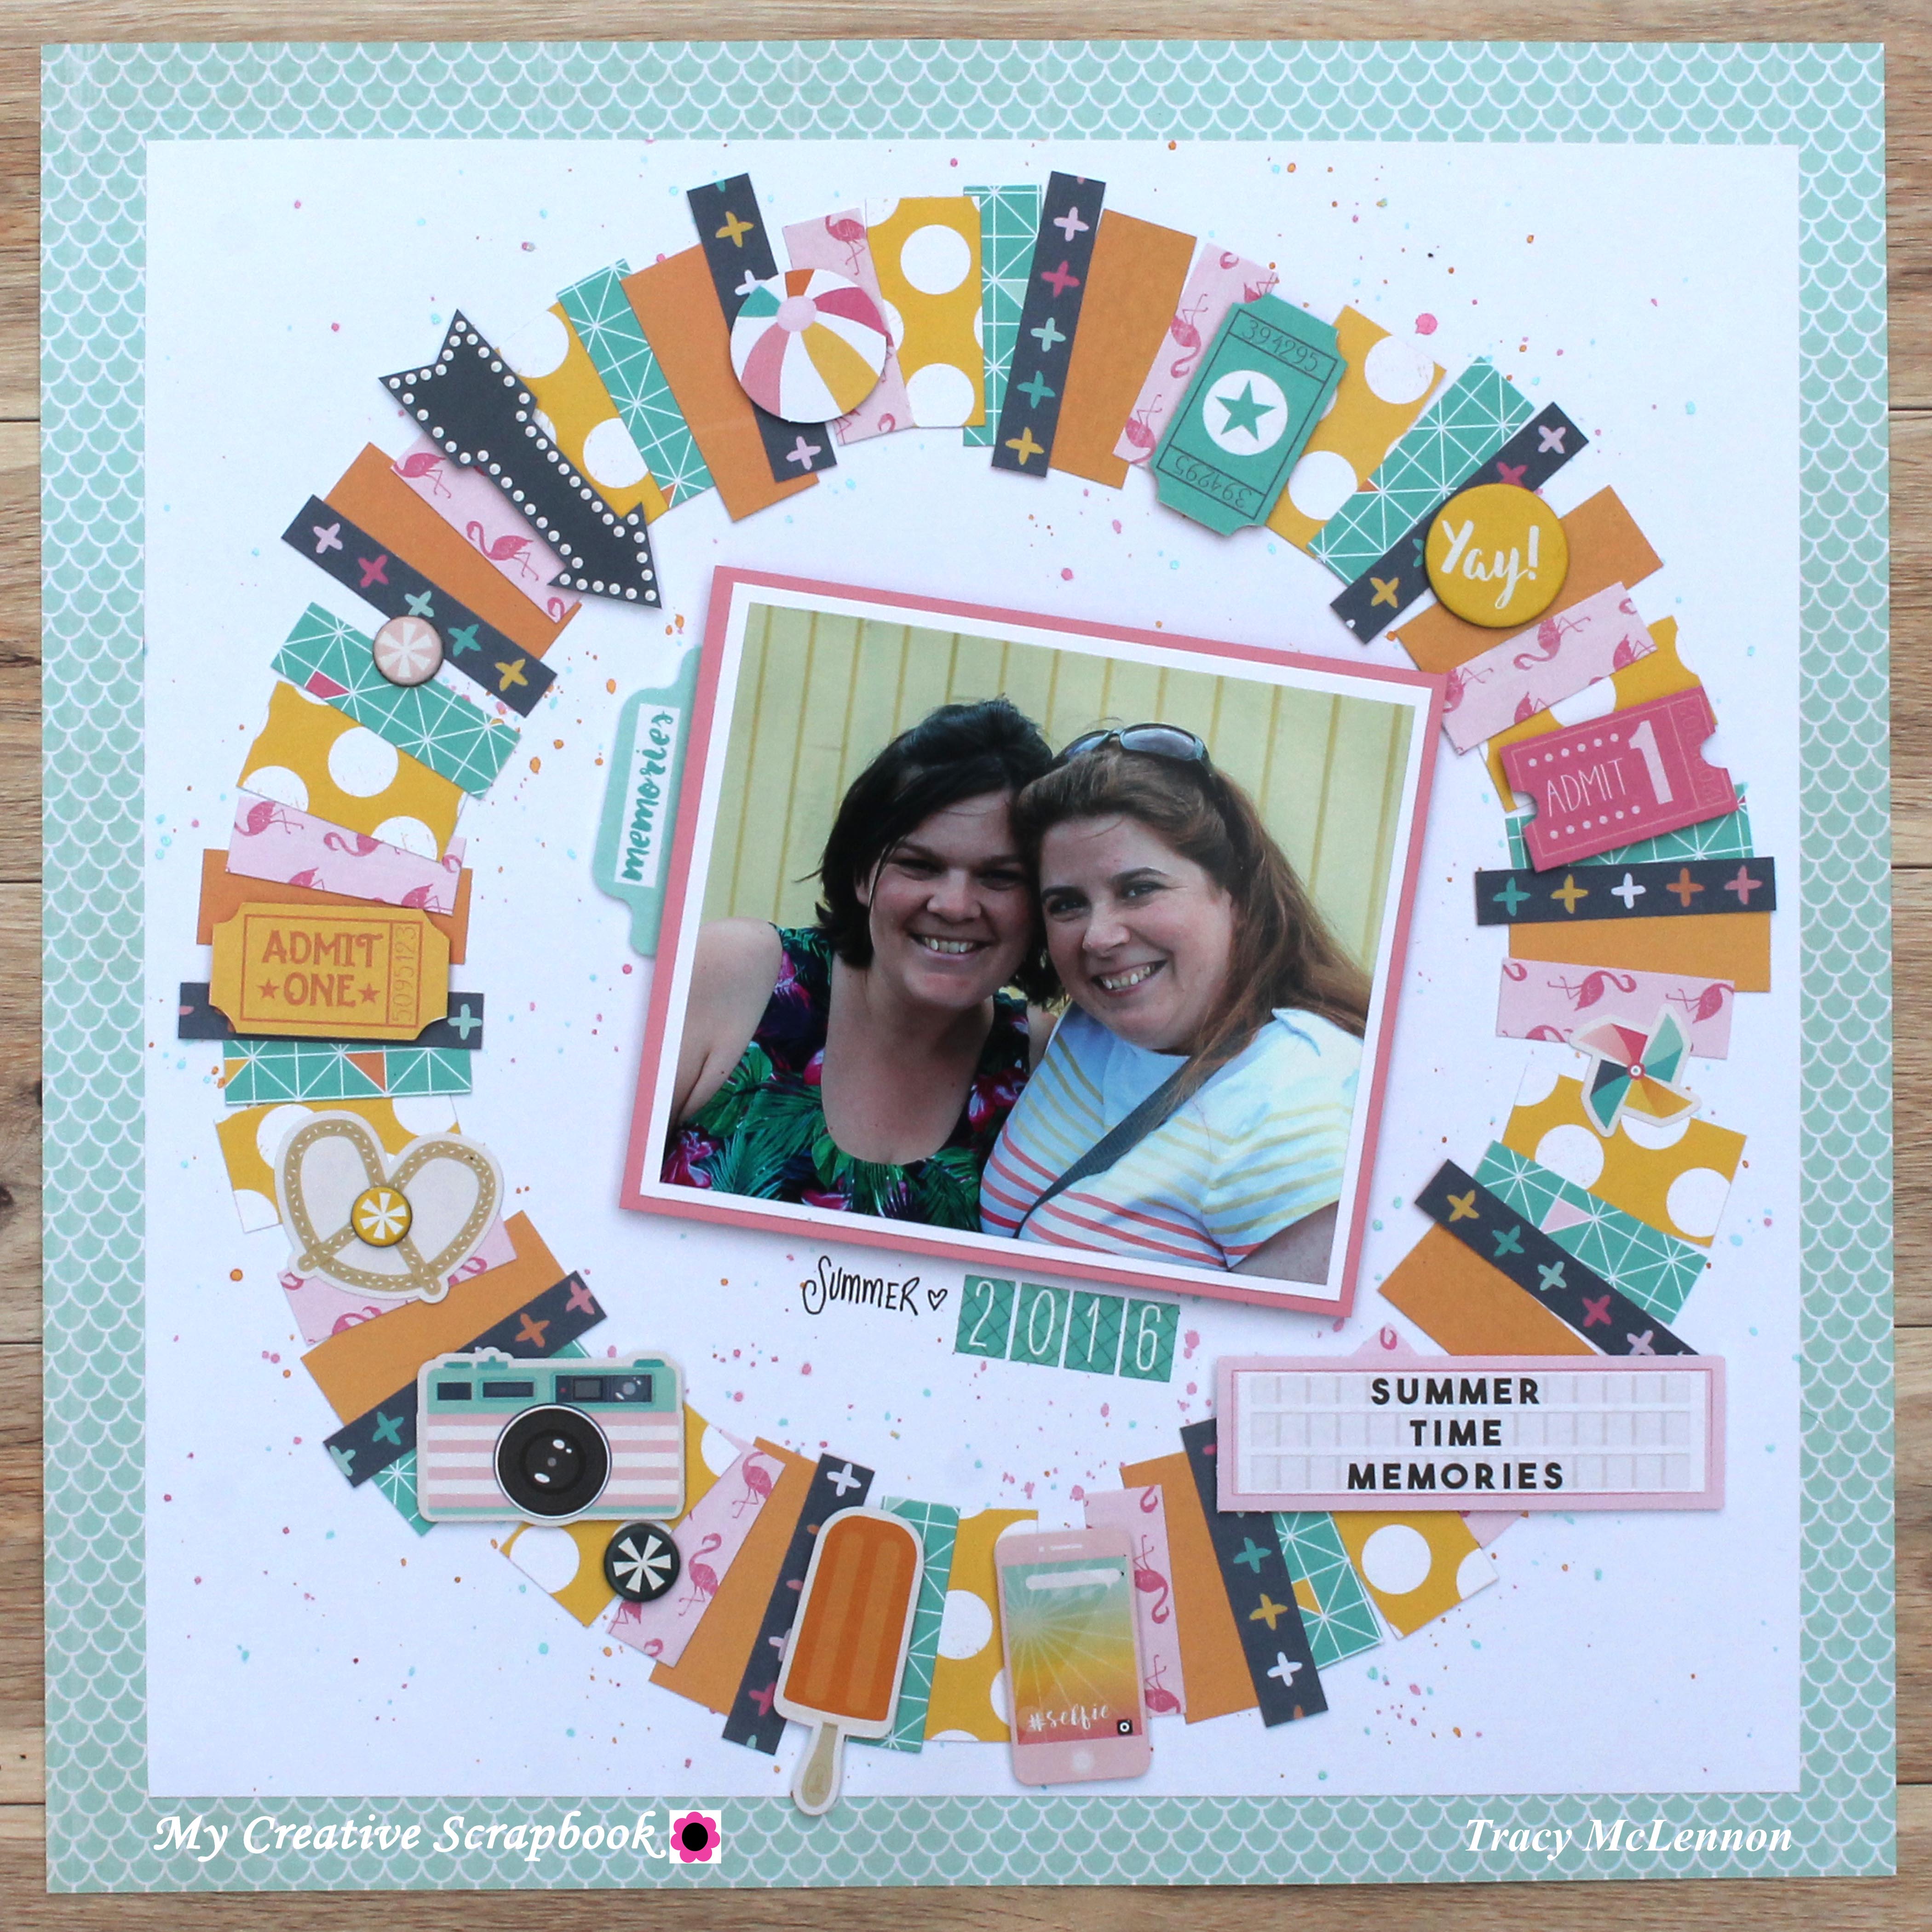
My layout is created using the July Creative Kit from My Creative Scrapbook and a few of these other additions:
White and Pink Cardstock
Pink, Teal and Yellow Misters
Adhesives: Tape Runner, 3D Foam Squares
Plate and a Pencil
I started by cutting my white cardstock to about 10x10. Then I took a regular dinner plate and used it as a template to draw a large circle with pencil. Using that as a guide I splattered my mister colours around the circle. Let dry. Adhere the white cardstock to the teal patterned paper that is your background.

Then I cut all sorts of little pieces of patterned paper. The width varied from 1/2" to 3/4". The length varied from 1.25" to 1.75". Cut lots, there is nothing more frustrating than creating a pattern and then realizing half way through that you don't quite have enough.
I ran my tape runner around the circle that I traced earlier in pencil. This made it easy to just add pieces as you go, occasionally I needed to add a little adhesive to individual pieces when they overlapped a lot. I also left spaces here and there, that is where later I added other embellishments.

Once your patterned paper pieces are added, then I added the other embellishments. That included die cuts, chipboard and cardstock stickers. I often used 3D foam tape when adding, to get a little bit more dimension.
To finish I added my matted photo in the middle of the circle, again using 3D foam squares. Ta Daaaa, a super cute finished layout!
No comments:
Post a Comment