Hello MCS fans! Aimee here with you today to share a layout step by step tutorial. I had the pleasure of working with the colorful and Springy Creative kit. It was just a delight to work with as I love color and I tried to get as many colors on this layout as possible! I love the way it pops right off of the white background.
Happy Spring
And here is a view of that gorgeous Creative kit that I used:
Step 1: cut about 6 strips of pattern paper
Step 2: adhere to background paper and run through sewing machine to create lines across each strip of paper with the exception of the "happy spring" strip. Gently run your finger under each strip to curl the edges up. Just please be careful to not give yourself any paper cuts as we all know those stinkin' things HURT!! ;)
Step 3: layer a couple of pieces of pattern paper or card stock and adhere to your photo
Step 4: add some pop-dots to the bottom half of your photo. You won't need to add them to the top because of the raised elevation of the strips of pattern paper already on your layout...adhere to layout.
Step 5: Fussy cut a tag and some flowers.
Step 6: Adhere the tag directly under your photo using pop dots on the right side of tag. Add your flowers, heart punch and Happy Spring sticker banner.
Step 7: cut out a triangle of the flower pattern paper and adhere to the bottom corner
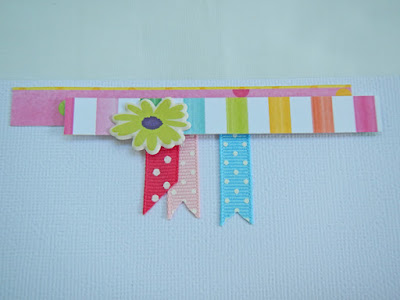
Step 8: cut two strips of pattern paper. Adhere the pink polka dot strip down first. Then adhere 3 pieces of ribbon on top. Use pop dots on the back of the rainbow stripes piece and adhere on top of the polka dot paper and ribbon. Add flower puffy sticker.
Step 9: add butterfly sticker, puffy "shine" sticker, and the "life is sweet" sticker around the top left of your photo.
And you are done!
Thank you for visiting us today and I hope you enjoyed this step by step tutorial!
Be sure to come back to see more beautiful creations made by our fabulous design team!


No comments:
Post a Comment