Brenda Cazes is featuring our April Main Kit today with a step by step layout tutorial!
--------------------
Hi everyone! Today I’m going to show you how I created this layout.
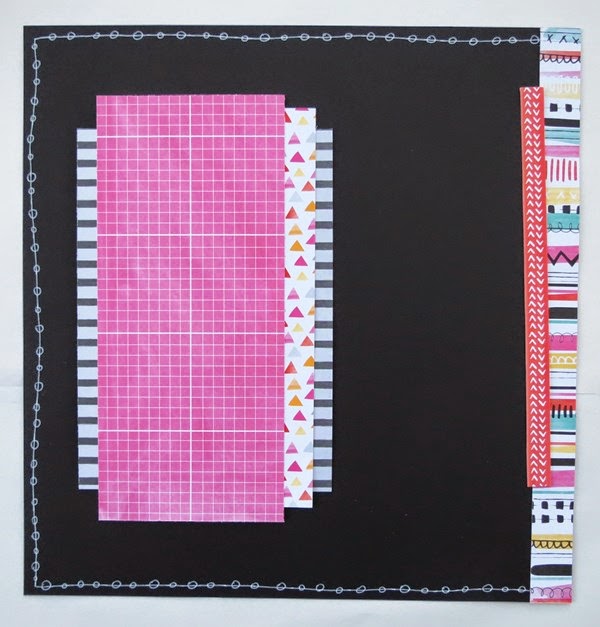
I started with a piece of black cardstock and using a white gel pen, I freehanded a border on three sides of the paper. I didn’t do the right hand side because I knew I was going to cover it up.
Next, I drew different sized circles over the doodled lines.
I then added a 1” strip to the right hand side.
Then, using one of the barcode strips, I cut it down to about 8” and added it over the strip I just added.
Cut a 4” x 9” piece from the pink grid paper and a 1 ½ “ x 8 ¼ “ piece of the triangle paper and glue it to the right hand side of the pink paper.
Next, I cut two 1” x 7.5” strips of the black striped paper. By just using strips, you save on paper!
Glue the strips to the pink grid paper.
Glue these pieces to the left side of your black cardstock.
Add one of the journaling squares and tuck it under the piece that was just added.
I then journaled on one of the diecuts and added it to the journaling square.
I trimmed my photos down to fit the frames and glued them to the frames.
Glue the framed photos to the pink grid paper.
Next, I added the title and some of the other embellishments included in the kit. I cut out two of the rectangles from one of the patterned papers and tucked them at the top under the strip on the right hand side. Then, using my sewing machine, I did a zig-zag stich over the red strip.
You might have noticed the yellow strip on the right hand side isn’t it any of my photos. It wasn’t until I finished my second layout and placed it beside this one that I noticed it wasn’t 12x12”. Apparently, the black cardstock I used wasn’t a full piece! So I used another one of the barcode strips and glued it to the right hand side and stitched it to keep it in place. Here’s the finished layout.
--------------------
Please visit our Design Team Gallery to view more of Brenda’s beautiful work.
Here's the April Main Kit:
For full descriptions of our kits, subscription information, and more, visit our website at MyCreativeScrapbook.com
--------------------
Hi everyone! Today I’m going to show you how I created this layout.
I started with a piece of black cardstock and using a white gel pen, I freehanded a border on three sides of the paper. I didn’t do the right hand side because I knew I was going to cover it up.
Next, I drew different sized circles over the doodled lines.
I then added a 1” strip to the right hand side.
Then, using one of the barcode strips, I cut it down to about 8” and added it over the strip I just added.
Cut a 4” x 9” piece from the pink grid paper and a 1 ½ “ x 8 ¼ “ piece of the triangle paper and glue it to the right hand side of the pink paper.
Next, I cut two 1” x 7.5” strips of the black striped paper. By just using strips, you save on paper!
Glue the strips to the pink grid paper.
Glue these pieces to the left side of your black cardstock.
Add one of the journaling squares and tuck it under the piece that was just added.
I then journaled on one of the diecuts and added it to the journaling square.
I trimmed my photos down to fit the frames and glued them to the frames.
Glue the framed photos to the pink grid paper.
Next, I added the title and some of the other embellishments included in the kit. I cut out two of the rectangles from one of the patterned papers and tucked them at the top under the strip on the right hand side. Then, using my sewing machine, I did a zig-zag stich over the red strip.
You might have noticed the yellow strip on the right hand side isn’t it any of my photos. It wasn’t until I finished my second layout and placed it beside this one that I noticed it wasn’t 12x12”. Apparently, the black cardstock I used wasn’t a full piece! So I used another one of the barcode strips and glued it to the right hand side and stitched it to keep it in place. Here’s the finished layout.
--------------------
Please visit our Design Team Gallery to view more of Brenda’s beautiful work.
Here's the April Main Kit:
For full descriptions of our kits, subscription information, and more, visit our website at MyCreativeScrapbook.com


No comments:
Post a Comment