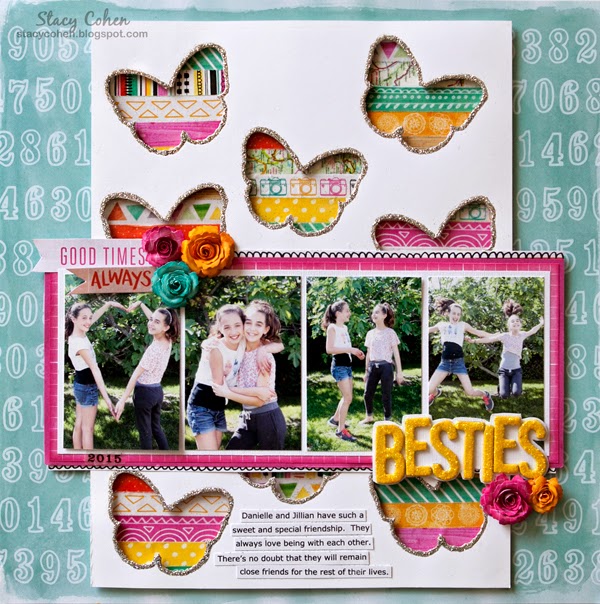
Guest Designer Stacy Cohen used the washi strips in our April Main Kit to create a beautiful, colorful butterfly background for her layout. Today she's sharing how she did it!
--------------------
Hi everyone! Washi tape certainly has become a scrapbooking staple. There are so many fun ways to use it. For my “Besties” layout that I made with the April Main Kit, I decided to cut out some butterflies and fill the negative space with strips of the colorful washi.
Here’s how to do it:
1. Use your favorite die-cutting machine, punch, or stencil to cut out the shapes. Note: I once did this technique by tracing around the shapes onto cardstock and hand-cutting them out with a craft knife and fine-tip scissors (the old school way!).
2. After you’ve cut out all the shapes, place the die-cut paper over another sheet of paper/cardstock. Use a light pencil to trace the shapes onto the second sheet of paper. These will be your guidelines for adding the washi strips.
3. When you remove the top sheet you’ll be left with the traced images on the bottom sheet. If the pencil lines are too dark, they may show through the washi tape. If necessary, use an eraser to lighten the pencil marks so that they are just barely visible to you.
4. Using the trace marks as your guidelines, place strips of washi tape over the shapes. Be sure to cover the shapes completely.
5. After all the shapes have been covered with washi tape strips, adhere the top sheet (the die-cut sheet) to the bottom sheet with 3d adhesive. Optional, outline the shapes with glitter glue, markers, colored pencils, etc.
And there you have it!
--------------------
Please visit our Design Team Gallery to view more of Stacy’s beautiful work.
Here's the April Main Kit:
For full descriptions of our kits, subscription information, and more, visit our website at MyCreativeScrapbook.com
--------------------
Hi everyone! Washi tape certainly has become a scrapbooking staple. There are so many fun ways to use it. For my “Besties” layout that I made with the April Main Kit, I decided to cut out some butterflies and fill the negative space with strips of the colorful washi.
Here’s how to do it:
1. Use your favorite die-cutting machine, punch, or stencil to cut out the shapes. Note: I once did this technique by tracing around the shapes onto cardstock and hand-cutting them out with a craft knife and fine-tip scissors (the old school way!).
2. After you’ve cut out all the shapes, place the die-cut paper over another sheet of paper/cardstock. Use a light pencil to trace the shapes onto the second sheet of paper. These will be your guidelines for adding the washi strips.
3. When you remove the top sheet you’ll be left with the traced images on the bottom sheet. If the pencil lines are too dark, they may show through the washi tape. If necessary, use an eraser to lighten the pencil marks so that they are just barely visible to you.
4. Using the trace marks as your guidelines, place strips of washi tape over the shapes. Be sure to cover the shapes completely.
5. After all the shapes have been covered with washi tape strips, adhere the top sheet (the die-cut sheet) to the bottom sheet with 3d adhesive. Optional, outline the shapes with glitter glue, markers, colored pencils, etc.
And there you have it!
--------------------
Please visit our Design Team Gallery to view more of Stacy’s beautiful work.
Here's the April Main Kit:
For full descriptions of our kits, subscription information, and more, visit our website at MyCreativeScrapbook.com


2 comments:
GORGEOUS layout and what a fun, fun way to use washi or even leftover paper scraps. I love the overall design and color scheme of your layout but the washi butterflies are over the top! Thank you for sharing this idea. Just awesome.
Hi,
I have a Question i am little bit confuse
What is difference between Scrap booking, Paper crafts and Stamping?
Hope i will get detail answer from Here.
Thanks in Advance
Post a Comment