
Christine Meyer is featuring our March Creative Kit today. Read on to see how she created some awesome details on her layouts!
--------------------
Hi My Creative Scrapbook Fans! Have you been diving into the fun new kits yet this month or are you eagerly waiting for it to arrive? I had so much fun with the vibrant colors and patterns in this month's Creative Kit and today I am going to share with you how I did a couple of little details on two layouts! First up I want to talk about the dimensional scallops that you see on this layout:


--------------------
Please visit our Design Team Gallery to view more of Christine’s beautiful work.
Here's the March Creative Kit:

For full descriptions of our kits, subscription information, and more, visit our website at MyCreativeScrapbook.com
--------------------
Hi My Creative Scrapbook Fans! Have you been diving into the fun new kits yet this month or are you eagerly waiting for it to arrive? I had so much fun with the vibrant colors and patterns in this month's Creative Kit and today I am going to share with you how I did a couple of little details on two layouts! First up I want to talk about the dimensional scallops that you see on this layout:
The scallops on this paper are gorgeous but they were just screaming at me to make them look like ruffles! So here's how I did that:
Cut out a 6 inch wide piece of the paper.
Fussy cut random scallops - don't put too much thought into this -- even if you overlap a little it is okay! I went through and did one round of fussy cutting and then looked at where there holes to do more.
Using a craft knife tends to produce rough edges (at least for me anyway :)) so I use a small sanding tool to clean up any edges of the scallops that look jagged. After that I attached it to my layout. I curled the scallops up a bit and that's it!
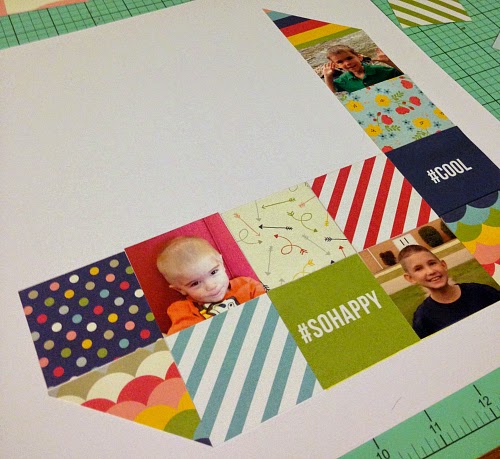
The next little technique I want to show you is how I lined up the squares to create the heart in this layout:
I used the 2 inch Insta squares for this heart. My original intent was to do it straight up in the layout but it just took up too much room that way and was overwhelming. So I decided to lay the heart on it's side.
Using a ruler I drew in a light line so that I had my heart borders straight and even.
I then did four squares across and four up. I also cut some patterned squares in half diagonally to use for triangles where needed. I was careful on the outside pieces of my heart to stick with patterns that didn't have a white base. I didn't want the border to blend in at all with the white cardstock background.
From there you continue to fill in with squares and triangles to create the heart shape. When you get it all filled in you can hand stitch or machine stitch to add some texture. I went with long straight hand stitches that stretched the length of each square.
Hope you enjoy playing with your kit this month! Make sure to share your creations with us on our facebook wall!
Please visit our Design Team Gallery to view more of Christine’s beautiful work.
Here's the March Creative Kit:
For full descriptions of our kits, subscription information, and more, visit our website at MyCreativeScrapbook.com
2 comments:
Awesome tutorial thank you
I loved seeing this scalloped layout during the blog hop and I am so glad you showed an up-close tutorial, because I am so scrap-lifting this very soon. What a fun twist to do with a single piece of patterned paper. Love the heart grid too, and a perfect technique to use with small paper scraps. THANKS FOR SHARING!
Post a Comment