
As we wrap up another month of fabulous kits along with brilliantly beautiful layouts, cards, mini albums, and projects from our design team, we thought it'd be fun to shine a spotlight on one of our design team members.
DT member Sandi Clarkson stops at nothing to include beautiful details in her work. Read on as she walks us through many of her details of her October Limited Edition kit work.
We hope you will also enjoy a little question and answer session with Sandi at the end of the post!
--------------------
Hello, My Creative Scrapbook Kit Club fans!! I am so happy to share my October projects with you! I had the privilege of using the always gorgeous Limited Edition Kit and I must say that this month's kit contents really got the mojo flowing.

"Relax"
Firstly, I created a layout using a vintage photo of my mom (curlers and all) and dad enjoying a cup of coffee on their front porch. Since this Kit featured Prima's Coffee Break collection, I just couldn't resist! Even though I'm a big coffee drinker myself, I always associate it with my parents. LOL

I've used my favorite distressing technique on this one ... burning the edges! Be very careful doing this one, girls! I always do this using the flame of a candle BUT over the kitchen sink WITH a stream of water running ... just in case! And ALWAYS when someone else is home. You can never be too careful! Those are my THREE cardinal rules and I don't break them no matter what!! Sink, water, third party at home! It's a must!

So, here is one pretty cluster. I adored all the lovely flowers in the Kit this time but the black and white striped one was a special fave of mine! De-lish! And aren't those glasses just the cutest things? You can see a bit of my stamping in the background.

In this close-up you can see where I've used molding paste with The Crafters Workshop stencil from the Kit and then used the Prima Coffee Break stamp over it.
This is the same technique but on the other side of the photo. Of course, the white gesso over the middle of the page provides a nice base.
***

"The Big Street"
Next, I created a pink layout using a photo I found on Pinterest of Lucille Ball from a movie she did called The Big Street. I had no idea that she did dramatic roles before she did comedy. Anyway, I wanted to do something just a little bit different and so, I dug out my punches. They don't get much use these days! I had a tutorial on this earlier in the month.

In this cluster you can see the gorgeous Prima vine with the pearls and leaves. Oh so pretty! I've tucked both the sheer ribbon as well as some of the sequined trim into the cluster. Off to the side is another sequin from the embellishments package. Loved these!

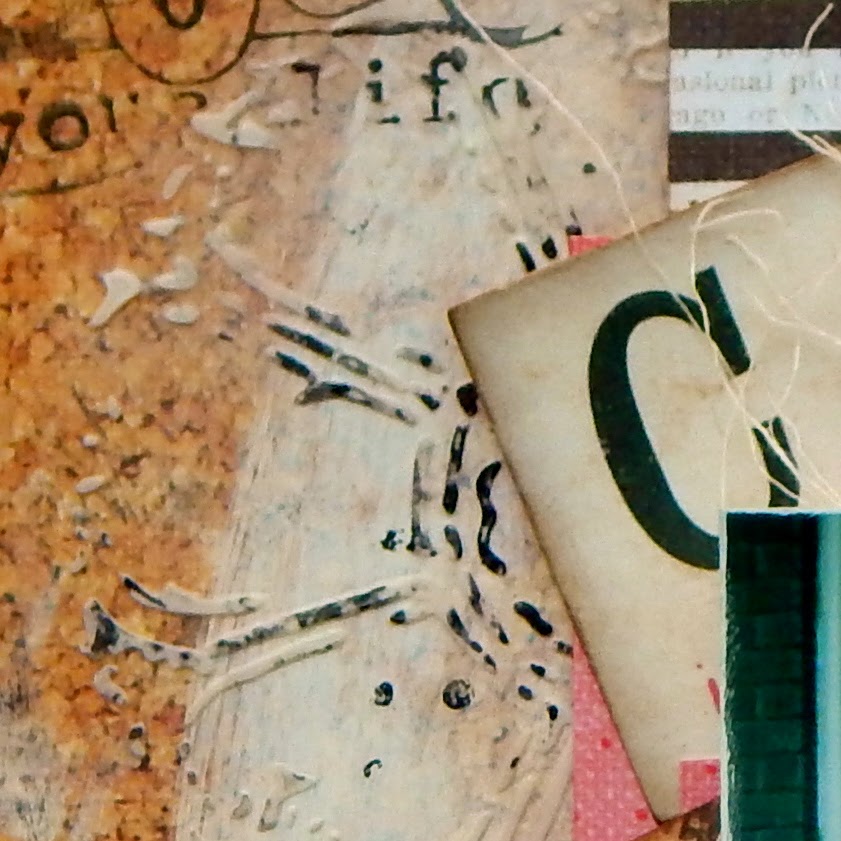
I wanted to demonstrate that the TCW stencil could be used with inks as well as with molding paste and that is what I've done here in black. You can see the somewhat circular pattern to the right of the photo cluster. To help with contrast, I've primed my pink paper with a white gelato from my stash. My large alphas were altered with chalk ink.

In the upper left corner, I've again used ink with the TCW stencil in the weaved pattern and this time with a charcoal grey. I've done this randomly across the page. It's very faint but adds a nice touch!
I wanted to show you the pretty wooden piece from the Kit. I loved these and for the most part left them bare except for this page. Here I've used some Lindy's Stamp Gang Embossing Powder from my stash to give it a nice shine. To create the bubbles you see in the background, I just used a stencil from my stash along with the stencil from the Kit. Bubbles seemed appropriate for this oldie "movie" page. You can see more of the black ink-work done with the TCW stencil also.
***

"Today"
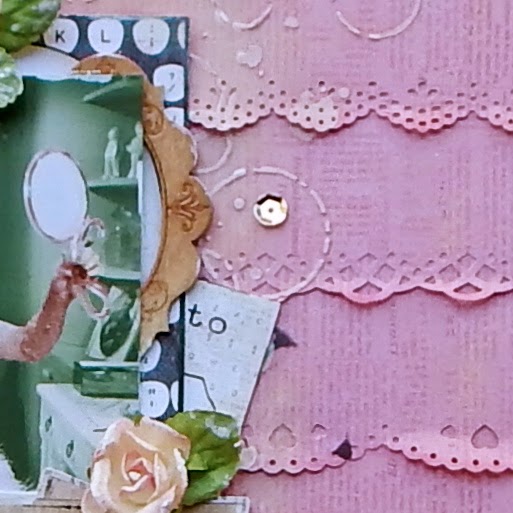
Oh my, this one was so hard to photograph! But trust me, there is about a 1/4" of a polka dot edge all the way around that is just too cute. The rest is pretty simple with banner and layers of notecards and embellishments.

It's very hard to see but I've again used the TCW stencil with the charcoal grey ink and then followed that with my own ledger stencil and some molding paste. To add color I've used Lindy's Stamp Gang's Grab a Guy Gold and let the mist run down the page. See that spoon and the sweet little cup? Adore! I figure this girl of mine could use her coffee while studying!

And the same thing over on this side. Loving these wooden embellishments!
***

"Zoe"
I've had lots of comments on this layout during the Blog Hop which struck me as humorous because I seriously made this one from tiny leftover scraps! I did plan ahead on the flowers and one of the papers but the rest was sheer luck! Whew! Having a cute photo helps!

At first I wasn't sure about this hand embellishment but I thought it looked adorable here on top of the pretty flowers with the sequins off to the side and the twine and sheer ribbon underneath it all. And of course, pointing to the newest member of our family. It was so fun tucking in the teapots, coffee cups and other trivia here and there ... just finding a spot for everything that was left over from the kit. I think I feel in love with sequins all over again!

You can barely see in the background that I've used a stencil from my stash along with some molding paste and mists for a dash of texture and color contrast. I colorized my alphas as well. Don't you love that nice, large Prima flower? I distressed the edges of the flower a bit with my scissors just to change it up!

Here you can see some of the layers of cards and embellies. As I mentioned earlier, I was dead-set on leaving these wooden shapes "naked" because I loved the contrast they provided against the colors. But they are easy to alter with paints, mists or embossing powders … whatever you choose.
Thanks for letting me share! I hope you have received your Kit by now and are having fun! If you haven't joined us yet, click on this LINK to get more information!
--------------------
And now, let's get to know Sandi!

How did you get started with scrapbooking?
I started scrapping after my older daughter made an idle remark about not remembering doing anything "memorable" for Easter. She was teasing me but naturally I wanted to set the record straight! So, photo documentation seemed the way to go. I knew I'd seen scrapbooking "stuff" at the local big box stores, so off I went. Oh my! I wandered aimlessly for hours. Thank goodness for those things called kits! I had no idea what to do with my supplies once I bought them but I sure did put my heart and soul into that silly album. And my daughter now remembers ALL about Easter ... on many levels. It actually touched her very deeply.
What is your favorite subject to scrap?
Favorite subject? That's easy! My grand babies, of course! I'm also fond of scrapping wedding photos. Or anything candid that really touches the soul and tells a story.
What is your favorite technique to use lately?
I love playing with my molding paste, stencils and colors of all kinds ... whether mists, gelatos, water colors or whatever you like. I love building my background.
What advice do you have for someone brand new to scrapbooking?
New? First of all, don't go overboard buying things. You'd be surprised how little you need to make a fabulous project! Tools are almost a thing of the past. Today, at least for me, it's more about the art supplies, gesso etc. Join a Kit club and get plugged in. Follow our Blog. Look for inspiration online. It's everywhere. For free!
Do you have any other hobbies?
I've always been a big reader! Books are like buried treasure. Love them. Decorating is a fun past time for me. There's always one more thing to do. I also love gardening although this years' garden is looking kind of sad. Long story! And I crochet just enough to be able to pass that talent on to the next generation. I used to sew all the time but now I just sew on paper! LOL
--------------------
Happy Halloween to those celebrating.
See you right back here tomorrow for our November SNEAK PEEKS :)
1 comment:
Sandi a wonderful post, Thank you for sharing our design process with us.
We love having you on the team
Post a Comment