My Creative Scrapbook design team member Mary Ann Jenkins is up today sharing how she used the trim in our March Main Kit!
Here's Mary Ann:
>>><<<
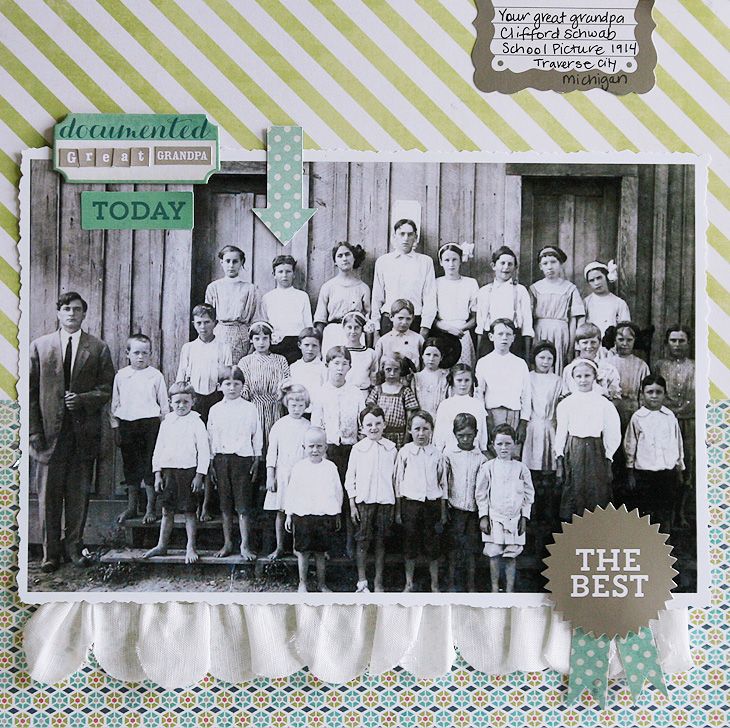
Hi friends! It's Mary Ann here today to share a layout and some ideas on how to use the fun Heidi Swapp scallop trim that is included in the March main kit.
As you can see, I used the trim under the photo. I love the scallop edge, and although it would have worked to just lay it flat under the photo, I did a little "quick" sewing to give it a bit of dimension.
I did an easy straight stitch by hand, then pulled the thread just a bit to gather the trim together for a ruffle effect.
This was really simple to do, and since the stitching would be hidden under the photo, I didn't even have to worry about what color the thread was ;)
Here's a few other ways you could use the scalloped trim too.
For the shabby flower, I misted the trim and let it dry. This look could also be achieved by adding a little color from a stamp pad. I then did the same straight stitch, but this time pulled the thread together tightly so it would gather to look almost like a rose.
For the gold flower, I did the same straight stitch again, and instead of gathering tightly, I kept it loose to form a flat flower shape. I also used a bit of mist to give it a splash of gold color (this would also look very pretty with just the natural color of the trim) After the mist had dried, I stitch on an old button from grandma's button jar.
Be sure to check out the website to see all the March kits!
>>><<<
>>><<<
Hi friends! It's Mary Ann here today to share a layout and some ideas on how to use the fun Heidi Swapp scallop trim that is included in the March main kit.
As you can see, I used the trim under the photo. I love the scallop edge, and although it would have worked to just lay it flat under the photo, I did a little "quick" sewing to give it a bit of dimension.
I did an easy straight stitch by hand, then pulled the thread just a bit to gather the trim together for a ruffle effect.
This was really simple to do, and since the stitching would be hidden under the photo, I didn't even have to worry about what color the thread was ;)
Here's a few other ways you could use the scalloped trim too.
For the shabby flower, I misted the trim and let it dry. This look could also be achieved by adding a little color from a stamp pad. I then did the same straight stitch, but this time pulled the thread together tightly so it would gather to look almost like a rose.
For the gold flower, I did the same straight stitch again, and instead of gathering tightly, I kept it loose to form a flat flower shape. I also used a bit of mist to give it a splash of gold color (this would also look very pretty with just the natural color of the trim) After the mist had dried, I stitch on an old button from grandma's button jar.
Be sure to check out the website to see all the March kits!
>>><<<
We invite you to join us and experience the possibilities that our coordinated monthly kits offer. To purchase a kit, please visit our website, here.


1 comment:
Mary Ann, Love your flower tutorial! Thank you
Post a Comment