
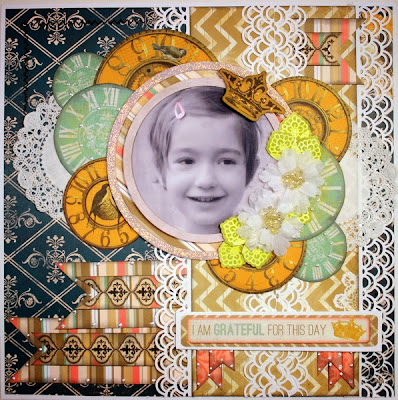
My Creative Scrapbook design team member Angel Rodrigue is up today with a step by step layout tutorial plus some chipboard altering tips featuring our October Main kit!

Below is the steps I took into making the layout posted above..
My Creative Scrapbook Main Kit this month include the Bo Bunny Avenue Line!!!
Here I picked this pattern paper inked the edges with Prima fluid chalk ink and did a little zig zag stitching with black thread using my sewing machine as shown in the picture. I wanted it to pop so I trimmed the pattern paper just enough so that it lets the black Cardstock peek through from behind..Then I cut the top and bottom of the huge doily that was in the kit in half and adhered it to each side of the page as shown below..


NOTE: You can get these mini doilys at your local grocery stores in the cake department or craft stores.


--------------------------------------------------------------
 After I used my star dust Stickles and filled on the larger piece leaving the smaller piece just colored..
Then I appled wet glue behind it and used the as the center of my page showcasing my photo.


This is how I used the Chipboard pieces that Came in the October Main Kit over at My Creative Scrapbook!
I used my Prima Fluid Chalk Ink and colored the whole piece.

Then I appled wet glue behind it and used the as the center of my page showcasing my photo.

Very Fun and easy to do . Makes your chipboard come to life.
--------------------------------------------------------------
Be sure to take a look at Angel's beautiful work in our Design Team Gallery!
We
invite you to join us and experience the possibilities that our
coordinated monthly kits offer. To purchase a kit, please visit our
website, here.
No comments:
Post a Comment