
To view or purchase our kits, click here.
We're back today with more July Main kit inspiration featuring the "I Heart Summer" collection by Simple Stories.
My Creative Scrapbook Design Team member Jodi Baune is sharing how she transformed a sticker from the kit into a fun dimensional embellishment.
Here's Jodi:
Hello! Manufactures are great about making so many fun matching elements to add to our projects I love to see how I can make those elements stretch, and what I can turn them into! I want to share with you how I took a banner sticker and made it into a fun flag for my layout!

A fun tip…Using a Q-tip, I add baby powder to the back of the sticker so the adhesive is no longer sticky making it easier to work with the sticker.

I painted the toothpick black.

Once the paint has dried I apply a glue line to the back of the sticker and add my toothpick.

Flip over and add pearl to the top of the “pole!”


 Jodi Baune
Here's our July Main kit:

I dug in my stash and found a toothpick for the “flagpole,” black paint, and a black pearl.

A fun tip…Using a Q-tip, I add baby powder to the back of the sticker so the adhesive is no longer sticky making it easier to work with the sticker.

I painted the toothpick black.

Once the paint has dried I apply a glue line to the back of the sticker and add my toothpick.

Flip over and add pearl to the top of the “pole!”

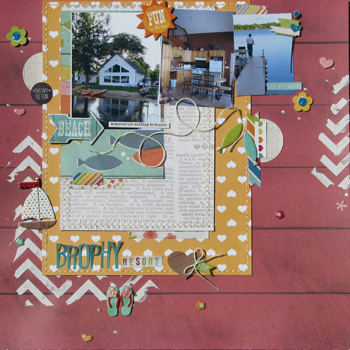
Here it is tucked into my layout!

My Creative Scrapbook Design Team member
------------------------------
Here's our July Main kit:

and here is more of Jodi's beautiful work using the kit!

We
invite you to join us and experience all that My Creative Scrapbook has
to offer.
To purchase our kits, please visit our website, here.
To purchase our kits, please visit our website, here.
1 comment:
Great job Jodi! I love altering embellishments too!!
Post a Comment