To view our kits, click here.
For our sketch challenge (deadline: June 14), click here.
For our huge Prima prize giveaway, click here.
For our huge Prima prize giveaway, click here.
------------------------------
My Creative Scrapbook Guest Designer Christin Grønnslett is here today to reveal how she created the mixed media backgrounds on each of her May Limited Edition kit layouts!
Here's Christin:
"Today I wanted to give you a little sneak into my creative process and I will show you how I made the backgrounds of all my layouts this month.
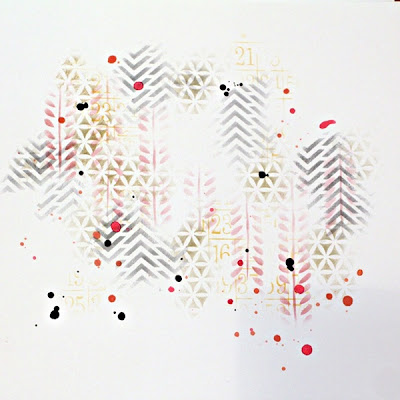
On this layout I started with white cardstock as a base. I took out my stencils and started to color on the stencils using sponges. It's a pretty dry process and you can add as many layers as you want right away. I sometimes use the same technique using Pan Pastels - the only difference is that you need to fixate different layers with the pan pastels.
Then I added some mist droplets in different colors and some stamps (the butterfly and the border is in the kit)
Here is the final result. I totaly go my freehand, I just play with the stencils without thinking where my layers of paper would come or picture. You might want to mark up some parts, but I don't get sad if most of the parts I have covered using the stencils have been covered.
********************
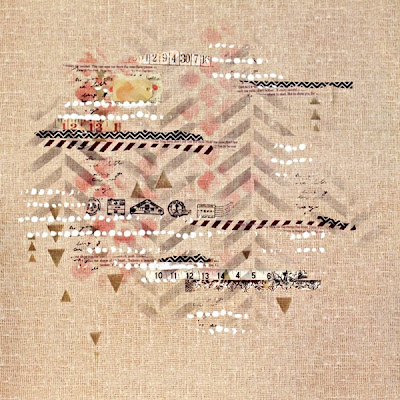
For the next layout I started with a burlap paper, I wanted to soften up this background too. Here I started with some washi tape and small parts of patterned paper adhered with glue.
Then I again used my distress inks and stencils. The white dots are super heavy gesso with a stencil.
Here is the final result
********************
For the next layout I wanted to use a black lacy background paper and for the papers and decos not to dissapear on the black paper I smeared some gesso using a spatula on the black paper.
Here is the final result - also with small color droplets. (mist)
********************
For the last layout I went mith mists to color my background. I covered big parts of the layout with a layer of gesso first - so the paper would get totally soaked in mist. Then mists in different colors and some water so the mist could fall down the paper when I held it up.
Next more color - brown and white and more water.
After the first few rounds of mist, water and heat gun I again took out my stencils and colored with distress ink in layers, then stamped parts using different bakcground stamps, added some mist droplets, but most importantly I added a layer of gesso using a stencil.
And here is the final result
Hoping that you will try new techniques to add different layers to your layouts. Have a nice day - Love from Christin aka Umenorskan"
Christin Grønnslett
My Creative Scrapbook Guest Designer
------------------------------
Here's the May Limited Edition kit:
Thanks for joining us this month, Christin!
My
Creative Scrapbook kit club is all about you and helping you preserve
your memories in a fun and creative way. For information about
subscribing to any of our monthly kits, please visit our website, here.


3 comments:
thanks for sharing! beautiful layouts! loved watching your creative process!
Absolutely fantastic tutorials and stunning pages ♥♥♥
You make it look so easy! Wish I was as good as you! Stunning layouts ♥
Post a Comment