
Here's Shell...
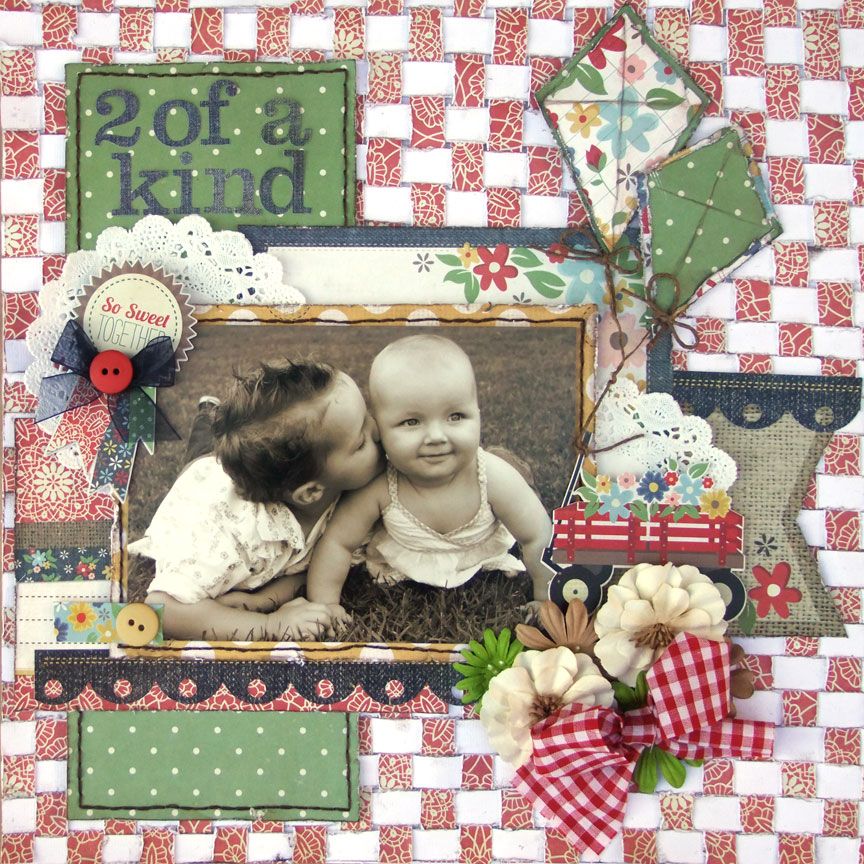
Paper Weaving seems to be making a bit of a come back. I have seen this technique used on a few manufacturers blogs & thought I would give it a try. It is a bit time consuming but it adds so much texture to your background!
You need
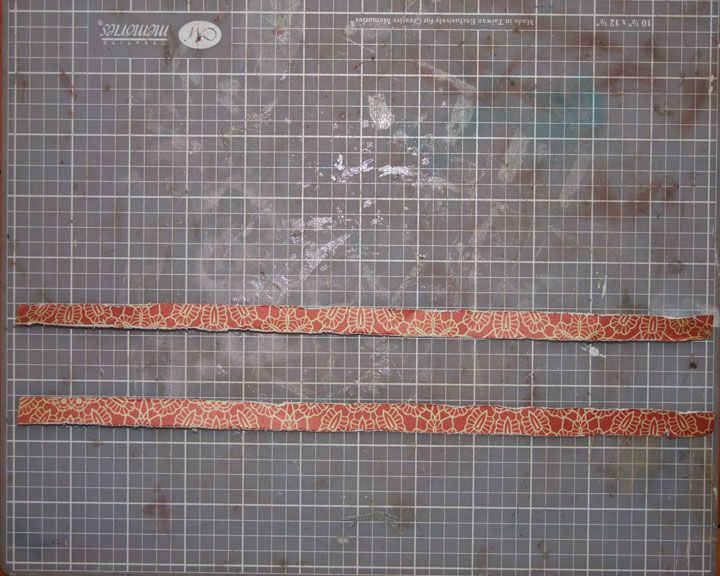
X2 sheets of 12' paper for weaving . I have used a sheet of pattern paper & a sheet of cardstock. You can use 2 sheets the same or 2 sheets that compliment each other
X1 sheet cardstock for a background
Cut both sheets into strips. My are approximately 12" X 1.5cm. I have distressed & inked every strip but you can skip this step if you like!
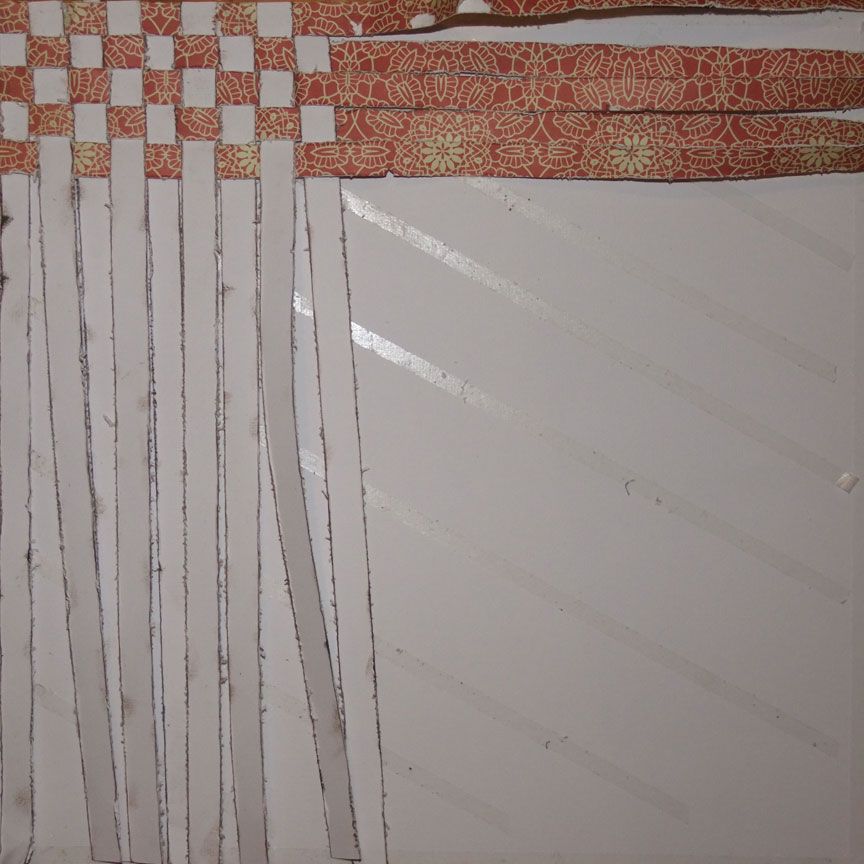
Place diagonal strips of tape on your piece of background cardstock
One colour will only run horizontal the other colour runs vertical. Start with about 5 strips of each paper
(I used the red paper for horizontal & the white for vertical)
Sart with your first Vertical (V) piece & stick it on the top left hand corner so it runs down the whole left side of the page. DONT STICK IT ALL THE WAY DOWN YET!!!
Take your first Horizontal (H) piece & also stick this on the top left hand corner so it runs along the top of your page. DON'T STICK IT ALL THE WAY DOWN YET!!!
Start adding more strips rembering which pattern is V or H. I found it easier to just add a strip at a time weaving the paper under & over as you go
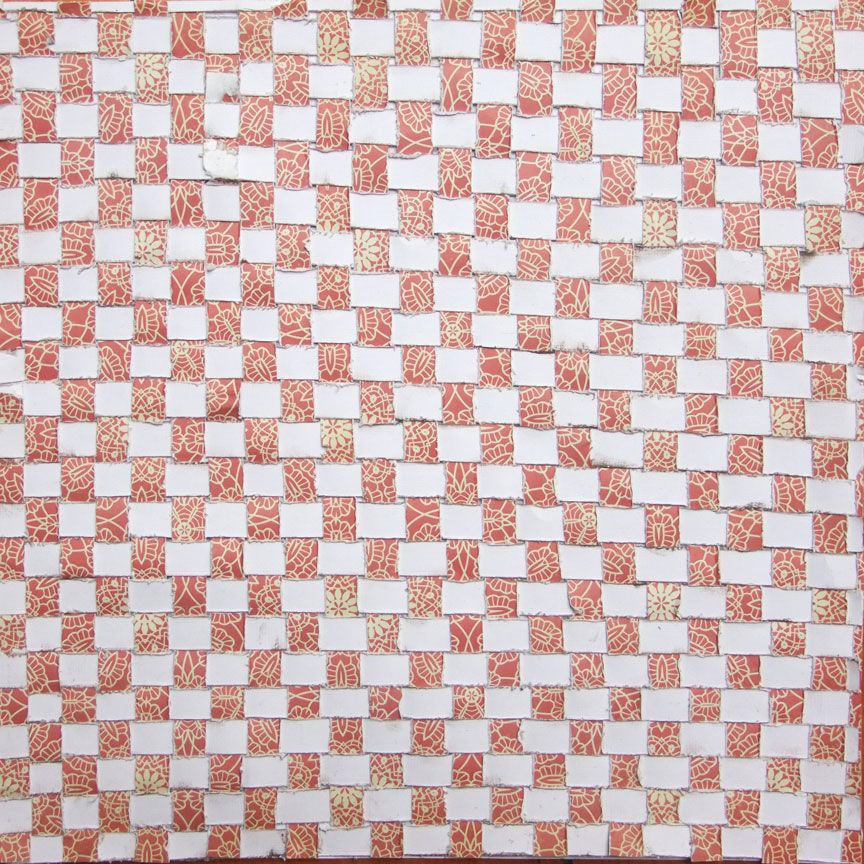
As you continue to weave keep the weave as tight as you can. After you have weaved a few strips stop & pull them tight together so there are no gaps in the weaves otherwise you pattern will be crooked. As you can see in this picture my are not perfectly even but I have tried as best i could to keep the weave tight & the strips straight!
Once you have finished weaving trim the edges of your strips where you need to. Decorate your page as you normally would!
-----------------------------------------------------------------------------------------------------
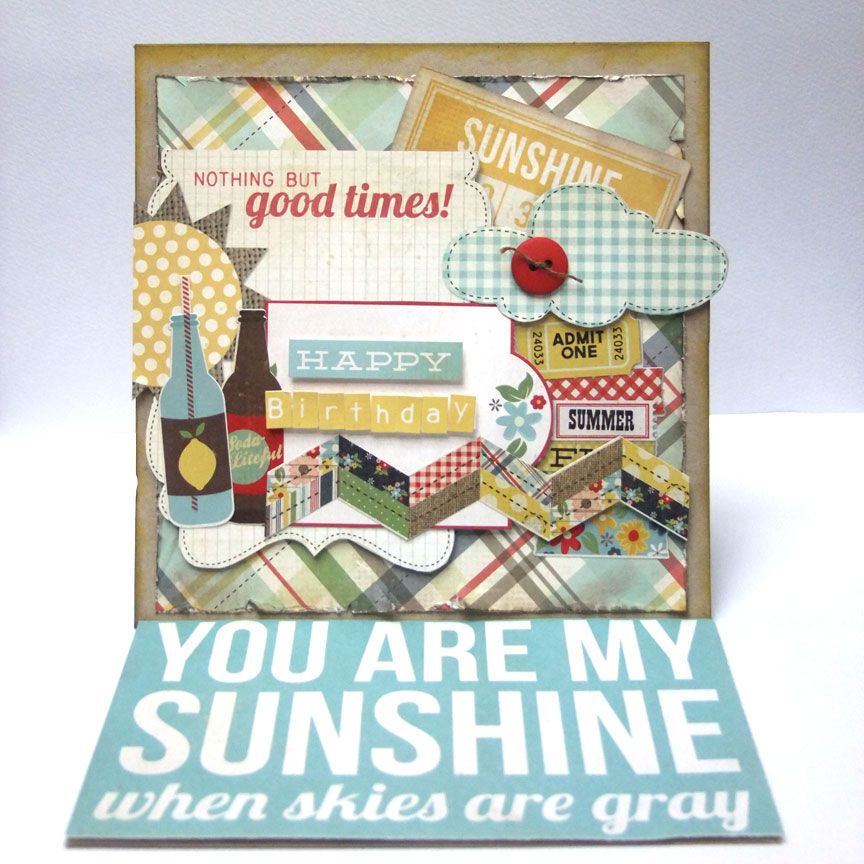
I wanted to share with you how I created my easel card. It is easy to make & has a lot of WOW factor!
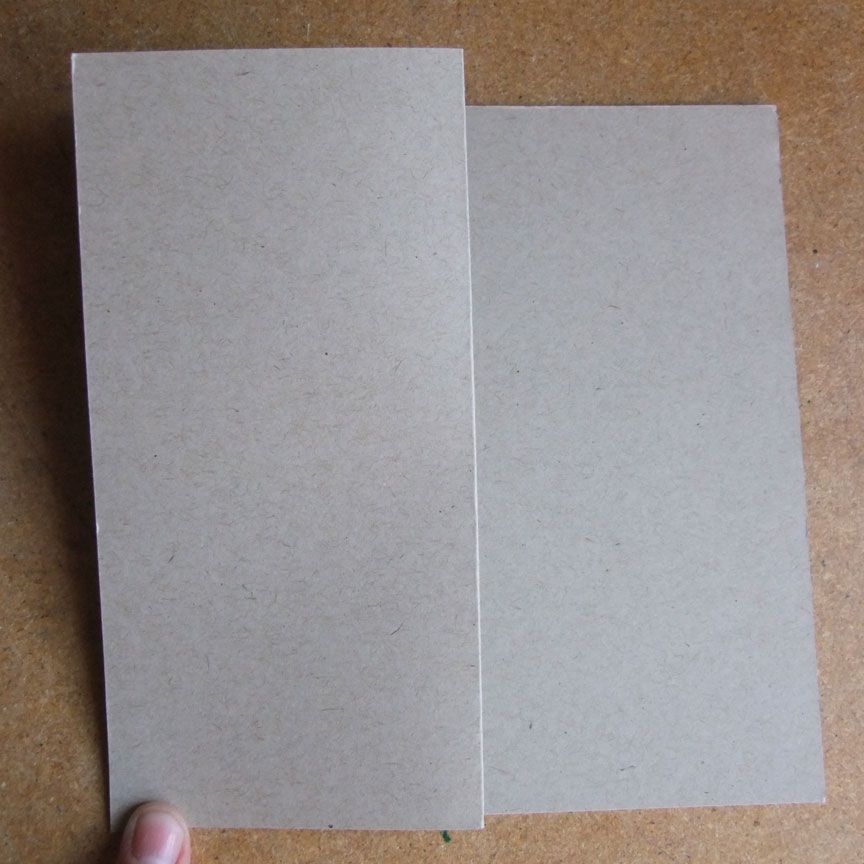
First start with some Pattern Paper or cardstock
cut X1 6"X12" piece
cut X1 6"X6" piece
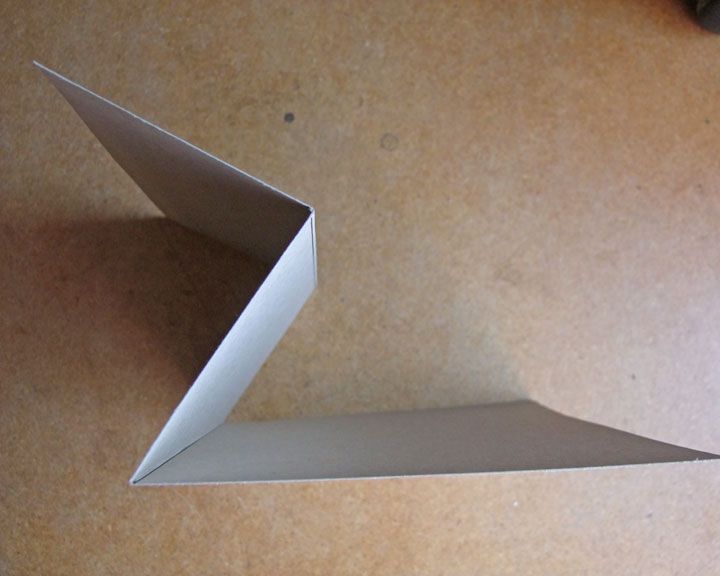
Score the 6"X12" at 3" & 3" so you have 3 sections
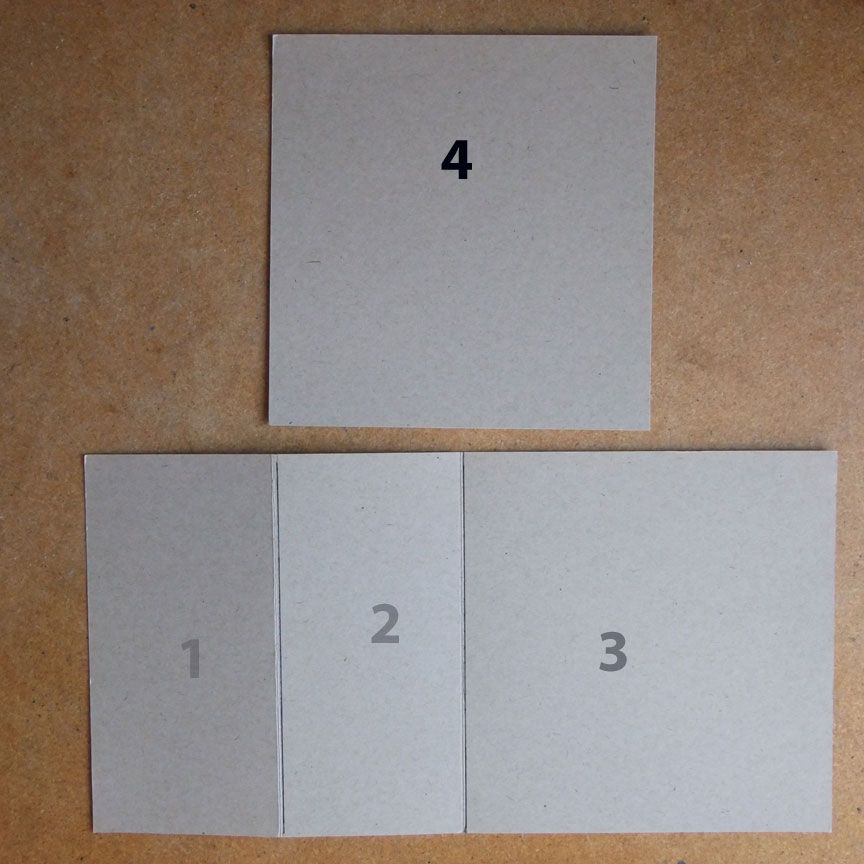
At the second score fold card
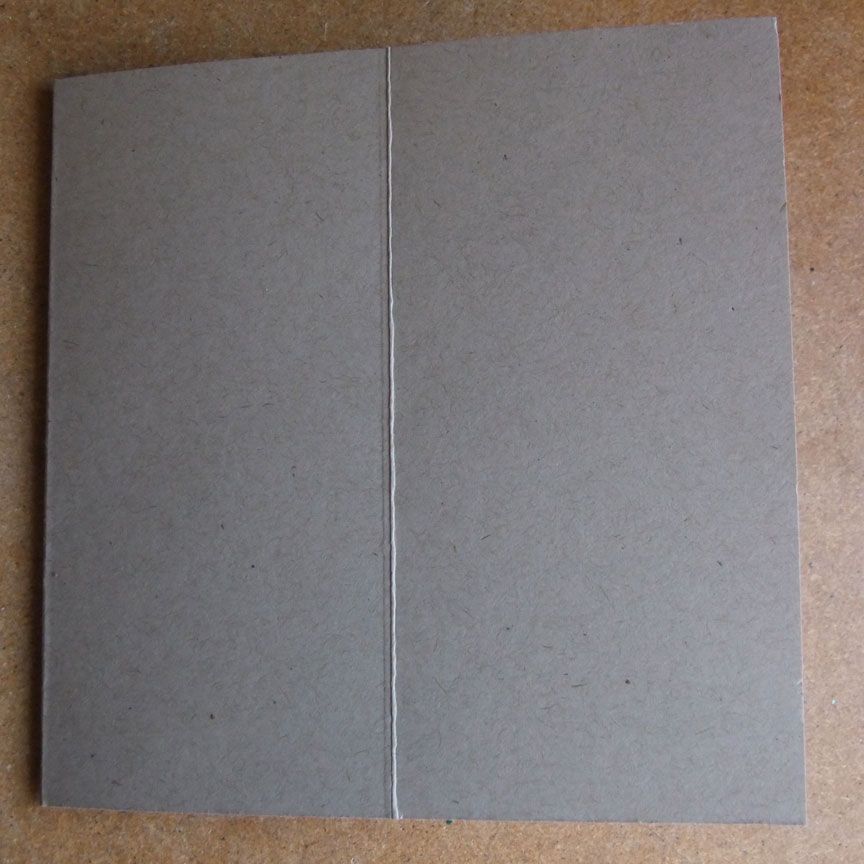
At the first score fold card back. Place some tape on this section
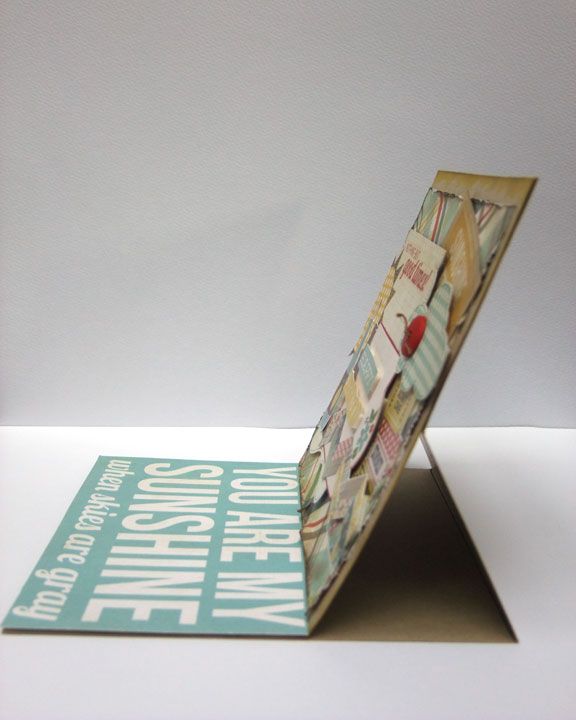
Now when you let it go it looks like a Z shape
Take piece 4 (the 6X6 piece) & stick this to section 1 (where we have already put the tape) Make sure the top edges are both lined up
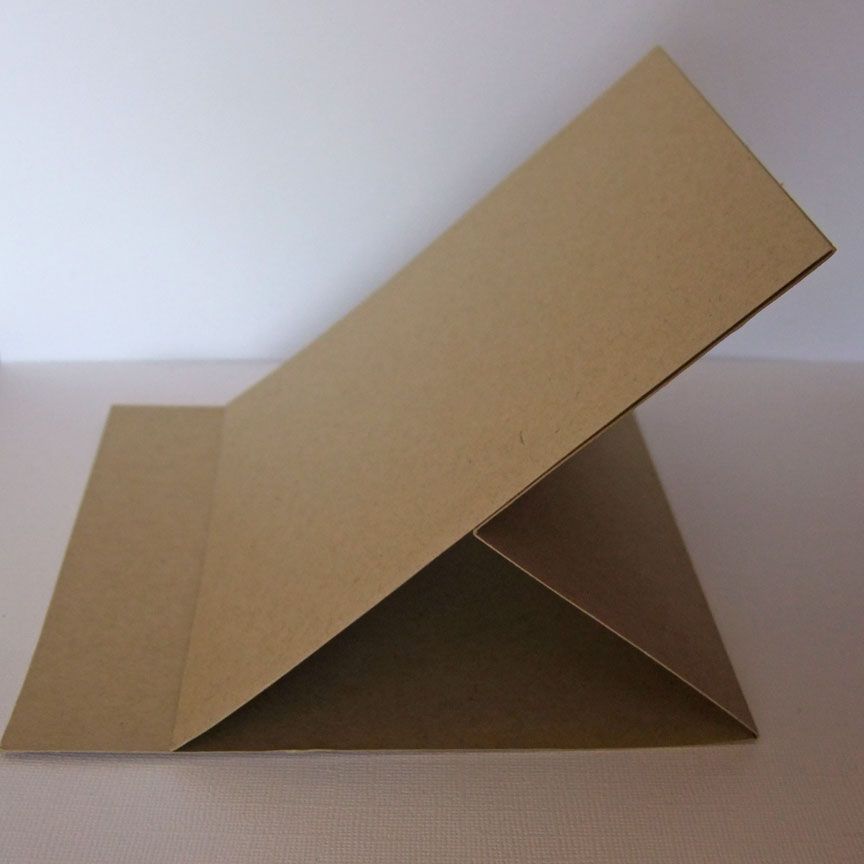
Now all you need to do is decorate it! Just remember though to keep the easel standing you will need to place some decoration along the bottom of the card . I have used a notecard cut from some patterned paper & raised it with some foam tape. That way the easel can rest against it & it will stand by itself.
You could use things like brads,buttons or punched borders to give the same effect
-----------------------------------------------------------------------------------------------------
A quick little tip to create interesting photo mats is to use fabric instead of paper! The August Main kit comes with a gorgeous gingham print that you could use or you could try something a little bit different that I did on this page

I was inspired by the cute sticker sheet which had a little jeans pocket. I thought I would add a real denim jeans pocket to my page
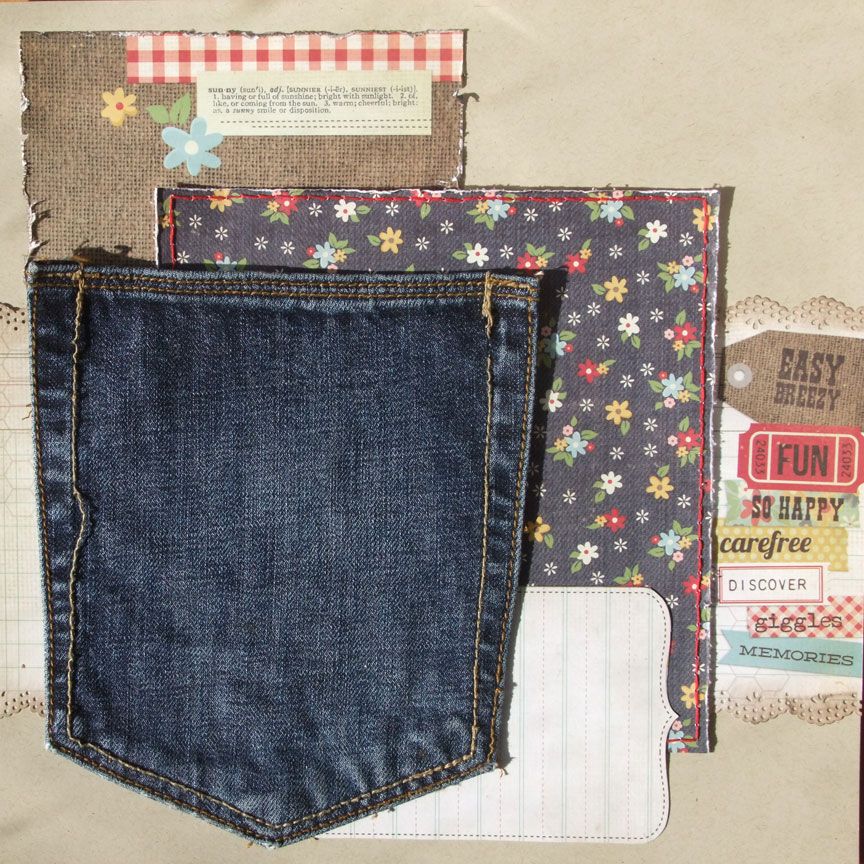
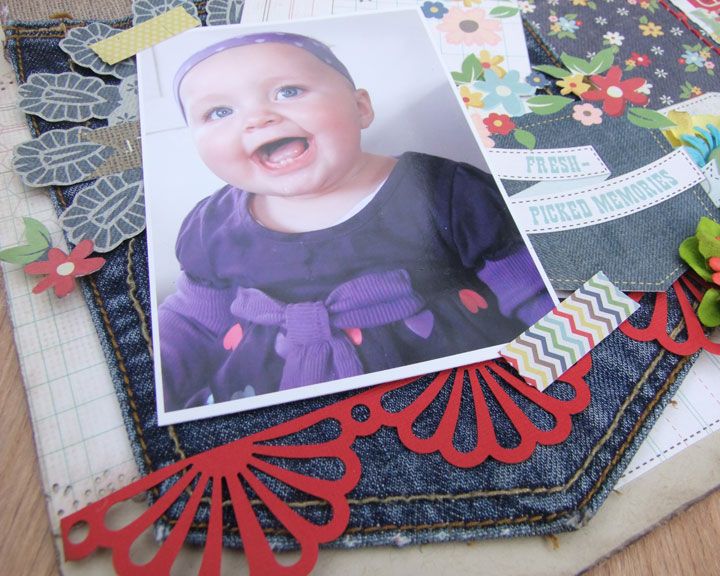
Using fabric adds a bit of texture & interest to your page! (& I think it looks so cute too!)
1 comment:
I love the paper weaving and darling photo!
Post a Comment