
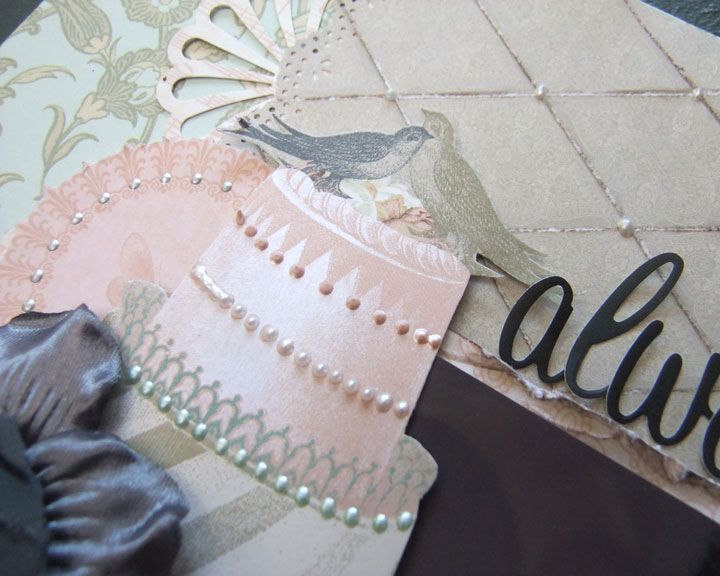
Here's Shell...
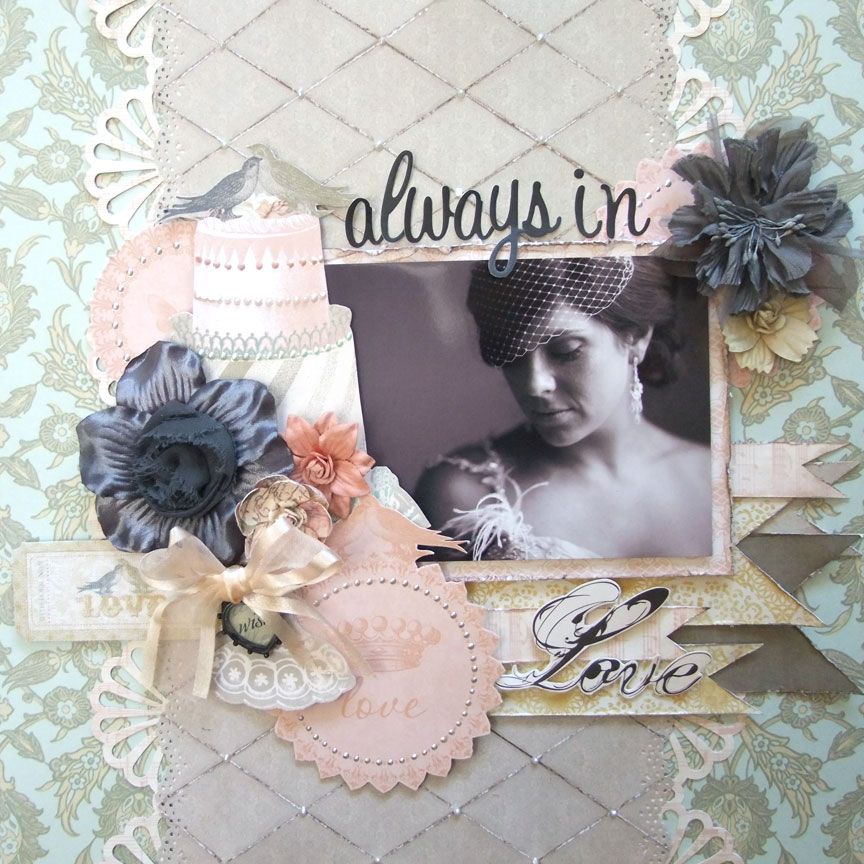
I wanted to share with you how I created the faux quilted background on my always in Love page
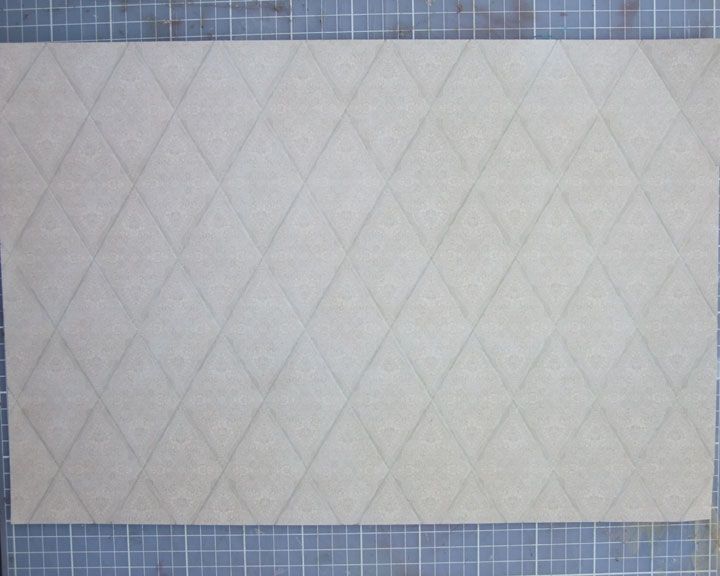
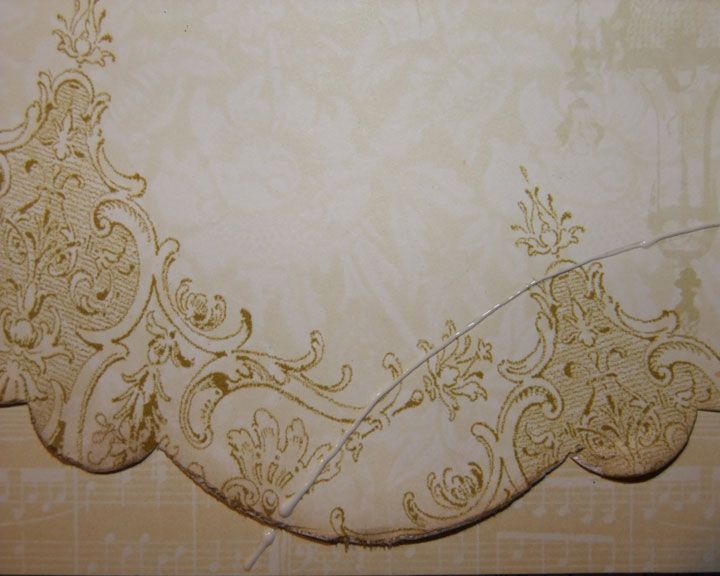
Firstly I took the Websters Pages In Love sheet with the cake on it from the Album kit. I used the pattern as a guide to score lines approx 1 inch apart diagonally in a diamond pattern
Fold along the scored lines first lengthways
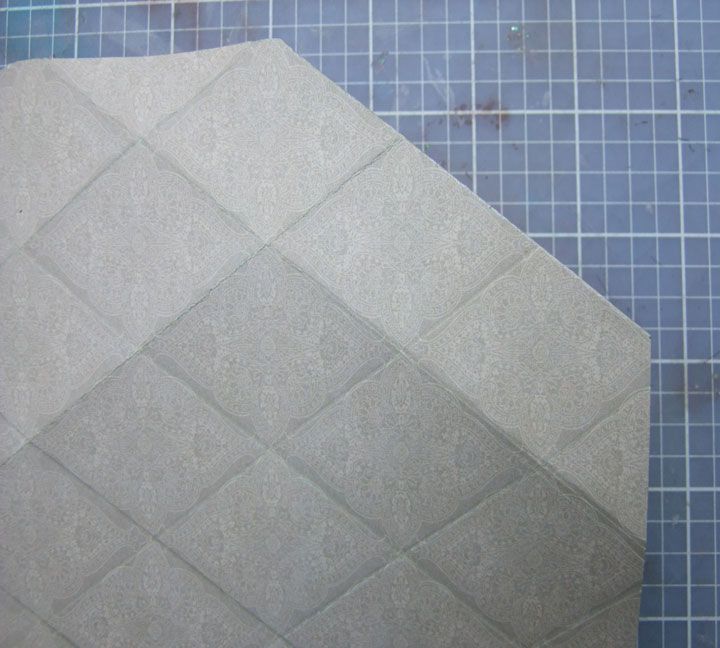
Then use a dark brown ink. I used Versa Color in pinecone & ink along each fold line
Now fold along the remaining score lines & ink also
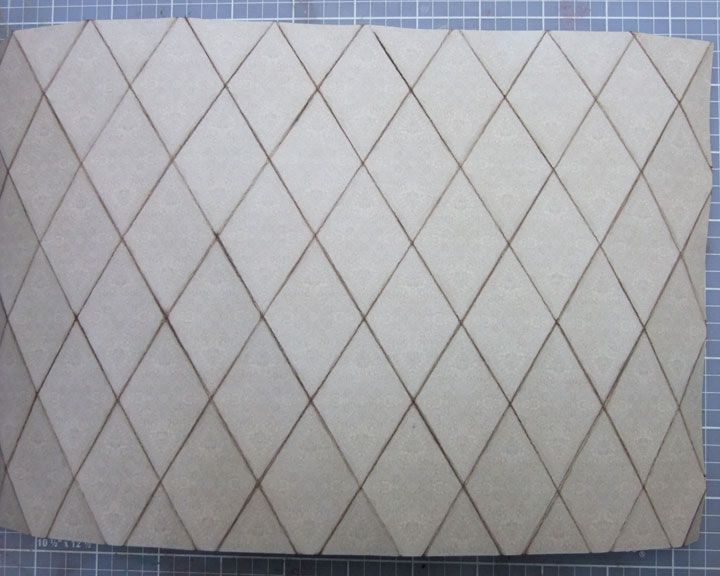
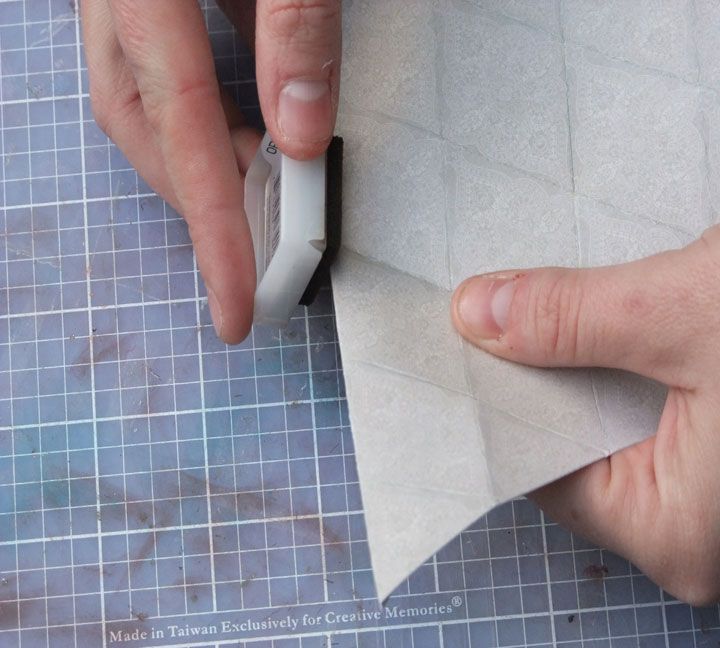
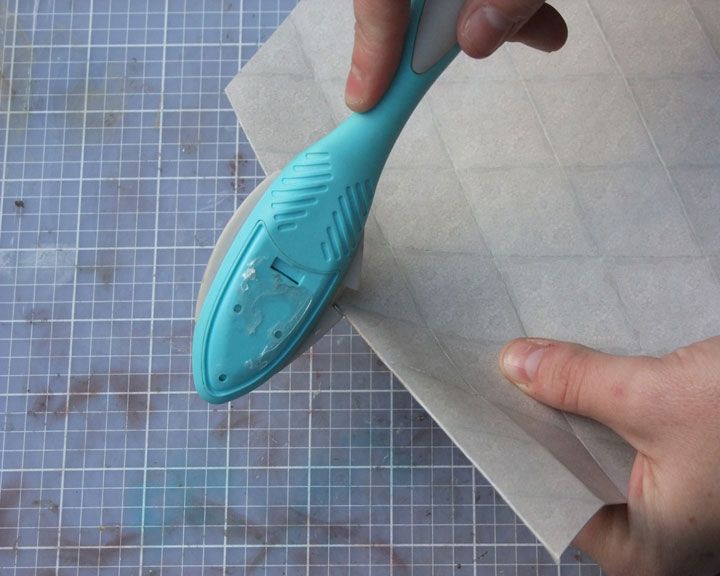
Fold along the score lines for a second time & gently distress the edges with a distress tool
When finished it will look like this
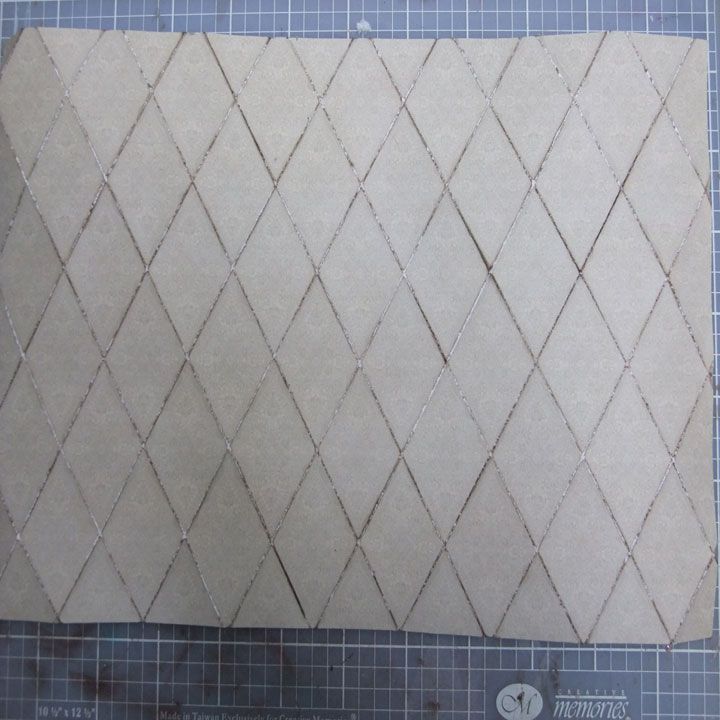
Once I had stuck this to my page I then added some Viva liquid pearl in ice white to each crossover
This is something simple to try to give a bit of texture to your page & gives a more vintage look!
-----------------------------------
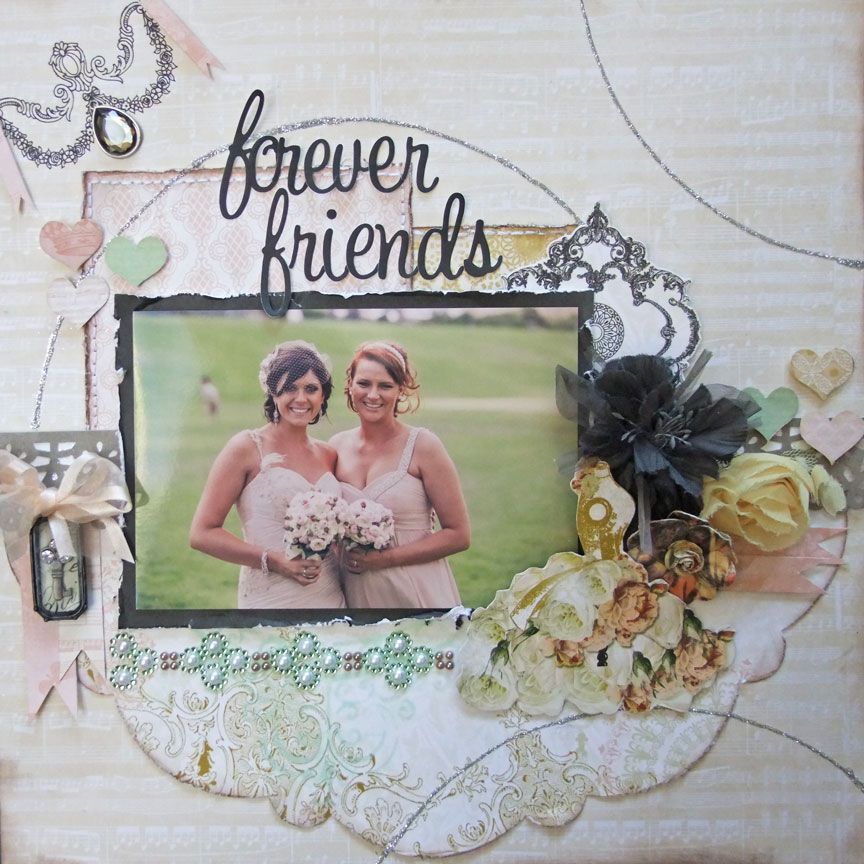
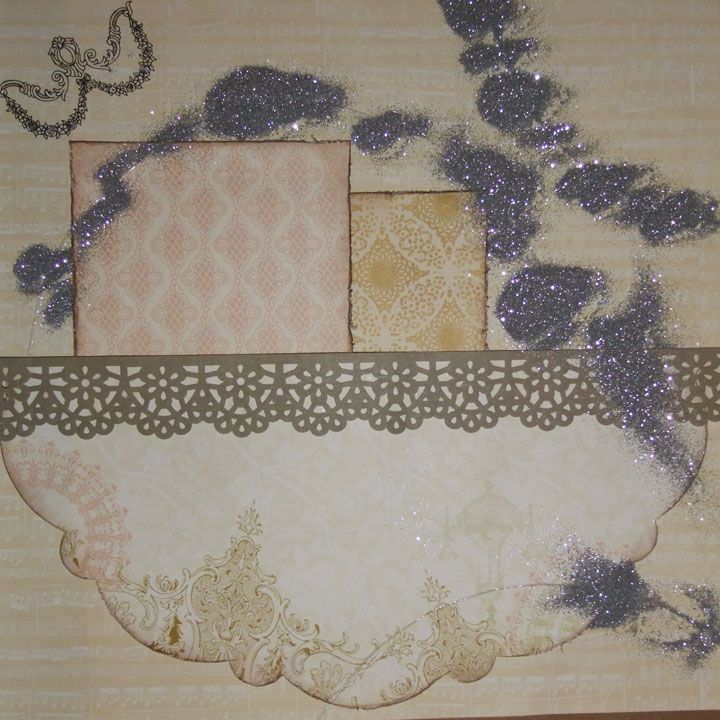
I was really excited to see the Teresa Collins Blingage glitter in the Album kit. I couldn't wait to have a play! I decided to create some interest to my background on this page by adding some glitter circles
Firstly I worked out a rough layout for my page before I drew my circles. Once I was happy with it I stuck down the first few layers. Using a plastic plate I traced around it using a pencil.


Once I was happy with where I had drawn my lines I used some glue (Tombow Mono multi purpose glue but any clear drying glue is fine) Just use a fine line of glue along the pencil lines
This is the messy part! I placed my page in an old Pizza box but if you are lucky to have a glitter tray then use that! Lightly sprinkle the glitter along your glue lines
(make sure you have a good hold on the glitter pot because I dropped mine & made a big mess
 !!)
!!)Finally shake off the excess glitter into the pizza box then use a funnel to pour the glitter back into the pot. Use a clean dry paint brush to help brush away excess glitter.This is how it will look finished

This technique is a bit messy but lots of fun. It gives your background some movement & interest!
-----------------------------------
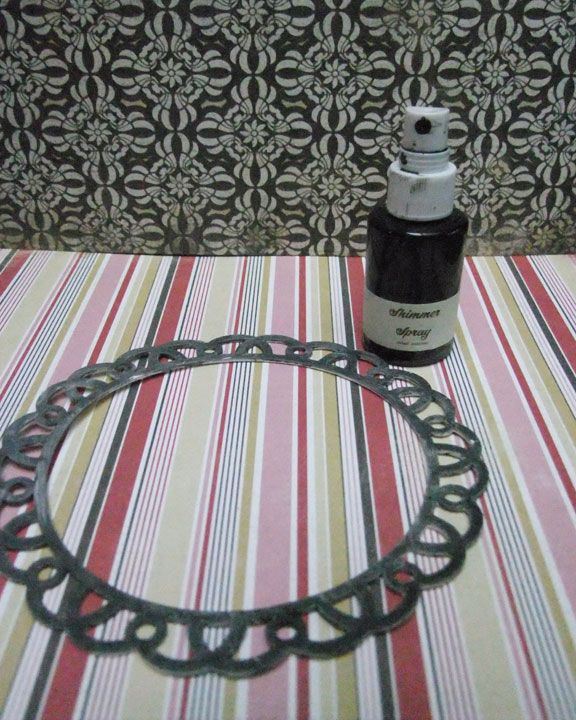
This months Main kit features a gorgeous chipboard circle frame. Here is a quick tip on how I altered the frame for this page
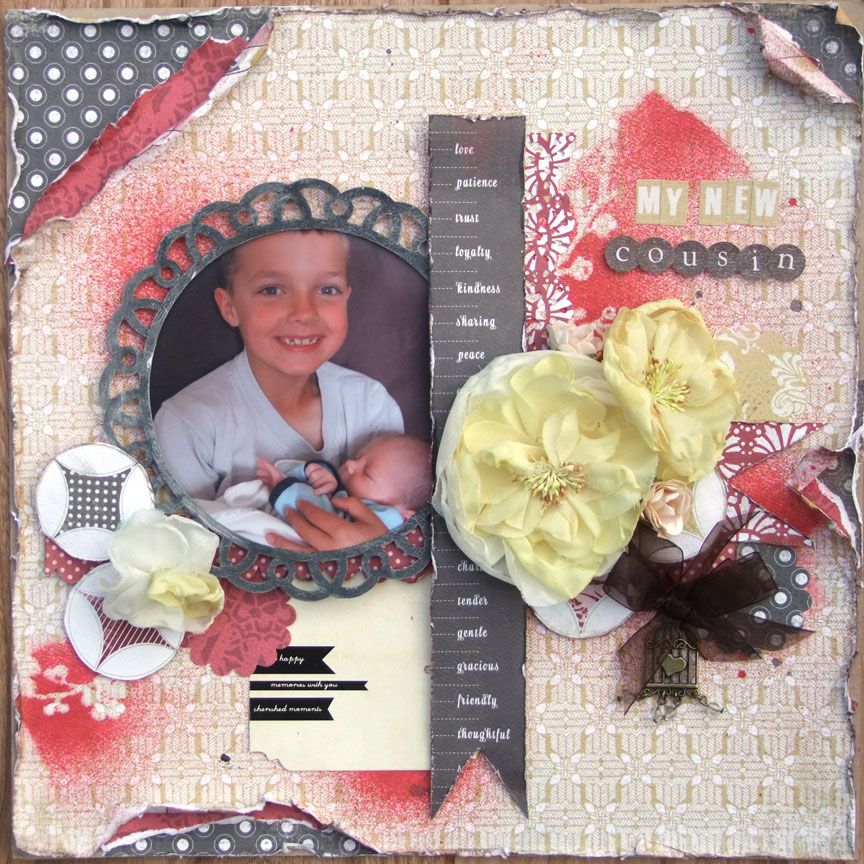
First start by painting the whole frame in gesso. Wait for it to dry
Use a black glimmermist (mine is just a generic one form my LSS). Take the spray off the mist & use a paintbrush to paint the mist on instead of spray.
Once the mist is dry use some crackle paint. I used the Tim Holtz distress crackle in rock candy which is clear. Remember that how much crackle paint you use depends on how obvious you want the cracks to be. Use a thicker coat if you want more of a crackle
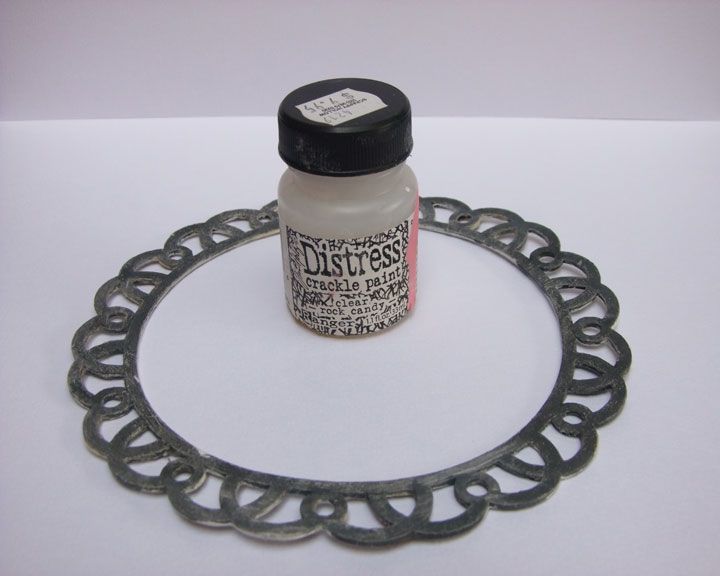
You will get a better result if you let the crackle paint dry naturally. I wait until it is almost dry then use my heat gun to speed it up. This is a close up of the crackle finish

Thanks for looking!
First start by painting the whole frame in gesso. Wait for it to dry
Use a black glimmermist (mine is just a generic one form my LSS). Take the spray off the mist & use a paintbrush to paint the mist on instead of spray.
Once the mist is dry use some crackle paint. I used the Tim Holtz distress crackle in rock candy which is clear. Remember that how much crackle paint you use depends on how obvious you want the cracks to be. Use a thicker coat if you want more of a crackle
You will get a better result if you let the crackle paint dry naturally. I wait until it is almost dry then use my heat gun to speed it up. This is a close up of the crackle finish
Thanks for looking!
No comments:
Post a Comment