
I am constantly asked "how do you get so many photos on the page without the page looking crowded?" In this Tuesday tip, I am going to go step-by-step and show you how I put a multi-photo page together.
In 2011, I started a photo a day project. Every day I take a photo of the "highlight" of my day, from the kids' activities, to a favorite food or restaurant, to a note that Carmen might have written to me. At the end of each week, I then complete 1 page with all 7 photos of the day on it. By the end of 2011, I will have a 52 page album with all kinds of snippets of my life for the whole year. The page I'm showing you how to do is one of those pages.
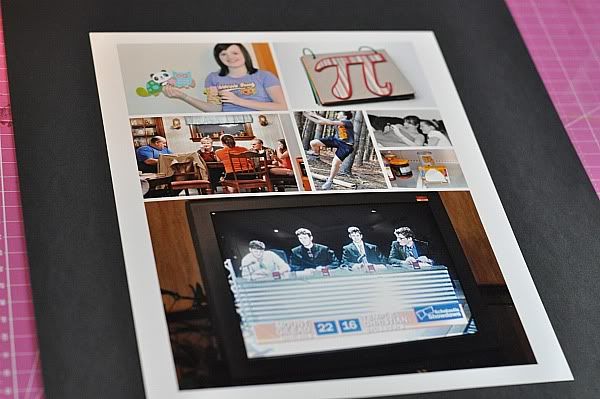
I find that one of the easiest way to do multi-photo pages is to create a collage at Wal-Mart. I upload all my photos at Wal-Mart and then make a 8X10 collage of my 7 photos for the week, choosing a "hero" or focal photo for the week. This particular week's highlight was when Chase was on our local Academic Challenge television program. Here's the 8X10 collage as it is finished:
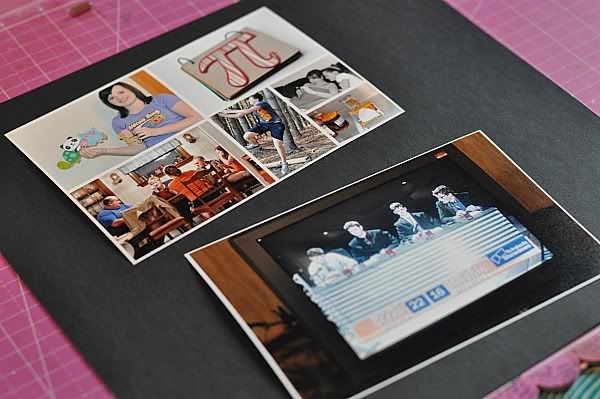
I really like to divide my collages up so I find a good breaking spot and cut the collage in two pieces like here:
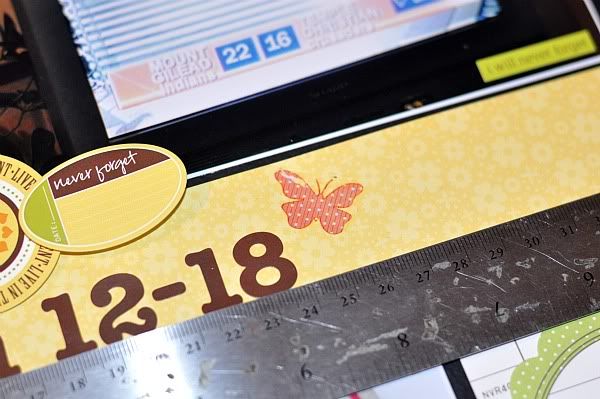
Now to put the page together. I start by placing my two collage sets on cardstock and I pick a patterned paper that will work with all my photos. On this page, I chose a Jillibean strip to divide the 2 collages and that would also work as my title block. I then started picking journaling blocks, circles to add to my design. I even tried to use a butterfly rubon but I messed it up when I rubbed it on. Check out my mistake here:
No problem...I can always find something to cover my mistakes. Here's my coverup:
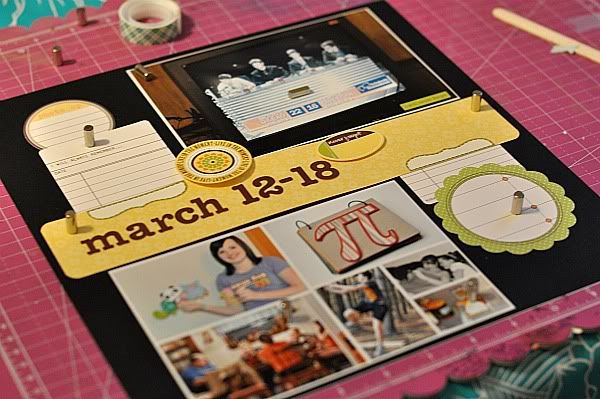
After I have laid everything out on my page and I like the overall look, I start gluing everything down. It is then that I add my day-to-day journaling for the week and put my finishing touches on my page, like ribbon, brads, hearts, owls, butterflies, etc. I then finish the page off with a white signo pen outline border which makes the page more complete.
Here's the finished product:
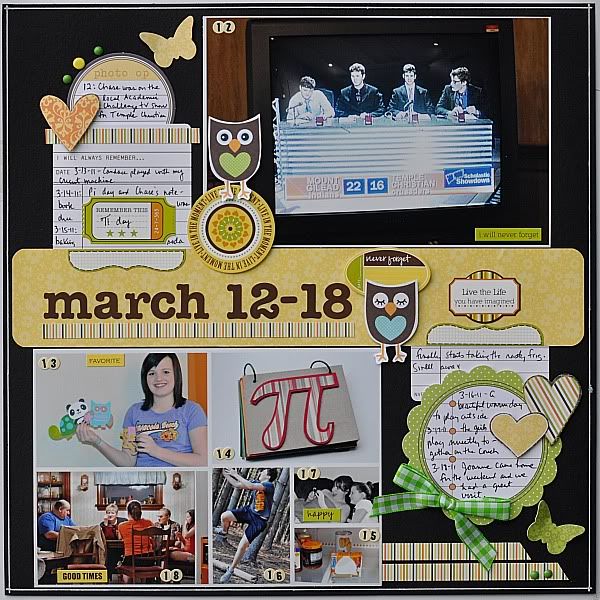
From start to finish, that's how I do a multi-photo page for my photo a day project.
In 2011, I started a photo a day project. Every day I take a photo of the "highlight" of my day, from the kids' activities, to a favorite food or restaurant, to a note that Carmen might have written to me. At the end of each week, I then complete 1 page with all 7 photos of the day on it. By the end of 2011, I will have a 52 page album with all kinds of snippets of my life for the whole year. The page I'm showing you how to do is one of those pages.
I find that one of the easiest way to do multi-photo pages is to create a collage at Wal-Mart. I upload all my photos at Wal-Mart and then make a 8X10 collage of my 7 photos for the week, choosing a "hero" or focal photo for the week. This particular week's highlight was when Chase was on our local Academic Challenge television program. Here's the 8X10 collage as it is finished:
I really like to divide my collages up so I find a good breaking spot and cut the collage in two pieces like here:
Now to put the page together. I start by placing my two collage sets on cardstock and I pick a patterned paper that will work with all my photos. On this page, I chose a Jillibean strip to divide the 2 collages and that would also work as my title block. I then started picking journaling blocks, circles to add to my design. I even tried to use a butterfly rubon but I messed it up when I rubbed it on. Check out my mistake here:
No problem...I can always find something to cover my mistakes. Here's my coverup:
After I have laid everything out on my page and I like the overall look, I start gluing everything down. It is then that I add my day-to-day journaling for the week and put my finishing touches on my page, like ribbon, brads, hearts, owls, butterflies, etc. I then finish the page off with a white signo pen outline border which makes the page more complete.
Here's the finished product:
From start to finish, that's how I do a multi-photo page for my photo a day project.

1 comment:
wow alicia what an amazing idea!! I think that the end result will be super dooper....good luck and please,please don't run out of steam.....
Post a Comment