
Hi there! I have a fun and functional pocket insert tutorial to share with you, that I created using the May Creative kit. This Hello Spring collection by Echo Park is so bright and cheery!
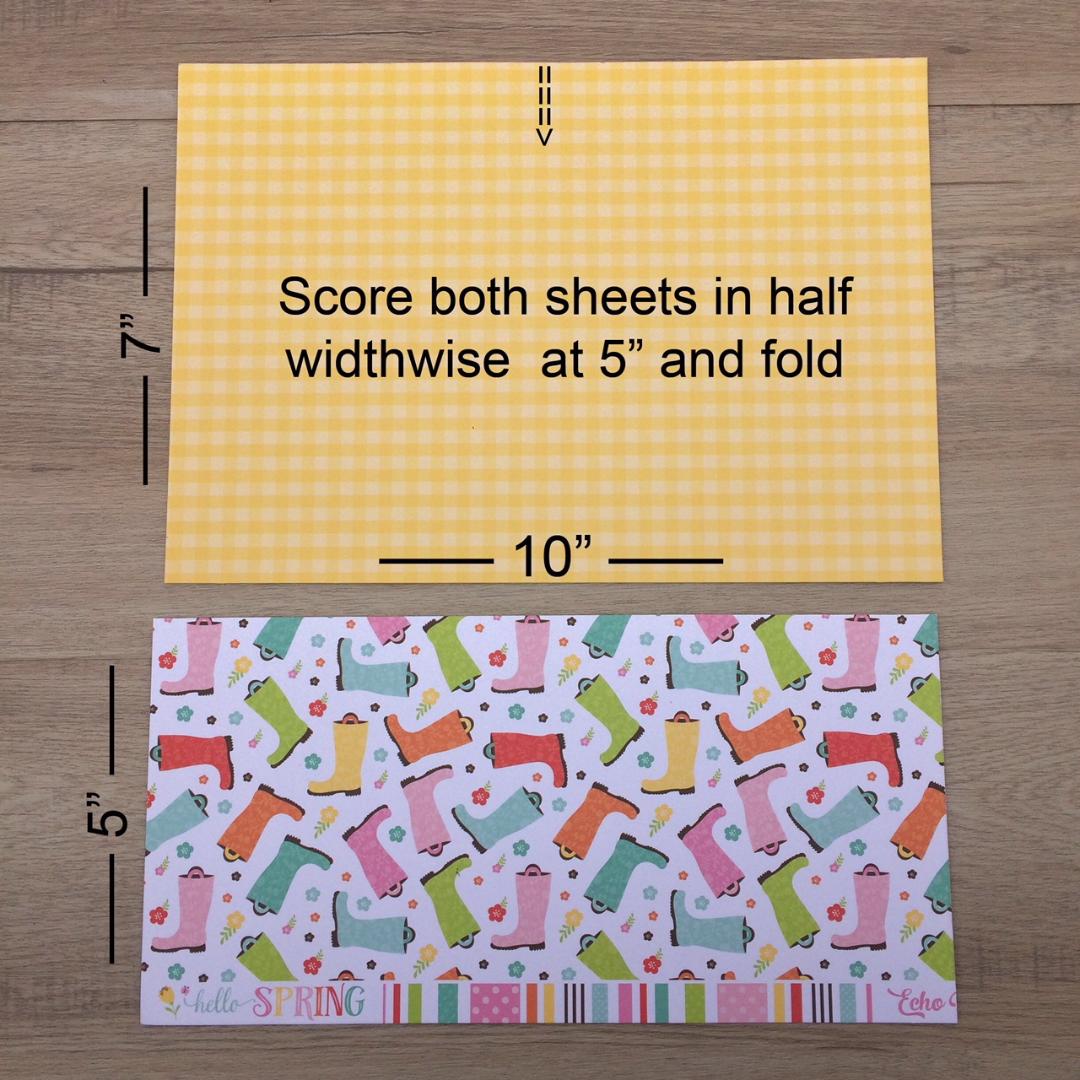
Let’s get started; the planner that I use is the Happy Planner Big and after creating a cute planner spread I wanted to also create a small pocket insert to go with it. I choose two papers one for the main body/insert and one to use for the pocket. I also choose to cut my paper in length to size for a mini planner but I allowed an extra inch in width as you can see in the photo my measurements were 7”x10” for the insert and 5”x10” for the pocket. I scored both papers at the 5” mark and folded them in half. My insert then measured 7”x5”
Then I used my We R Memory Keepers planner punch board * I love this punch board you can own any type of planner and yet make inserts, folders dashboards to fit all of your planner styles either ring, disc, or spiral it’s so versatile.
Using my disc hole punches I positioned them to the appropriate numbered notches for the size I wanted my insert. There is a chart on the back of this punch board to tell you where each punch goes.


I then removed my paper flipped it over and reinsert it into the punch board to punch the rest of the holes *tip- I find I like to remove the last punch here as it’s just re punching the same hole from the first time because it does make that hole a little larger.

I then unfolded the insert and adhered double sided tape along the length and bottom width of one side and folded it closed the reason why I didn’t tape the top was because I wanted to use the middle of the insert as an extra pocket. I took my 1” hole punch inserted it half way at the top and punched a half circle.


Now onto the pocket, I scored and folded both sides and along the bottom at the 1/2” mark. Then using my scissors I cut the bottom corners off the paper like so and cut out a v shape at the centre of the pocket. This is to prevent overlapping when it gets taped to the insert.

I needed to figure out where to cut my pocket so I folded it onto the insert and measured down 2” on the inside of the pocket. I then drew a line using my pencil from the 2” mark up to the top corner of the pocket. Following the pencil line I trimmed off the paper.

I then adhered double sided tape along the sides and bottom of the pocket and taped it to the insert, then I added a couple stickers to jazz it up.


You could use it to store your stickers, receipts, any mementos from your week such as kids concerts, movie tickets from date night and even pictures.
Don’t forget to check out all of the beautiful kits available this month!
Thanks for stopping by and happy planning 😊
No comments:
Post a Comment