
I have seen these cute paper crafted rosette turkeys floating around and decided to try my own hand at creating one using my Main Kit from this month. Christine joining today with a quick turkey tutorial!


------------------------------
Here are more projects that Christine created with our Main kit!


Here's the November Main Kit:
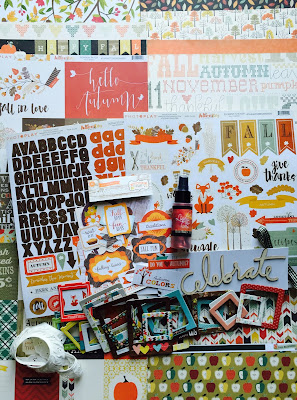
For full descriptions of our kits, subscription information, and more, please visit our website at MyCreativeScrapbook.com

Here's the details on how you too can make one!

Cut out three patterned paper strips. One should be 1.5" X 12", one should be 1.25" X 12", and the last should be 1" X 12".

Score lines on it each strip every 1/4 or 1/2 inch. I did 1/2 inch to make the rosette a little less full. Fold and secure it into a rosette - adding a punched circle to the front and back that coordinates.

Use the turkey sticker to trace a turkey head and body. Cut it out and fold a small piece over so you can attach it to the body.

Layer the rosettes and turkey head together with a strong adhesive like hot glue. Allow to dry. It will stand up pretty well on its own but if you want it to be more stable you can hot glue it to a circle on the bottom.
------------------------------
Here are more projects that Christine created with our Main kit!


Here's the November Main Kit:

For full descriptions of our kits, subscription information, and more, please visit our website at MyCreativeScrapbook.com
2 comments:
I love this!!!
golden goose sneaker
golden goose
off white shoes outlet
jordan 1 mid
supreme outlet
off white nike
bape
nike off white
yeezy
yeezy
Post a Comment