
We are so happy that Stephanie Buice joined us again to guest design this month. Today she's featuring our October Main Kit with instructions for creating her painted background!
--------------------


--------------------
You can see more of Stephanie's beautiful work in our Design Team Gallery!
Here's the October Main Kit:

We invite you to join us and experience the possibilities that our coordinated monthly kits offer. To purchase a kit, please visit our website, here.
--------------------
Hi everyone, it's so nice to be here with you today to share this super easy painted background technique.
First let's gather a few basic supplies: Two pieces of white card stock, Distress Stain Daubers (I used Crushed Olive and Peeled Paint), scissors, and a napkin or paper towel.
Step 1:) Using your darkest color first, simply press the dauber down on the paper and draw some lines. You can draw separate lines but for this background I like the look it gives when the lines are all connected. Your lines should end up looking like upright zig zags.
Step 2:) Then repeat step 1 with your lighter color (Crushed Olive in my case) making sure to fill in all of the white spaces and blending the two color together.
Step 3:) After you get your color down quickly lay down your napkin on top of your ink to pick up the excess. This helps prevent your paper from warping too badly.
Step 4:) Now your main design is done! Don't worry too much about how it looks right now since you'll more than likely be covering it up here and there. Let your paint dry completely (mine took about 15 mins).
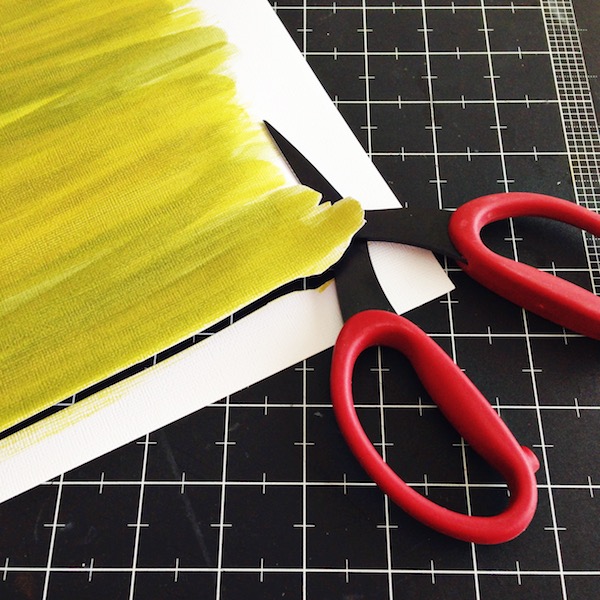
Step 5:) Once it's nice and dry go ahead and cut it out. If you'd rather just finish your layout without cutting it out I've done it like that before as well and it worked just fine. However for this layout I liked the texture and dimension that it adds to my layout when it's cut out and sewn on.
Step 6:) Once you have it cut out, decide on the placement you want it to be and then use tiny piece of wash tape to hold it to your other piece of white card stock.
Step 7:) Using your sewing machine sew your background down. I sewed in a double square so that I have the center to place the rest of my embellishments for my layout. (If you would rather just use adhesive you can skip this step).
And now you're done, See, wasn't that easy peasy!?
Now you can try this technique out with other mediums and colors, good luck and have fun.
--------------------
You can see more of Stephanie's beautiful work in our Design Team Gallery!
Here's the October Main Kit:
We invite you to join us and experience the possibilities that our coordinated monthly kits offer. To purchase a kit, please visit our website, here.
1 comment:
Love this technique, thank you
Post a Comment