
Guest Designer Stephanie Buice is up today with a machine stitching tutorial featuring our July Main Kit!
Here's Stephanie:
>>><<<


>>><<<
>>><<<
Hi everyone! I'm so happy to be back here again guesting for My Creative Scrapbook this time with the July Main Kit. Today I have a simple tutorial for you about sewing right onto your layouts.
I know that this trend has been around for a while but it's still going as strong as ever so for those of you who have been curious and wanting to give it a try I'm hoping this tutorial will help you jump over any hurdles or questions you may have.
I am always getting questions about what kind of machine I use, so here is my sidekick...
It's a simple regular Brother sewing machine that you sew fabric with. Although I believe that there are probably machines on the market specifically for paper, I just stick to what I know best. Honestly although I am not a huge fabric sewer I have been switching back and forth from paper to fabric for years and have never had any problems doing so. To each is own though and instead of purchasing yet another gadget this is just what I prefer. I mainly sew with white thread so to save time of always having to load it every time I usually leave it loaded and ready to go.
Getting started is so easy! Set up your paper and align the needle where you want it and get down to business. I just use a regular needle, nothing fancy. The biggest tip I can give you here is to try not to apply too much adhesive under the area you are going to sew. The adhesive will stick to your needle and tends to shorten your stitch length. So for this step just place your paper in the machine as you would fabric and begin sewing.
After you get your sewing done your paper piercer will become your best friend. When I first started sewing through paper I would thread each loose thread with a needle to pull it back through my paper to the rear of the layout. Talk about a waste of time! I quickly realized that if I poke holes with my paper piercer where I want the thread to go back though it's so much faster to just thread them through those holes by hand.
your paper should look like this:
I usually poke my hole in the stitch hole right before that last one machine made.
Then I simply push my threads back through the holes. They should look like this:
An easy tip: Once you get all your threads back through your holes flip your paper over and use your finger to smooth over them. This helps brush your paper back down a bit and your holes will become much less noticeable.
Once I get all my threads to the back of the paper I usually go though and tie a knot in each of the pairs of threads. If you use tape like I'll show you in the next step the knot tying is not really necessary. I just wanted to show different ways that I finish them off.
Then for added security I go through and add some tape over them. You can use plain tape, but since I have so much Washi Tape I have been using it up this way. ( Plus who really has the time to sit there and tie all those knots!?)
So go through all your threads and place the tape over them. Should look like this when you're done:
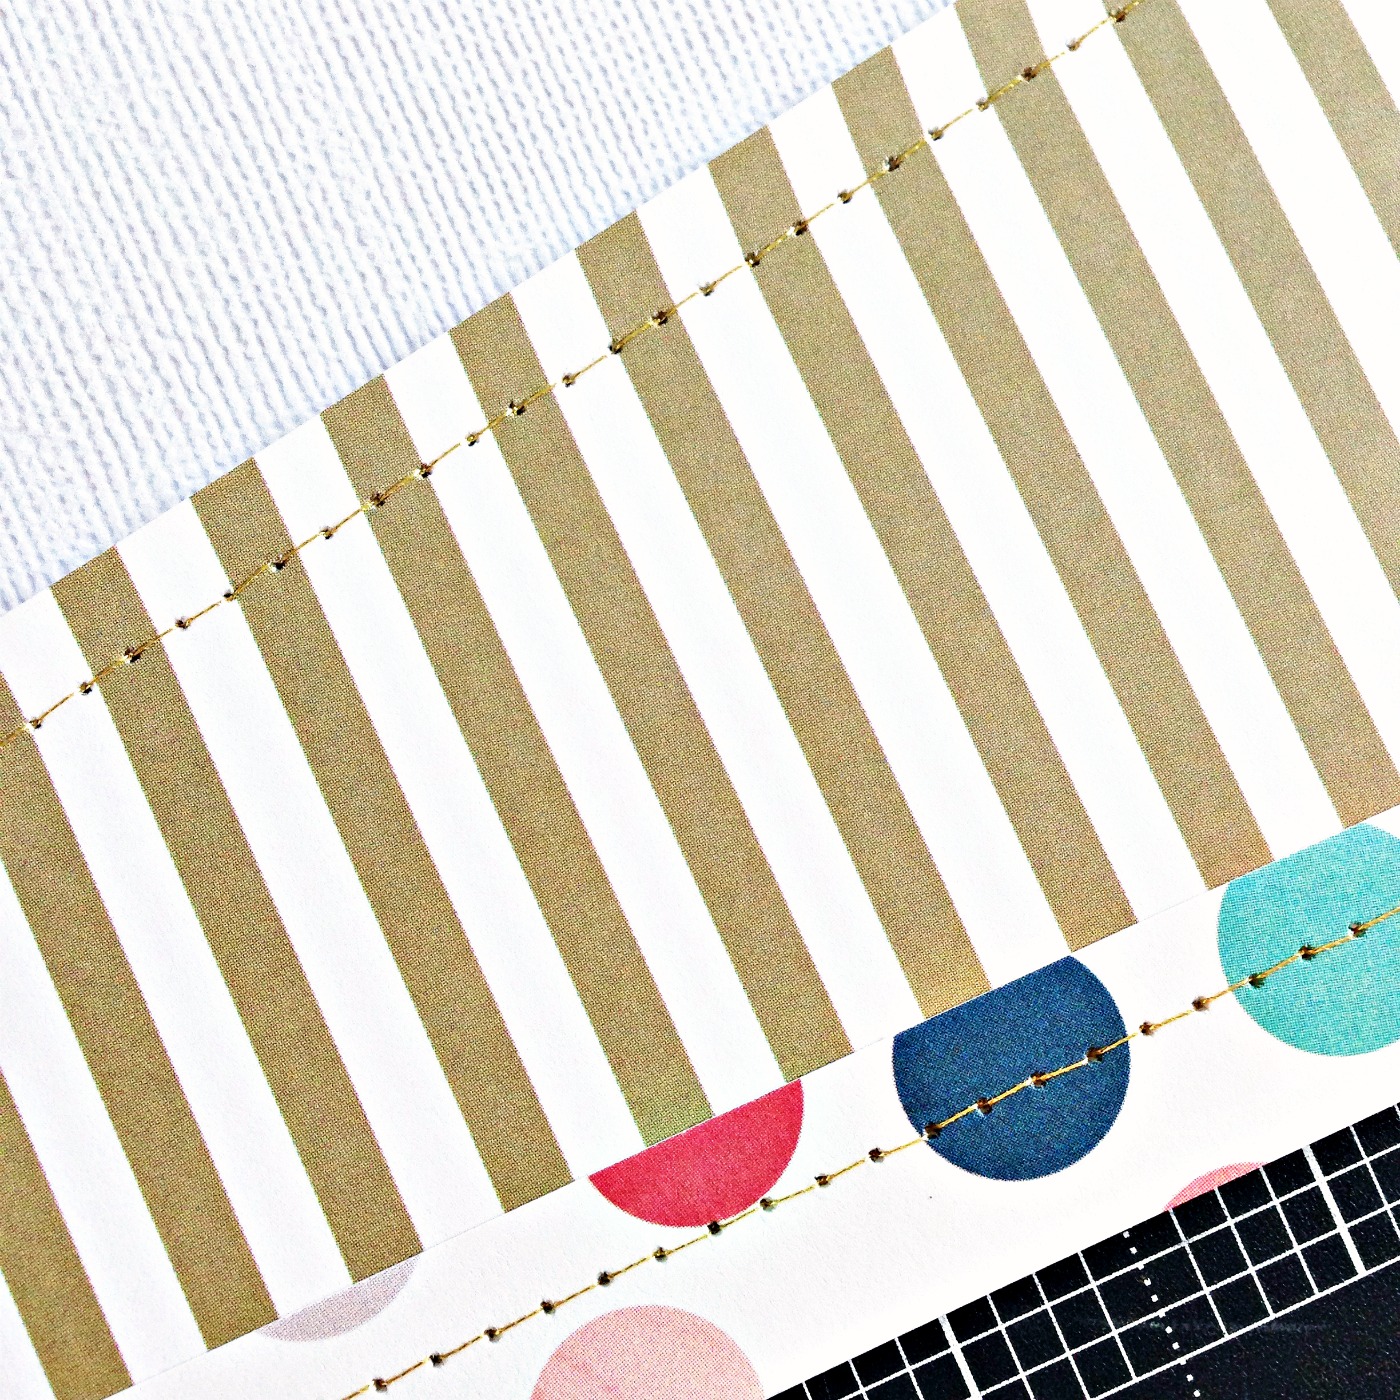
Here is what the stitches should look like on the pretty side of your layout:
And a better look:
Although for this layout I mainly stitched only through paper, don't be afraid to try sewing through your other embellishments as well. A few other things I often sew through are chipboard shapes and letters, any fabric that you use on layouts such as ribbon, Vellum, overlays, pretty much anything in my scraproom is fair game. Sewing on your layouts is an easy way to add more detail and it helps give things a more finished and polished look.
I hope this tutorial showed you how easy machine sewing on your layouts really is. I remember the unnecessary intimidation that I had before I started and I don't want that to hold anyone back like it did me.
So pull out that dusty machine, dive right in and start stitching away.
I hope that you've enjoyed all the layouts I created for you with the July Main Kit, thanks for checking out my tutorial, Here is my finished Tutorial layout:
>>><<<
Be sure to check out Stephanie's beautiful work in our Design Team Gallery!
Here's the July Main Kit:

Here's the July Main Kit:
We invite you to join us and experience the possibilities that our coordinated monthly kits offer. To purchase a kit, please visit our website, here.
5 comments:
thanks for the tutorial, I have a sewing machine but I used it only once - with bad result :(
I need to practice!
Great tutorial you make it look so easy now I think I need a sewing machine!
Great ideas, Love your step by step photos.. thank you
Love your stitching! I have found the easiest way to get the thread to the back side of the paper is to very gently tug on the loose thread that is already on the back of the paper and it will kind of pull the top thread down into the hole a little. Then take the hole pierce tool, or tweezers, or your fingers and pull it the rest of the way through. Tape it and done!
Love stitching on layouts! Great how to!!!!
Post a Comment