
My Creative Scrapbook design team member Nicole Doiron is up today with a tutorial featuring our May Main Kit!
Here's Nicole:
>>><<<


>>><<<
>>><<<
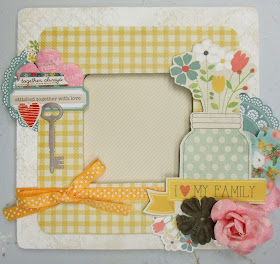
Today, I will show you how I created this lovely altered frame with the May Main kit in just under 30 minutes!

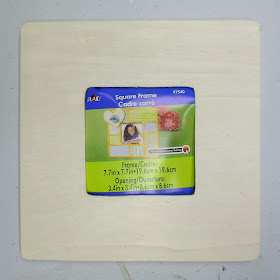
I started off with this Dollarstore square wooden frame with wide edges.

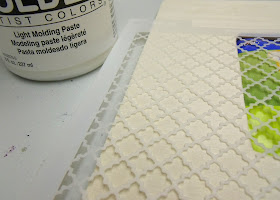
I spread some light molding paste on parts of the frame (leaving a few spots bare) using a fancy stencil. I then dried it with my heat gun. (3 minutes)

I then dabbed some white acrylic paint all over the frame to give it a whitewash effect. (2 minutes)

I cut a piece of pattern paper about half an inch smaller than the frame on each side. I then rounded the corners. (1 minute)

Lining up the patterned paper square carefully on top of the frame, I flipped the frame over to trace the photo opening. I then cut it out. (2 minutes)

To give a bit more dimension to my frame, I stuck the patterned paper to the frame using lots of 3D foam squares. (1 minute)

I glued a strip of ribbon on the bottom edge of my frame and made a bow. (1 minute)

Here you can see a close-up of the textured design created with the molding paste and stencil.

It was then time to embellish my frame a little. I cut a doily shape in half and tucked each piece on either sides of the frame. I then added a quote stuck on a little journaling frame that I cut out of the patterned paper. (2 minutes)

I carefully ripped the bottom layer of the pink rose included in the kit to make another flower and tucked half of it behind the quote. I added the heart and tab stickers. (2 minutes)

On the opposite corner of my frame, I added this jar of flowers that I fussy cut out of the patterned paper. I stuck it to the frame using 3D foams squares. (2 minutes)
I decided to add the chipboard key and some more flowers which you'll be able to see in the next images. (2 minutes)

Knowing that I wouldn't be able to use this flower vase sticker on another project, I decided to cut the flower part and tuck it behind my flower cluster. (1 minute)

Here you can see all the flowers used so far. I also cut a square of different patterned paper to put in the photo opening until I'm ready to put the perfect picture. (1 minutes)

I wanted to add more flowers so I made some homemade ones, punching 2 medium sized flowers out of patterned paper. I then stuck one layer over the other using a glue dot. I added a pearl in the center and folded the petals upwards, giving a bit more depth to my flower. (1 minute)


I repeated this process and made 5 identical flowers, adding 3 of them to my flower cluster. (5 minutes)

I added buttons in the center of 2 flowers. (1 minute)

And I added 2 more homemade flowers in the upper corner. (1 minute)

And there you go... 28 minutes!
A very quick project to do that will last a lifetime :)
>>><<<
Be sure to take a look at Nicole's beautiful work in our Design Team Gallery!
Here's the May Main Kit:

Here's the May Main Kit:

We invite you to join us and experience the possibilities that our coordinated monthly kits offer. To purchase a kit, please visit our website, here.
Fantastic frame, Wow and so fast!!
ReplyDeleteLove this
Very beautiful frame!! Thanks for the inspiration!
ReplyDeleteI love this frame! thanks for the step by step!
ReplyDelete