
For our Prima prize giveaway, click here.
------------------------------
To those who are celebrating Mother's Day today, we wish you a wonderful day! We're sharing some awesome paper and flower tips today from My Creative Scrapbook Design Team member Jodi Baune. Read on to see how she stretched the goodies in our May Main kit even further.
Here's Jodi:
"Hello! If you are like me, you have a hard time cutting your favorite papers because you love both sides and/or you are afraid you will run out! Here’s a couple tips to get the most from your papers and flowers.


I absolutely love the pink flower paper. I knew I would want to use it over and over BUT it is also the perfect background for the wood grain/flower paper. Here’s what I did (I do this quite frequently! )
I punched the edges first. Then, leaving a good inch around the inside….plenty for adhering my background paper, I cut out the center of my paper. I have a perfect punched edge with no cut corners, and still have plenty of the Pink flower to play with!

Another dilemma…The wood grain flower print is a pretty background for my layout BUT I am in love with the plaid on the back and definitely want to use it on a couple more layouts. Again, I cut away a portion of the paper, but because it is the background, I cut a much smaller piece.

I lined up where would be the best portion to cut, and easiest spot to hide. Now I have plenty more of my favorites to play with!

I altered the flowers from the kit by using my gesso to create distressed edges on the flower petals.
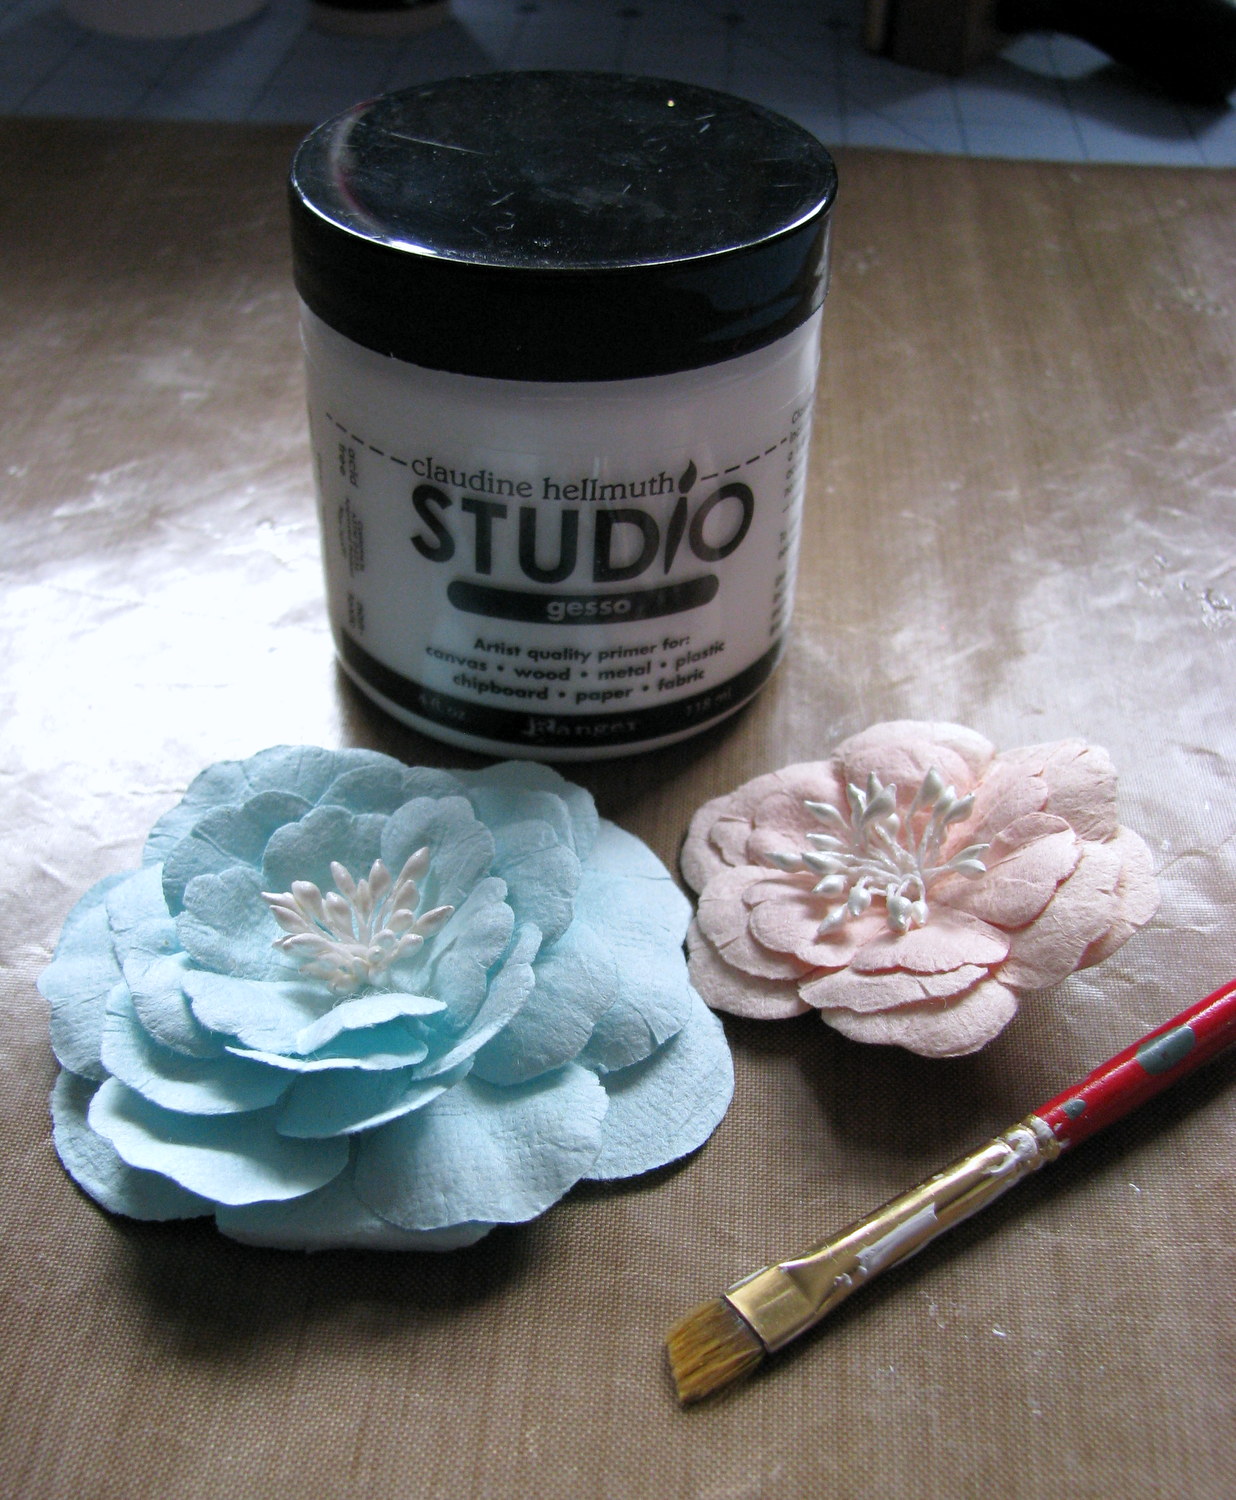
After dipping my brush into the gesso, I brushed most of the paint out onto my matte, leaving a light portion still on the brush.

Gently brush the edges of the petals to get a dry brushed look.

To make my flowers stretch, I removed the bottom two layers from the pink flower. I folded the bottom layers in half.

Again, I dry brushed the edges of the petals.


I tucked the folded side under the photo, adding fullness to my bouquet…it just looks like a whole flower is tucked under the photo!

I also took the bottom two layers off the white flower.

I wanted a subtle pink coloring in the center of the flower petals. Using my Ranger Distress Ink, I gently rubbed the petals with my applicator until I achieved the amount of color I desired.

I used a bottle cap from the kit as a flower center and now have two flowers to add to my layout!

I hope you have enjoyed my tips, and find cutting those papers a little easier now!
Thanks for stopping by!"


Jodi Baune
My Creative Scrapbook Design Team member
------------------------------
------------------------------
Here's the May Main kit:

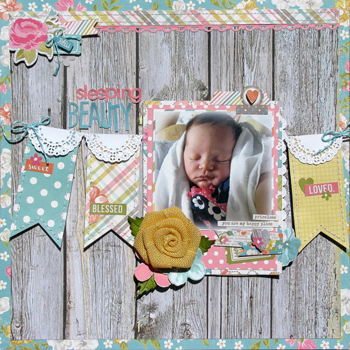
and here is more of Jodi's beautiful work using the kit:

My
Creative Scrapbook kit club is all about you and helping you preserve
your memories in a fun and creative way. For information about
subscribing to any of our monthly kits, please visit our website, here.
1 comment:
I save paper like that all the time, and even get teased by my local scrappy friends about it. They say i'm a cheapstake, but i just tell them i'm scrappy savvy! Good tips Jodi :)
Post a Comment