
Here's Zoe...
Hello ladies, Pam asked me to share my process for making a layout with the limited edition kit with you all!! I was excited for the challenge so this is my process from start to finish with flaws and all!!!
Step one... I always like to start my layouts with a simple shape so I started with a Vanilla toned rectangle

Step Two... I then paired up the cardstock with a complementary piece of patterned paper cut slightly smaller so that you can see the layers

Step Three... I LOVE my border punches, especially for adding delicate designs to softer layouts I also fussy cut around a floral element from the patterned paper and layered them up.

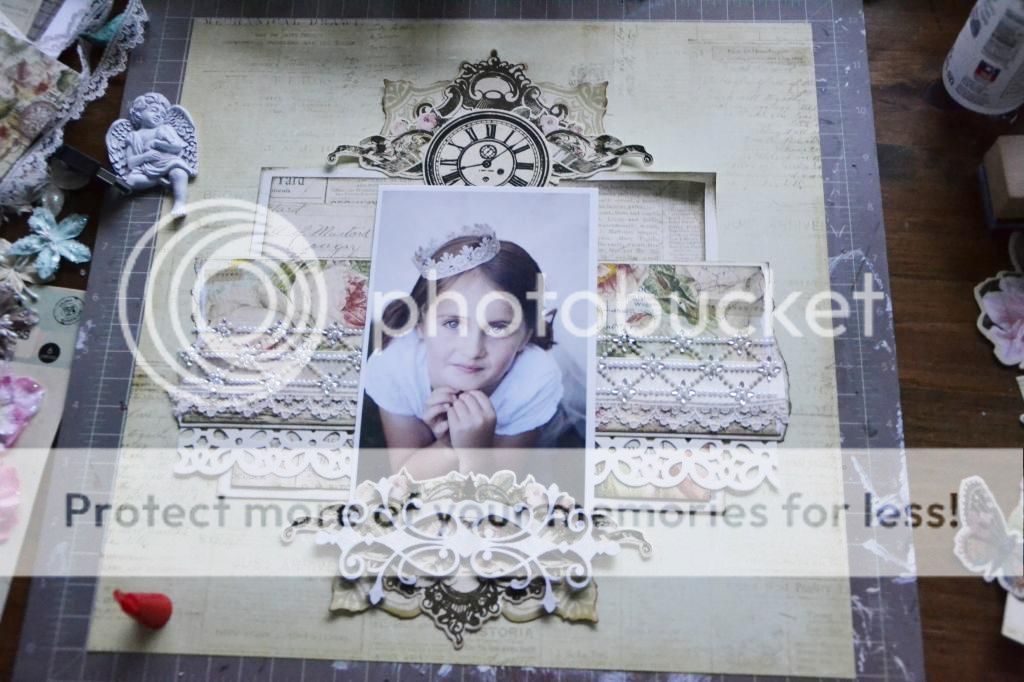
Step Four... I next cut up some of the shapes from the die cuts in the kit, so I could layer them behind the photo.

Step five... This is exactly how I work... I decided I didn't like the photo on the side and wanted to centre it with the die cuts at the top and bottom and I just layered, layered and layered and then layered some more until I got this...

Step Six... Once I was happy with my design time to strip it back and start glueing and painting and adding some texture

Step Seven: I love chipboard but sometimes I like it better painted. So if you like me want to paint your chipboard do this early on in your project so that it can be dry by the time you are finishing up, I actually just used Gesso

Step Eight: Once covered just dab a little extra on with the side of your brush to add some texture.

Step Nine: Add a punched boarder to the lower edge of your main focal area.

Step Ten: Add a strip of patterened paper to overlap the punched border. I also teared the ends and mounted onto Vanilla cardstock for the extra depth and design.

Step Eleven: Use some lace and your silk ribbon just towards the edge of your last strip added but not covering up... we want to show off the many details we are adding to our page

Step Twelve: Time to add the photo to the centre of the page, take you Prima Crystal border and but it ad evenly in the middle as you can and then affix to each side of the photo. If you need to use a rule do so... tools are good!

Step Thirteen: time to play with the die cuts add one at the top and the bottom of the photo as shown.

Step Fourteen: Add the clock face to the top and the chipboard piece to the bottom.
Step Fifteen: Gently fold your butterflies in the middle and then smooth the upper wings over you fingers to give a little curl to their wings, Also adhere your angel, I like the way I perched her here she looks like she's my daughters guardian angel

Step Sixteen: Now n my absolute honest opinion... The page could be finished at this stage... you could add you title and/or journaling and be done... I went a little further with some optional steps. I added my title and a few flowers in the top left and bottom right of the central focal area.

Step Seventeen: Using this AMAZING awesome product called rock candy to accent some areas on the page I added some to the butterfly wings and the curled corners this crackles as it dries, the thicker you apply it the larger the cracks.

Step Eighteen: Here is what the butterfly looked like once the crackle had dried. I also added very small pearls to the punched border.

Step Nineteen: Getting back into the Gesso I added small brush strokes on selective elements of the page to add some texture. I Love this technique it has a way of blending elements in together. And here is the finished page below. I really hope you enjoyed the step by step.

5 comments:
wooowwww fantasssssssstic
Fabulous work! Love it!
Zoe excellent work!!
Zoe Excellent work!!
lovely LO. thanks for the step-by-step !
Post a Comment